
Configuring ePCR Parameters
Overview
This guide explains how to configure electronic Patient Care Record (ePCR) settings in EPR FireWorks Back-Office. These settings control ePCR functionality, form layouts, data collection requirements, medical documentation standards, and NEMSIS reporting compliance for EMS operations.
The ePCR Configuration interface organizes parameters into specific sections as displayed in the interface: ePCR Parameters for core settings, ePCR Narrative for documentation templates, and NEMSIS Configuration for state reporting.
Before you start
Before you configure ePCR settings in EPR FireWorks, ensure:
You have administrator permissions in EPR FireWorks Back-Office
Department EMS protocols and documentation requirements are established
NEMSIS reporting requirements and state compliance standards are documented
To access the configuration interface:
Navigate to Management > Department Settings > Department Configuration.
Click the ePCR tab.
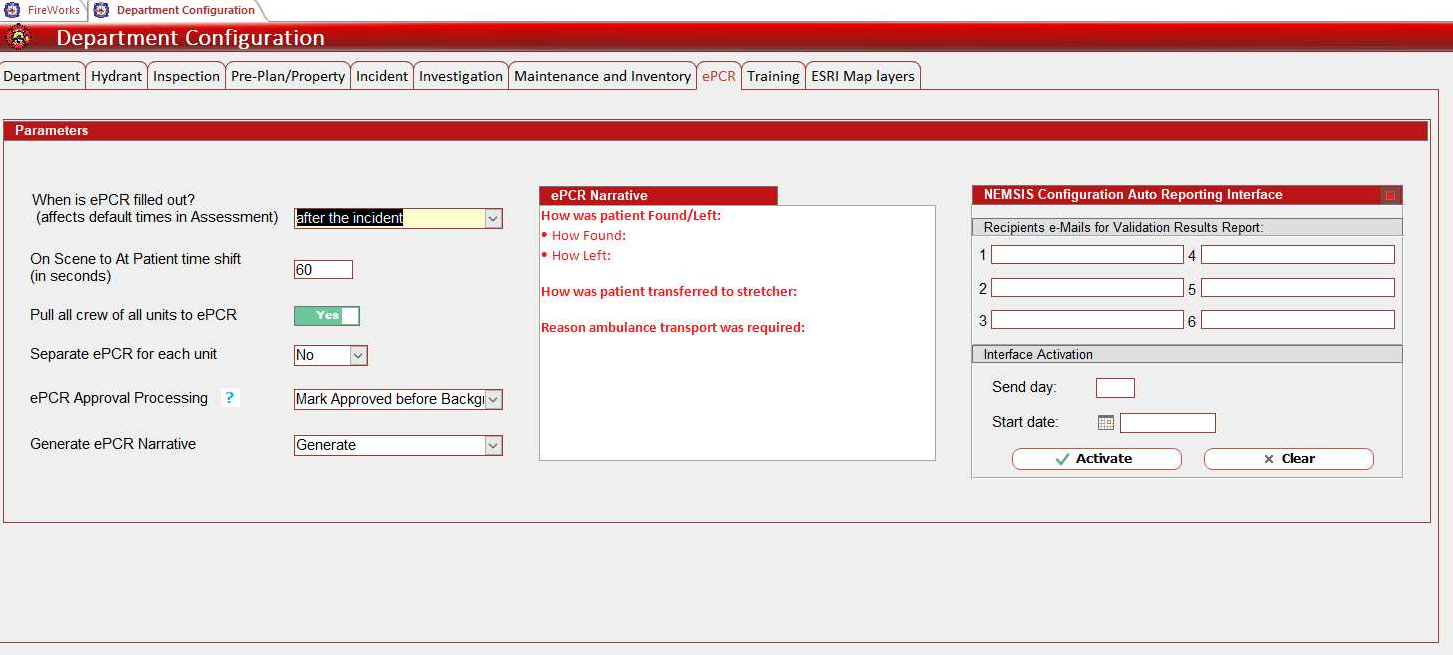
Configure core ePCR settings

Configure When is ePCR filled out? (affects default times in Assessment) to establish documentation timing:
after the incident: ePCR completed post-transport
during the incident: ePCR completed in real-time
Set On Scene to At Patient time shift (in seconds) to adjust timing accuracy between CAD notifications and actual patient contact.
Configure Pull all crew of all units to ePCR to control whether all responding unit crew members are included in patient care records:
Yes: All crew from all responding units included
No: Only primary unit crew included
Set Separate ePCR for each unit to control ePCR creation for multi-unit responses:
Yes: Individual ePCR for each responding unit
No: Single ePCR for entire response
Configure ePCR Approval Processing to determine report transmission method:
Foreground Processing: Report transmitted in real-time while user waits
Background Processing: Report transmitted in background, verified through ePCR History
Mark Approved before Background: Approval required before background processing
Result: Core ePCR workflow and documentation settings are configured.
Configure ePCR narrative and template settings
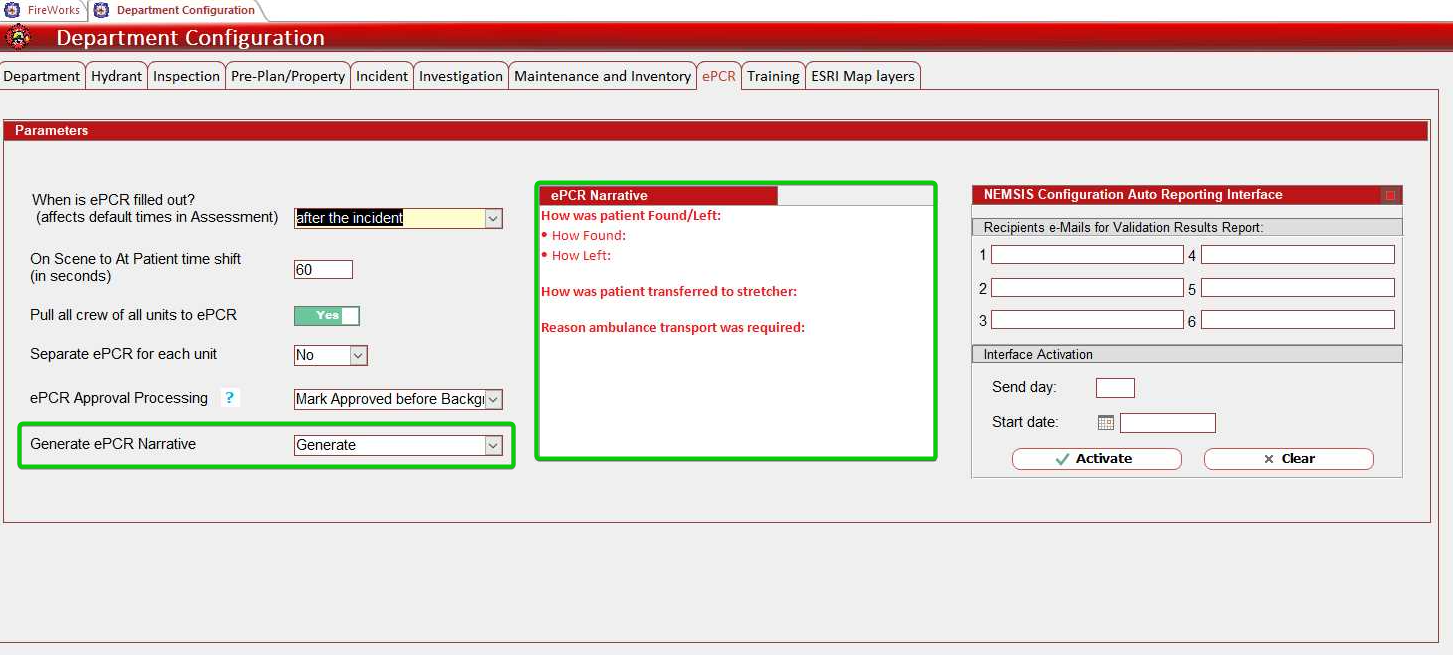
Configure Generate ePCR Narrative to control narrative creation:
Generate: Narrative generated automatically from ePCR data
Template Only: Narrative generated from template created in ePCR narrative field
Disabled: No ePCR Narrative created
In the ePCR Narrative section, configure standardized narrative templates according to your department's documentation requirements.
Result: ePCR narrative generation and template settings are configured.
Configure NEMSIS Auto Reporting Interface
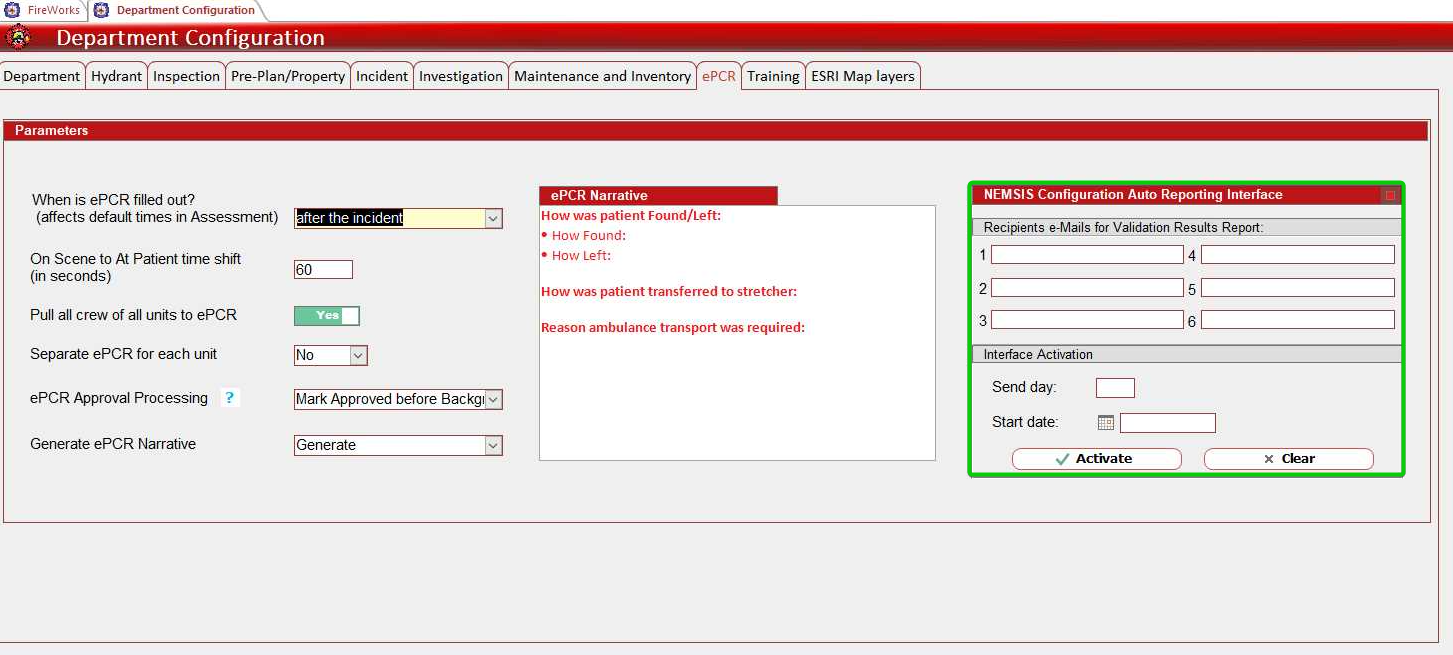
In the NEMSIS Configuration Auto Reporting Interface section, enter recipient email addresses for departments required to use automated NEMSIS reporting.
In the Interface Activation section, set Send day to specify the day of the month when automated NEMSIS reports will be sent.
Configure Start date to specify the initial date when auto-reporting will begin.
Click Activate to enable the NEMSIS auto-reporting configuration or Clear to reset all settings.
Result: NEMSIS auto-reporting interface is activated and configured for state EMS compliance.
Important: ePCR configuration may affect patient care documentation and NEMSIS reporting compliance. Coordinate modifications with EMS personnel before implementing changes.