
Configuring Inventory & Maintenance Parameters
Configuring Inventory & Maintenance Parameters
Overview
This guide explains how to configure maintenance and inventory settings in EPR FireWorks Back-Office. These settings control apparatus maintenance schedules, inventory management workflows, equipment tracking systems, and notification preferences within the maintenance and inventory management system.
The Maintenance and Inventory Configuration interface organizes parameters into specific sections as displayed in the interface: General Parameters, Preventative Maintenance Due, and Minimum Days for Early Maintenance and Inventory Check Assignments.
Before you start
Before you configure maintenance and inventory settings in EPR FireWorks, ensure:
You have administrator permissions in EPR FireWorks Back-Office
Department maintenance policies and inventory procedures are documented
Preventative maintenance schedules and notification requirements are established
To access the configuration interface:
Navigate to Management > Department Settings > Department Configuration.
Click the Maintenance and Inventory tab.
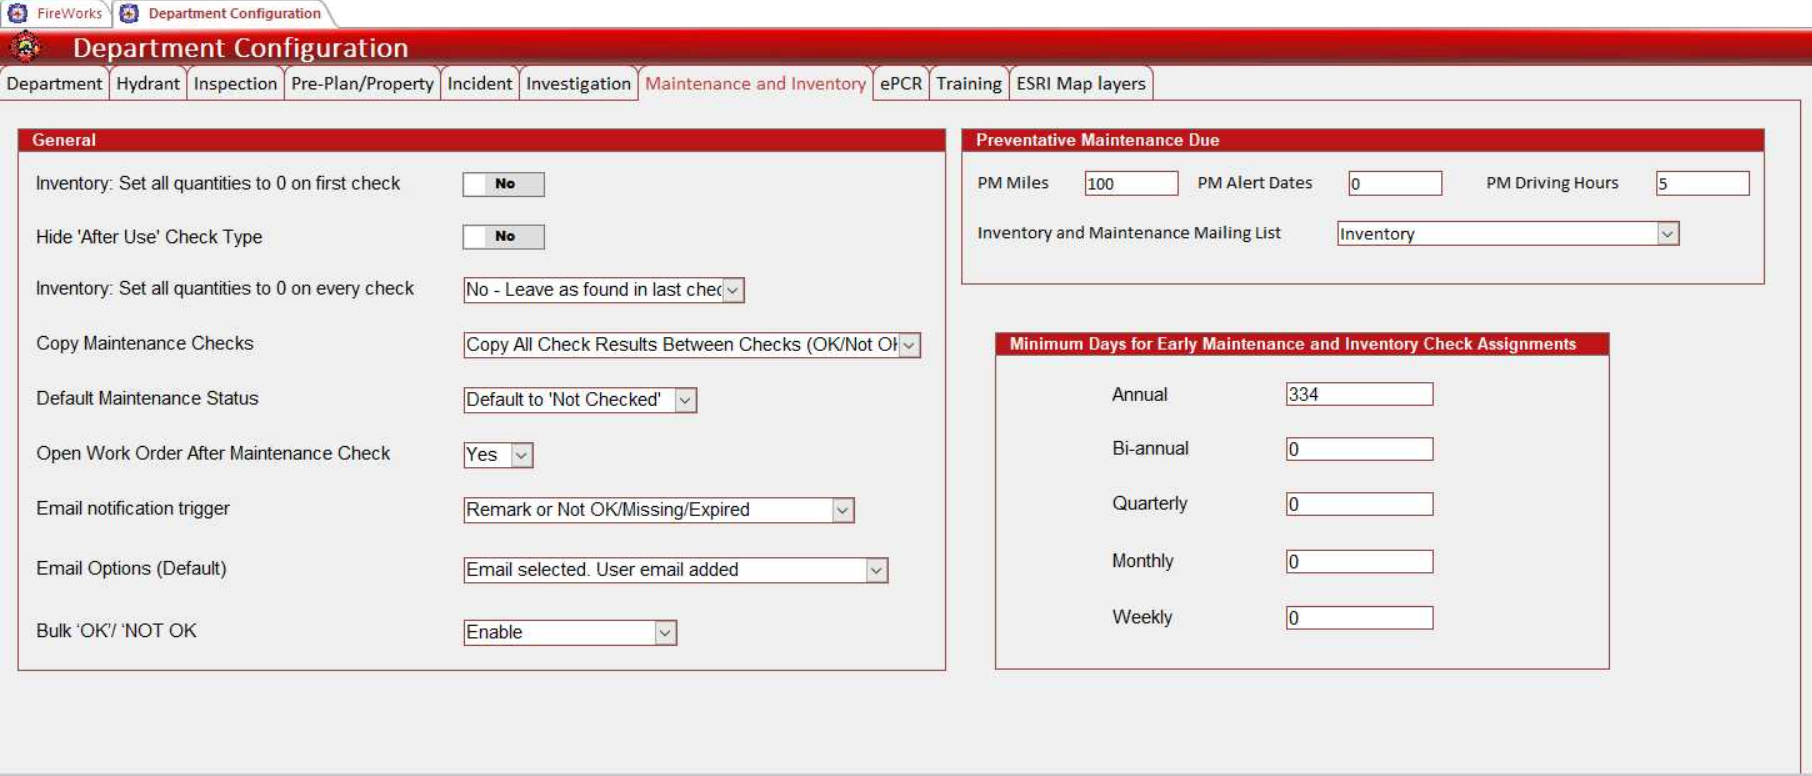
Configure General Parameters
Configure all settings within the General Parameters section of the interface.
Configure Basic Inventory Parameters
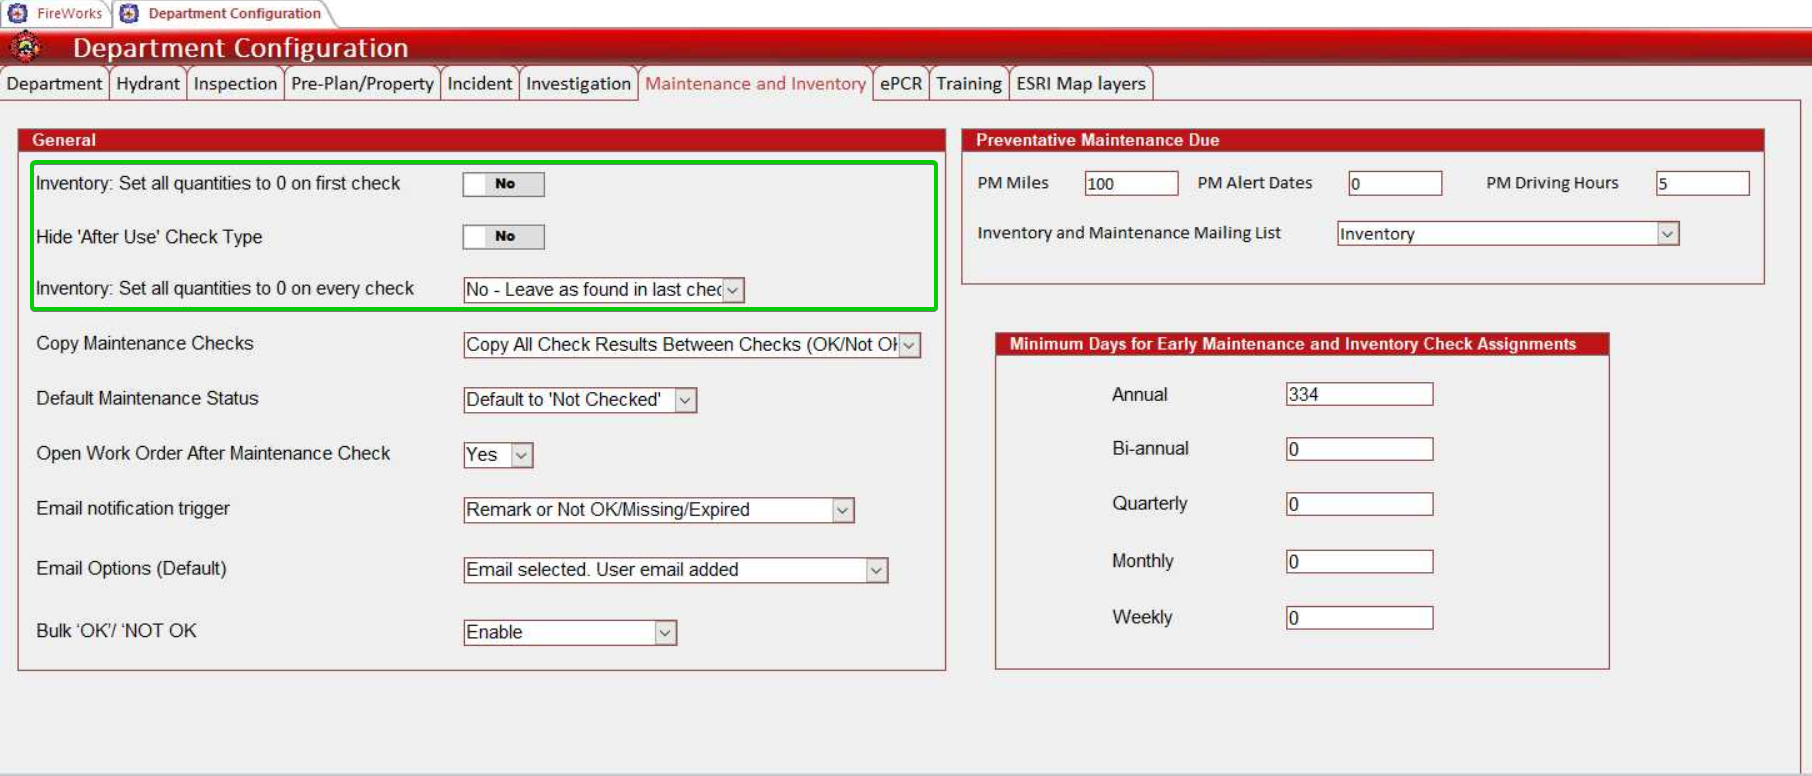
Configure Inventory: Set all quantities to 0 on first check to establish baseline counting methodology:
Yes: Resets all quantities to zero for initial baseline (recommended for new implementations)
No: Maintains existing quantity data (use when continuing established inventory)
Set Hide 'After Use' Check Type to control maintenance interface options:
Yes: Hides After Use checks (simplifies interface for basic maintenance)
No: Shows all check types (full functionality for comprehensive maintenance)
Configure Inventory: Set all quantities to 0 on every check to control ongoing inventory behavior:
No - Leave as found in last check: Maintains quantities from previous check (faster checks)
No - Leave quantity and remarks as found in last check: Preserves quantities and notes (complete continuity)
No - Change to required quantity: Updates to required quantity standards (maintains compliance)
Yes: Resets all quantities to zero each check (forces complete recount)
Configure Maintenance Parameters
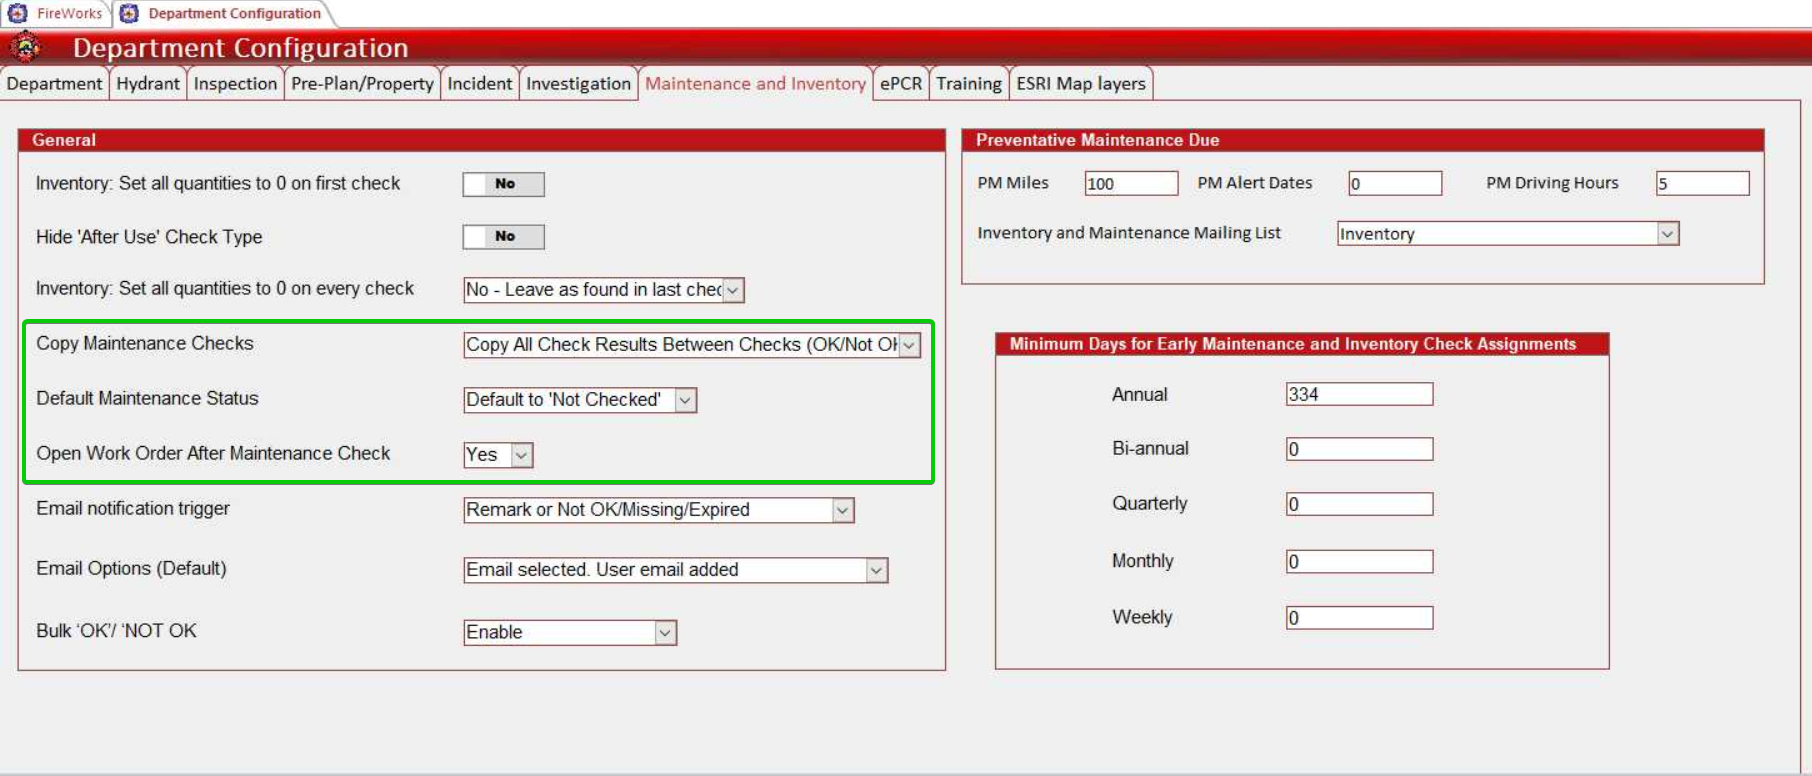
Set Copy Maintenance Checks to determine maintenance history transfer:
Copy All Check Results Between Checks (OK/Not OK): Transfers all previous results (maintains complete history)
Copy All Check Results Between Checks (OK/Not OK/Not Checked/Remarks): Transfers complete status and notes (comprehensive tracking)
Does Not Copy Check Results Between Checks: Starts fresh each cycle (clean slate approach)
Clear NOT OK/Remarks Upon Every Check Initiation: Removes all failure data (fresh start each time)
Only Copy NOT OK/Remarks Between Checks: Transfers only problems and notes (focused on issues)
Only Copy Remarks Between Checks: Preserves notes only (maintains continuity without status)
Configure Default Maintenance Status for initial maintenance state:
Default to 'Not Checked': Requires explicit verification of each item (thorough approach)
Default to 'OK': Assumes items are functional until proven otherwise (optimistic approach)
Set Open Work Order After Maintenance Check to control automatic work order generation:
Yes: Creates work orders automatically after checks (ensures follow-up on issues)
No: Manual work order creation only (gives control over work order timing)
Configure Email Notification Settings
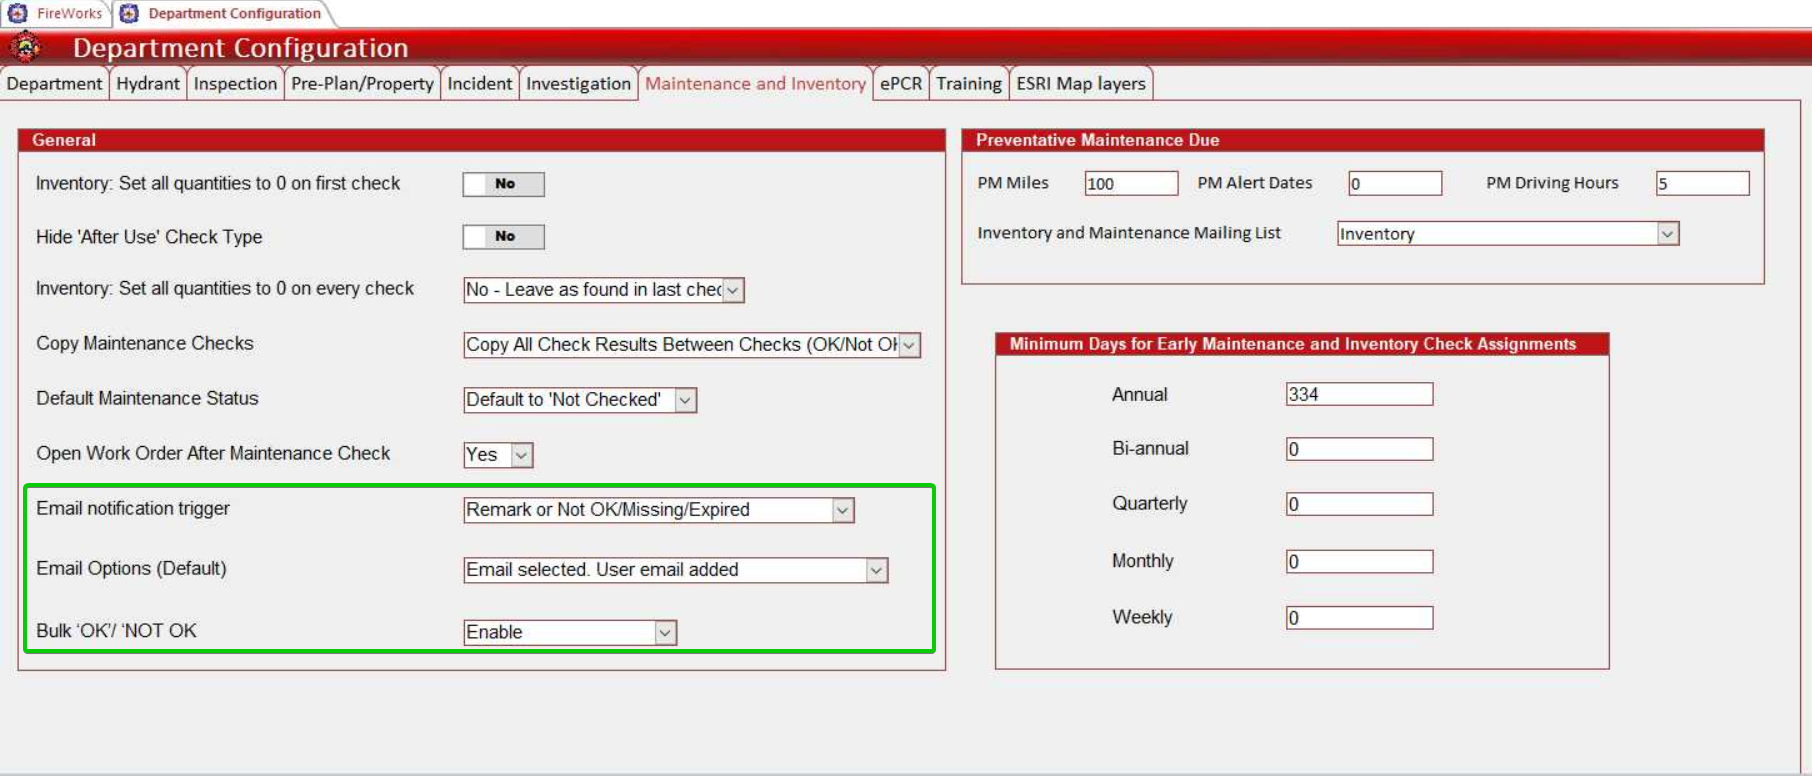
Configure Email notification trigger to control when maintenance alerts are sent:
Remark or Not OK/Missing/Expired: Sends alerts for any maintenance issue (maximum coverage)
Not OK/Missing/Expired: Sends alerts only for failed items (reduces alert volume)
All Rows: Sends alerts for all maintenance items (comprehensive notification)
Set Email Options (Default) to establish default notification behavior:
Email selected. User email added: Auto-populates primary user email with checkbox selected (convenient default)
Email selected only: Checkbox selected, email field left empty (requires manual entry)
Email not selected. User email added: Checkbox unselected, primary user email auto-populated (opt-in approach)
Email not selected. User email not added: Checkbox unselected, email field left empty (minimal default)
Configure Bulk 'OK'/ 'NOT OK' functionality:
Enable: Allows bulk status changes for efficiency (faster maintenance completion)
Disable: Requires individual item verification (thorough approach)
Configure Preventative Maintenance Due
Configure maintenance scheduling intervals and notification settings in the Preventative Maintenance Due section.
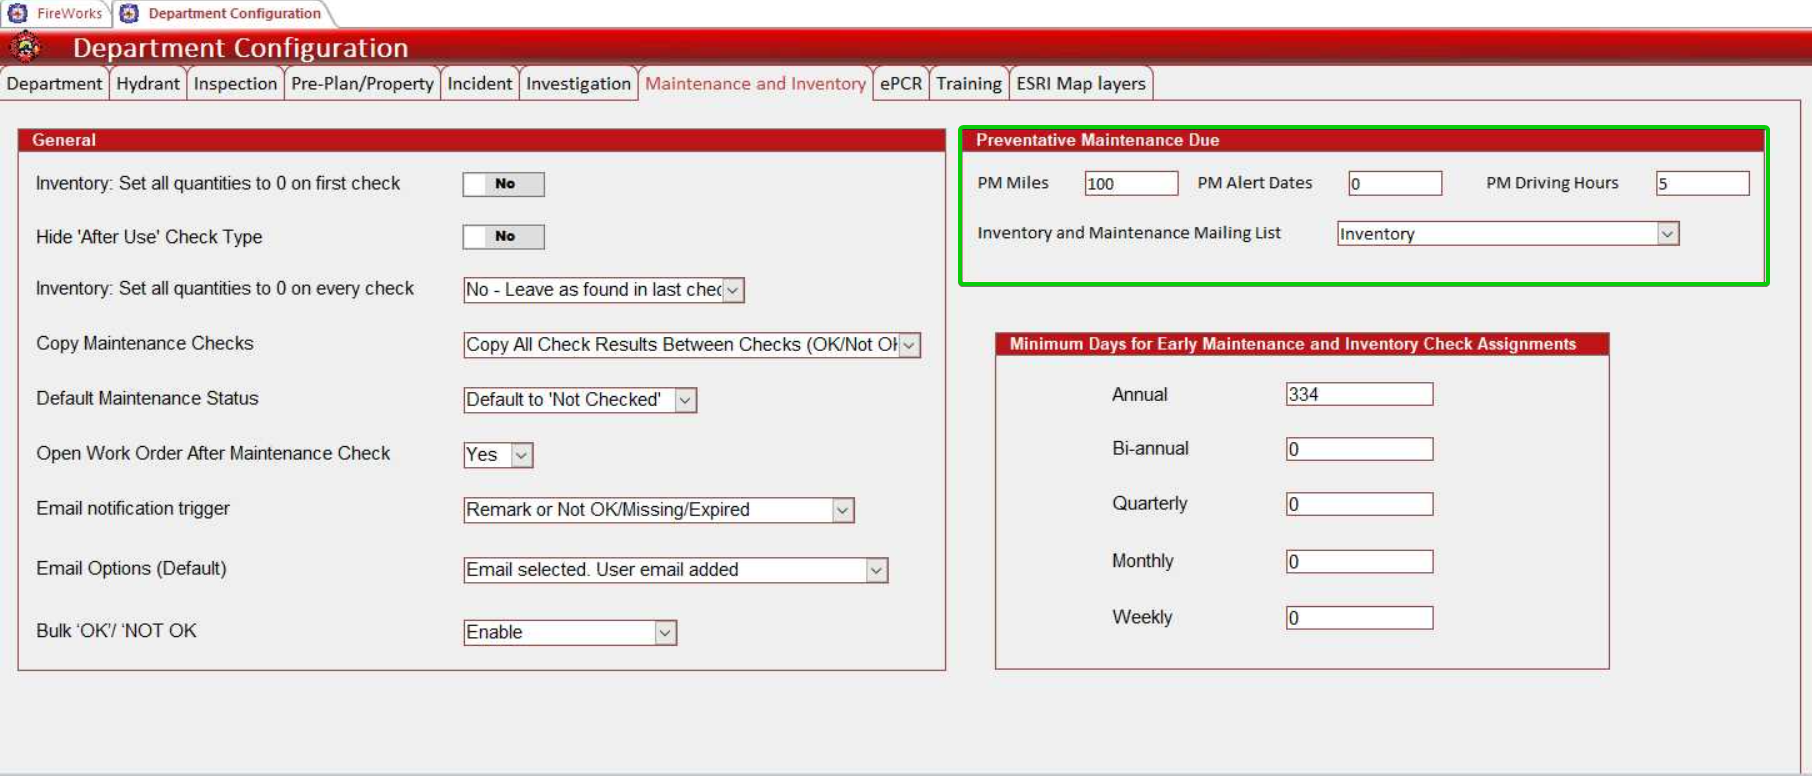
Set PM Miles to establish distance-based maintenance intervals for apparatus.
Set PM Alert Dates to establish time-based maintenance intervals.
Configure PM Driving Hours to establish engine hour-based maintenance intervals.
Set Inventory and Maintenance Mailing List to configure notification recipients.
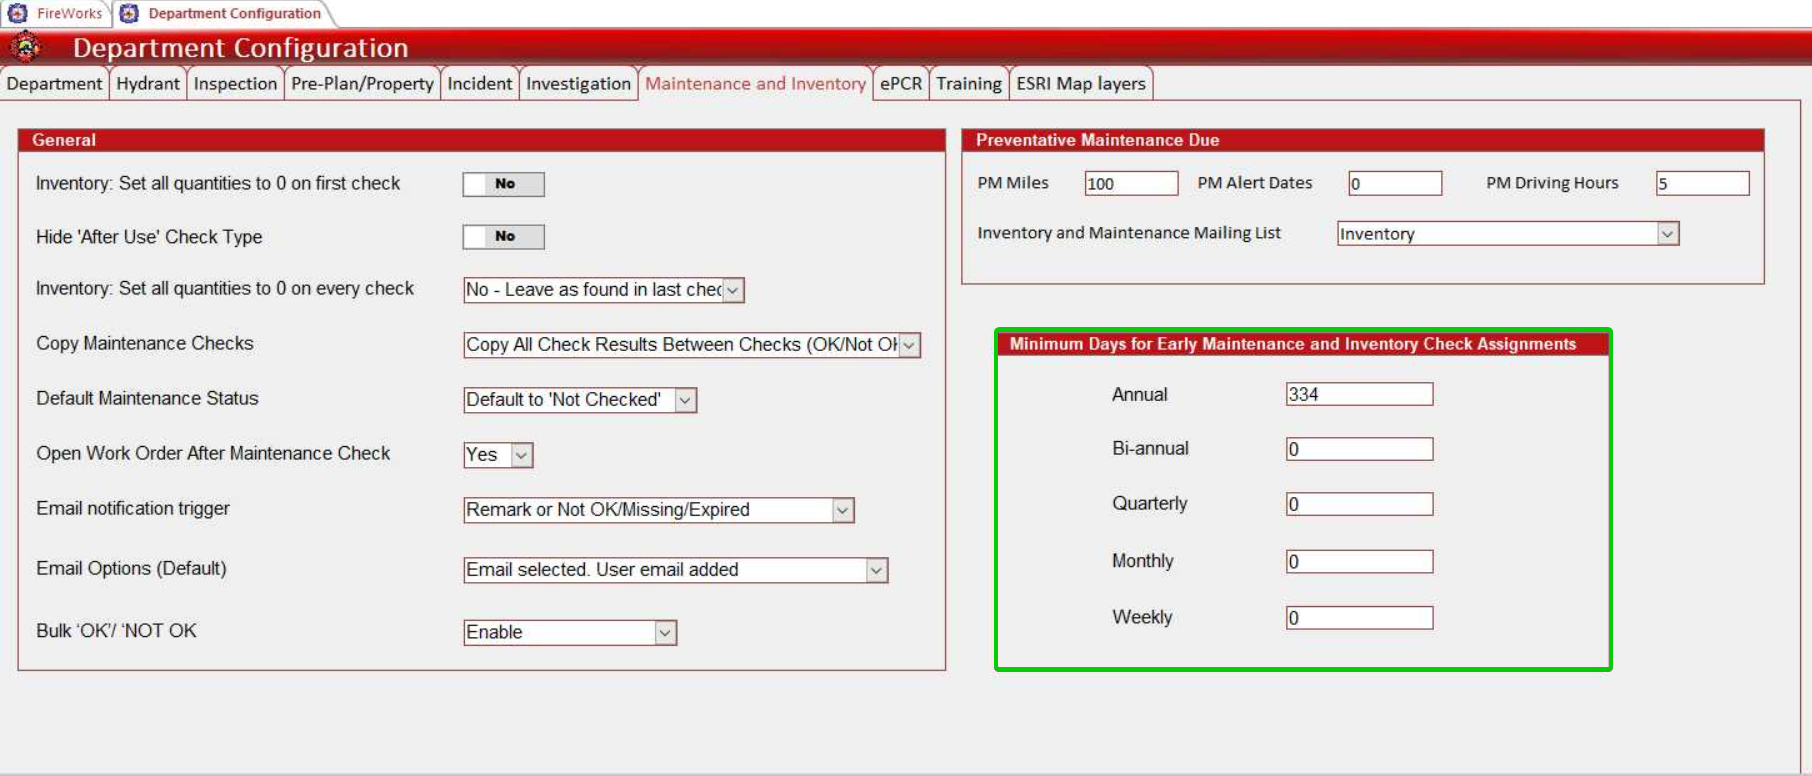
Configure Minimum Days for Early Maintenance and Inventory Check Assignments
Configure scheduling restrictions to prevent premature maintenance assignment. Set minimum day values for each maintenance check type to control how far in advance maintenance can be scheduled.
The check types are as follows:
Annual
Bi-annual
Quarterly
Monthly
Weekly
Important: Changes to maintenance and inventory configuration affect ongoing maintenance schedules and equipment tracking. Coordinate modifications with maintenance personnel before implementing system-wide changes to ensure seamless integration.