Flow Testing Procedures
Flow Testing Procedures
Record flow capacity measurements using EPR FireWorks flow test interface.
Before You Start
Complete required equipment setup including pressure gauges, pitot tubes, and crew coordination. Verify hydrant details accuracy in EPR FireWorks (location, specifications, valve configuration, and operational status). Establish communication protocols for testing procedures.
Note: For technical flow testing procedures and standards, refer to NFPA 291 hydrant flow testing guidance (MWUA).
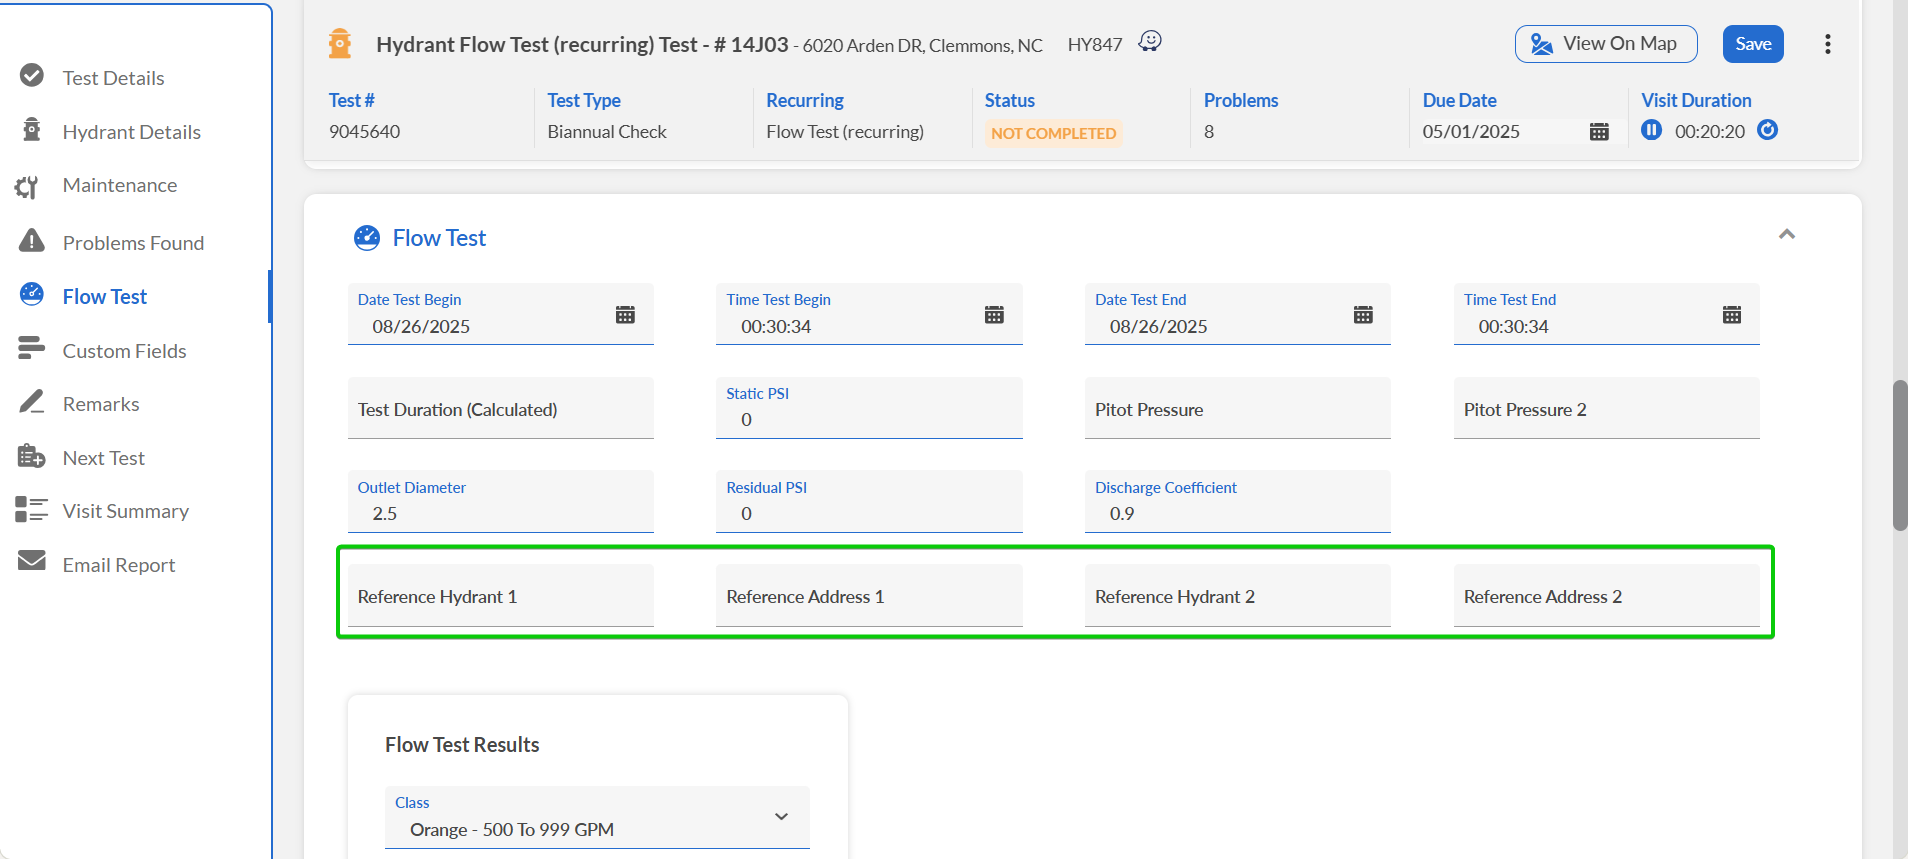
Access: Navigate to HYDRANTS > Hydrant Test > Flow Test in EPR FireWorks.
Recording Flow Test Data
The following procedure outlines the steps for documenting flow testing activities.
Step 1: Initialize Test Session
Enter test start date in Date Test Begin field.
Enter test start time in Time Test Begin field.

Coordinate crew positions between hydrants.
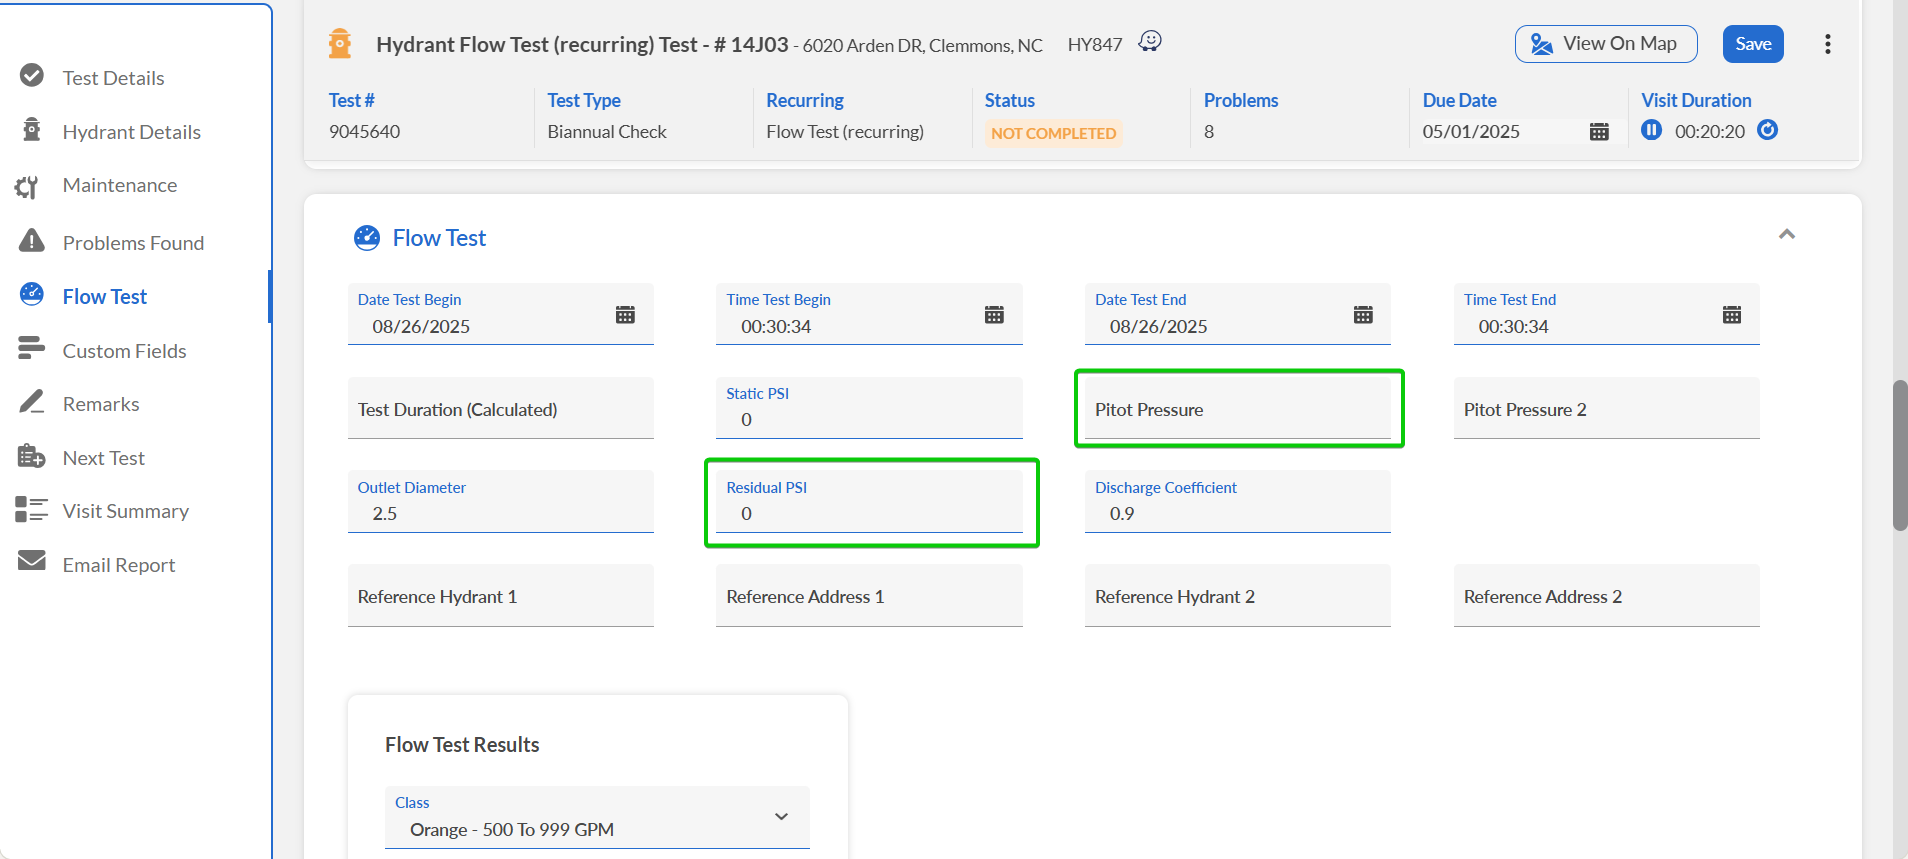
Step 2: Record Static Pressure
Attach pressure gauge to reference hydrant outlet.
Open reference hydrant valve fully.
Record pressure in the Static PSI field.

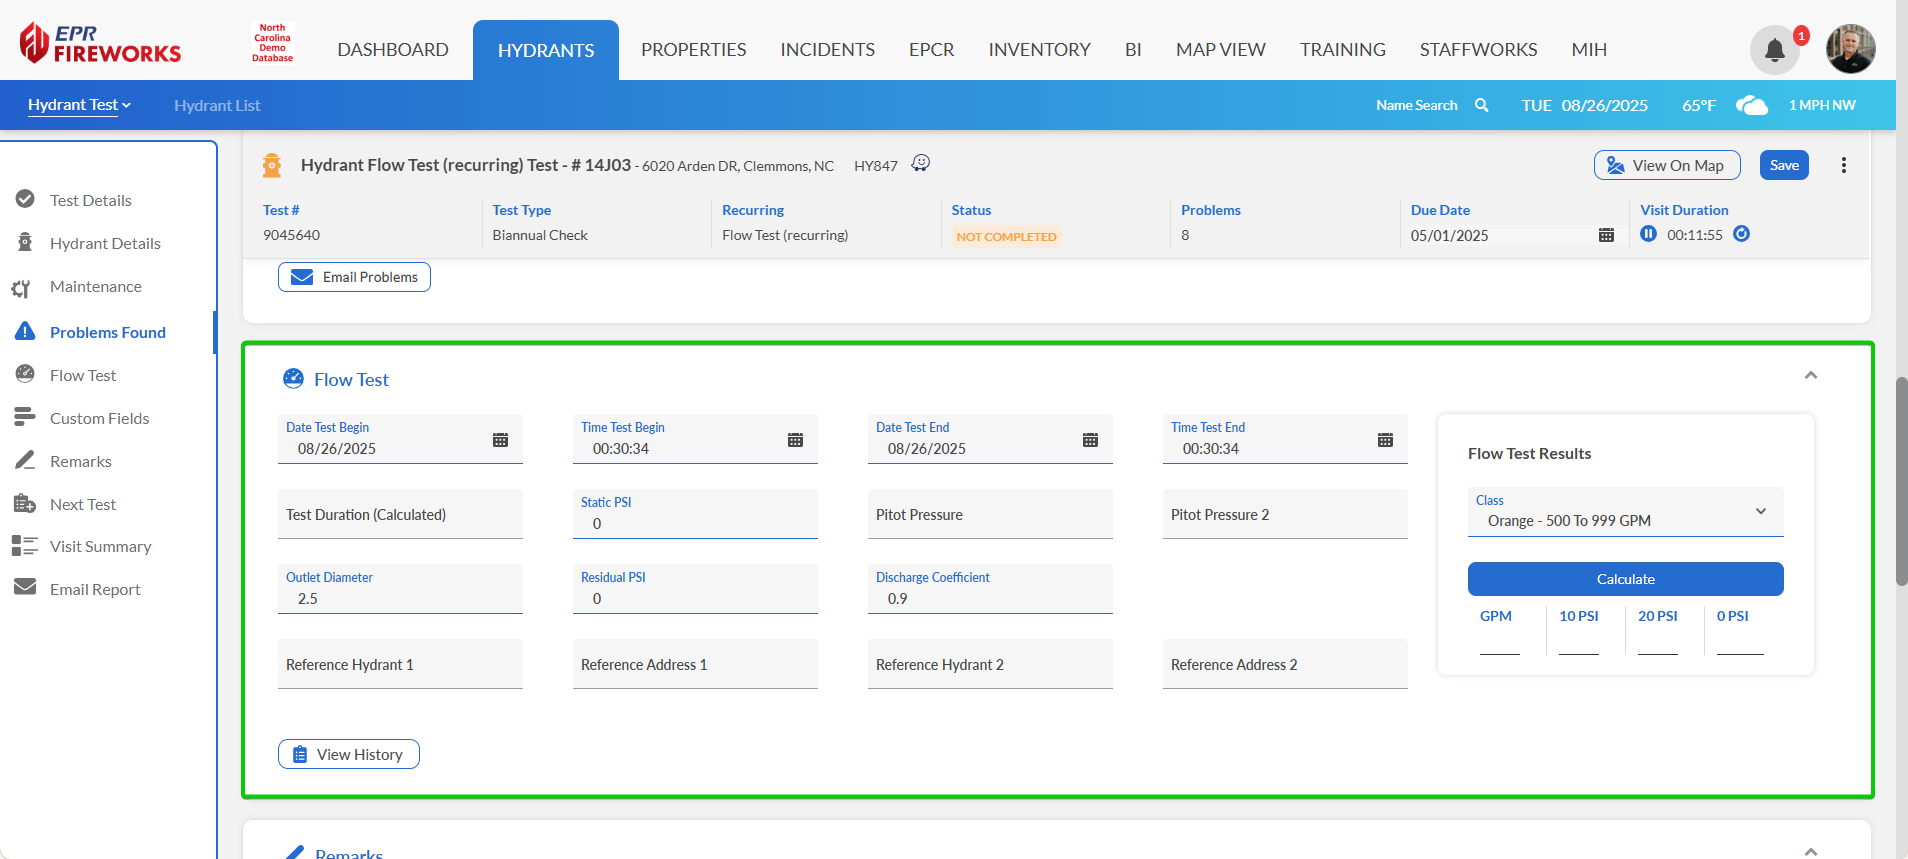
Step 3: Configure Test Parameters
Enter actual outlet diameter in the Outlet Diameter field.
Set Discharge Coefficient value.
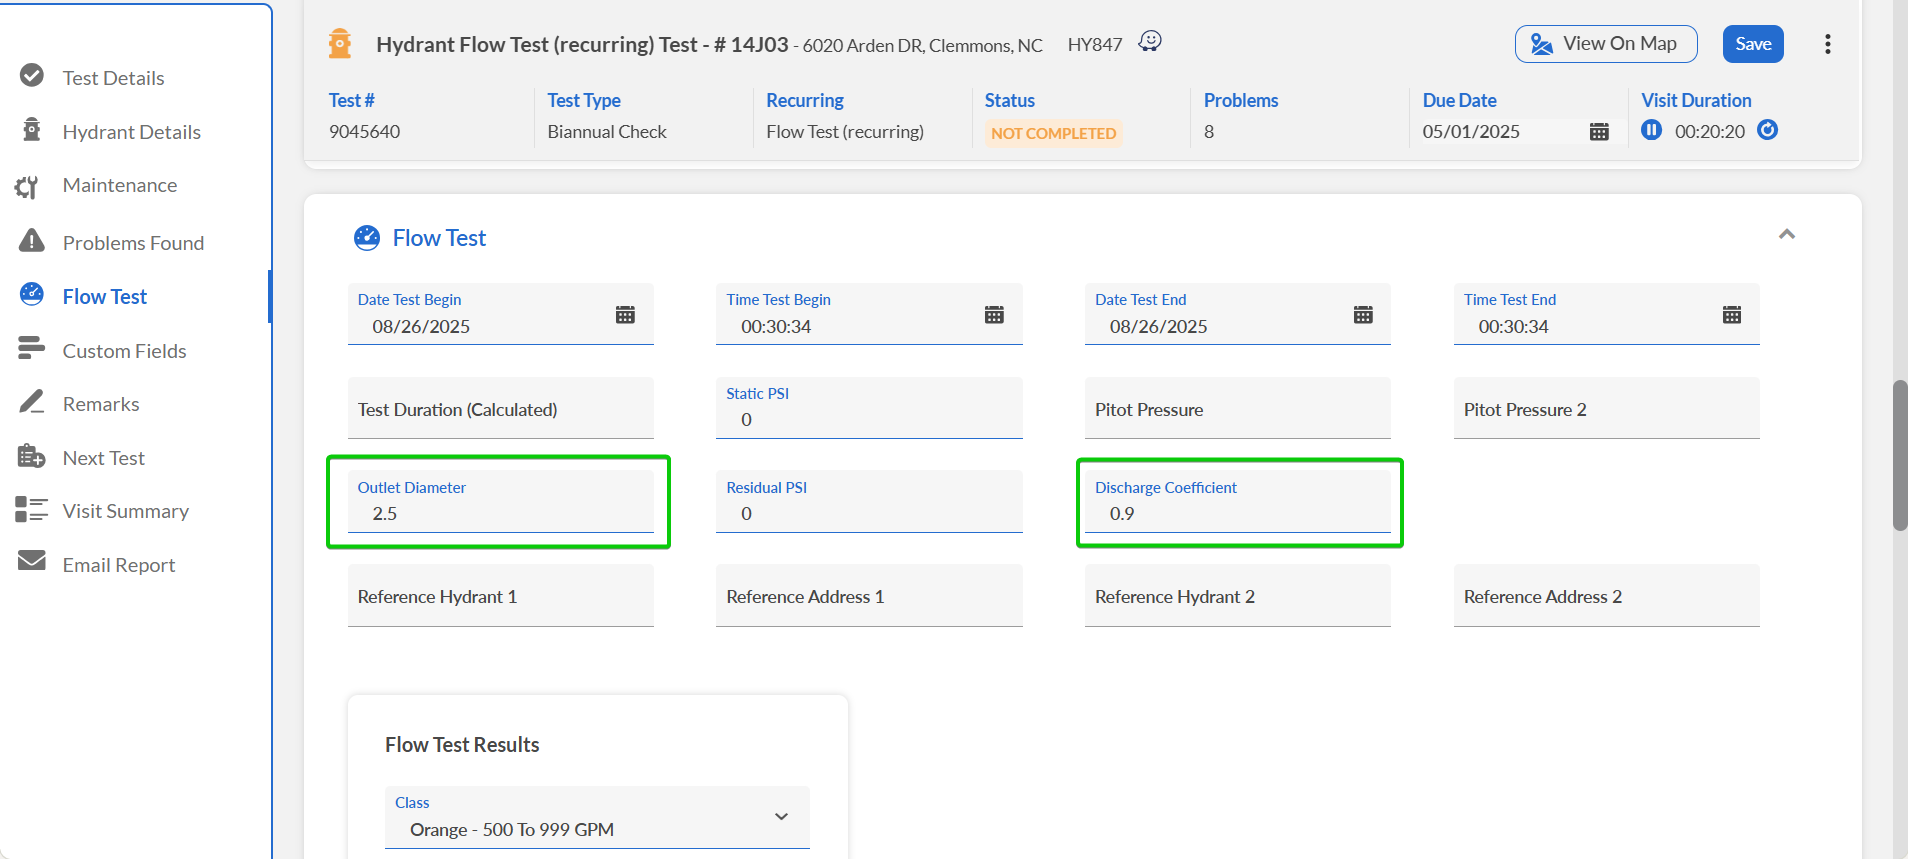
Enter reference hydrant identifications in Reference Hydrant 1 and Reference Hydrant 2 fields.
Enter reference hydrant locations in Reference Address 1 and Reference Address 2 fields.
Step 4: Record Flow Measurements
Coordinate simultaneous readings between crews:
Position pitot tube at test hydrant discharge.
Record pitot gauge reading in Pitot Pressure field.
Record reference hydrant pressure in Residual PSI field.
Step 5: Calculate Results
Verify all measurements entered correctly.
Click Calculate button.
Review results in Flow Test Results section.
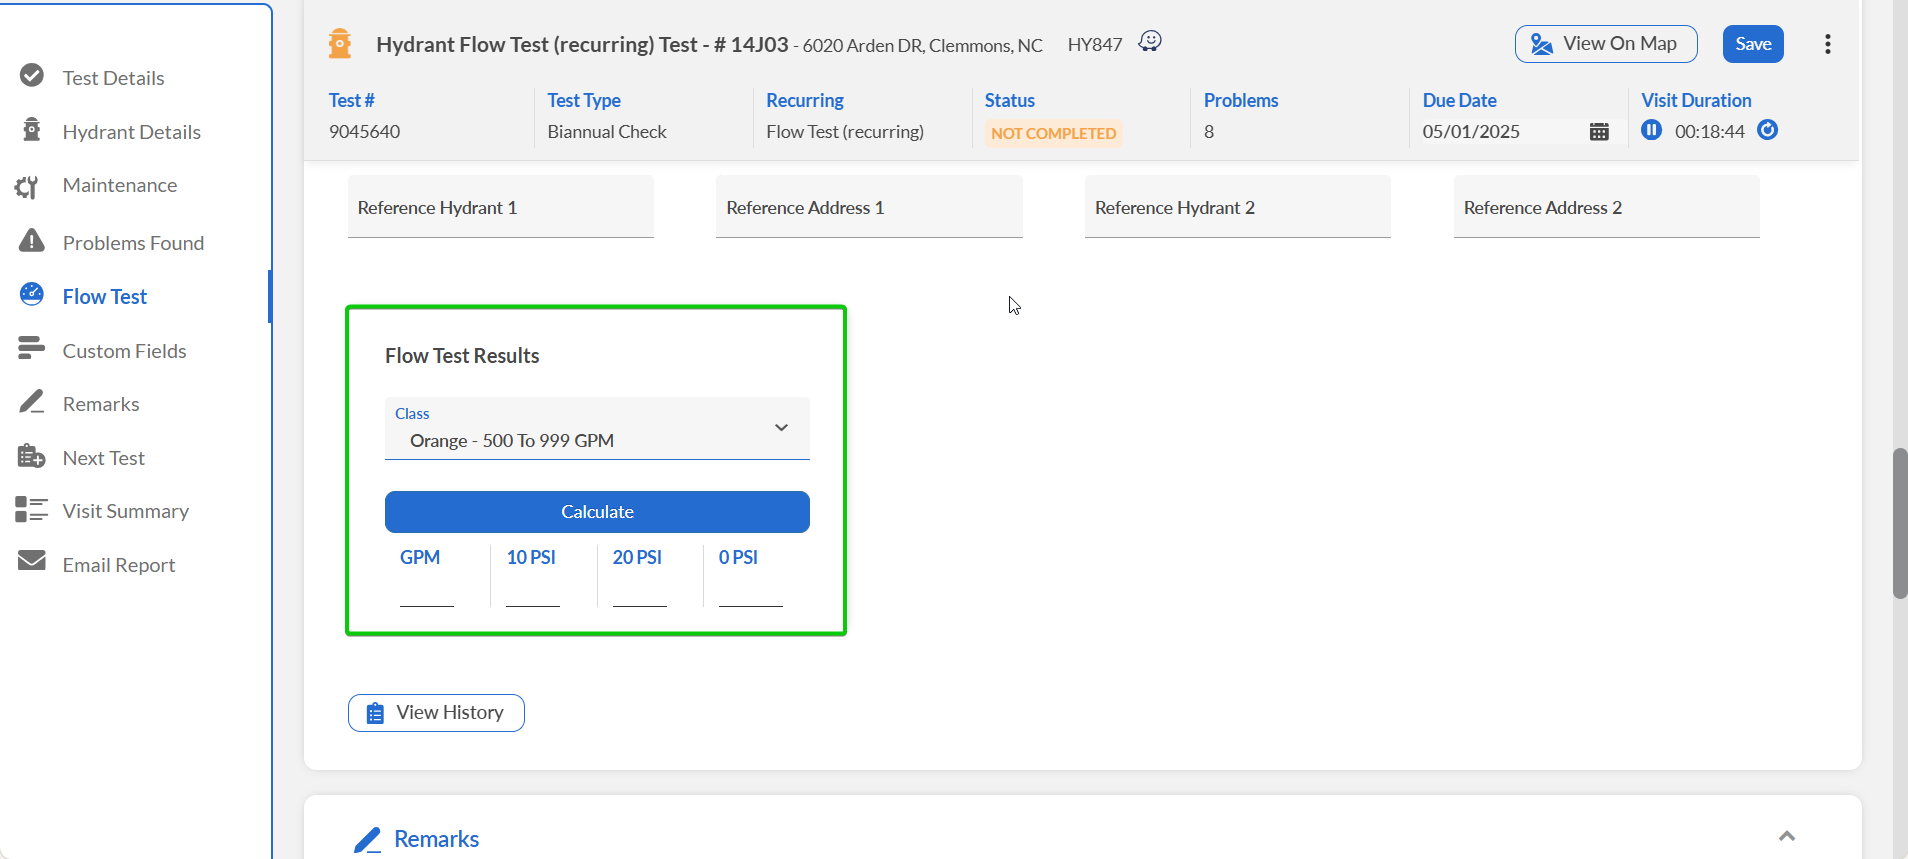
Result: Flow test data recorded with calculated GPM capacity documented in EPR FireWorks.
Documenting Problems Found
Document hydrant problems found during flow testing, as follows:
Navigate to the Problems Found section.
Click Add Problems.
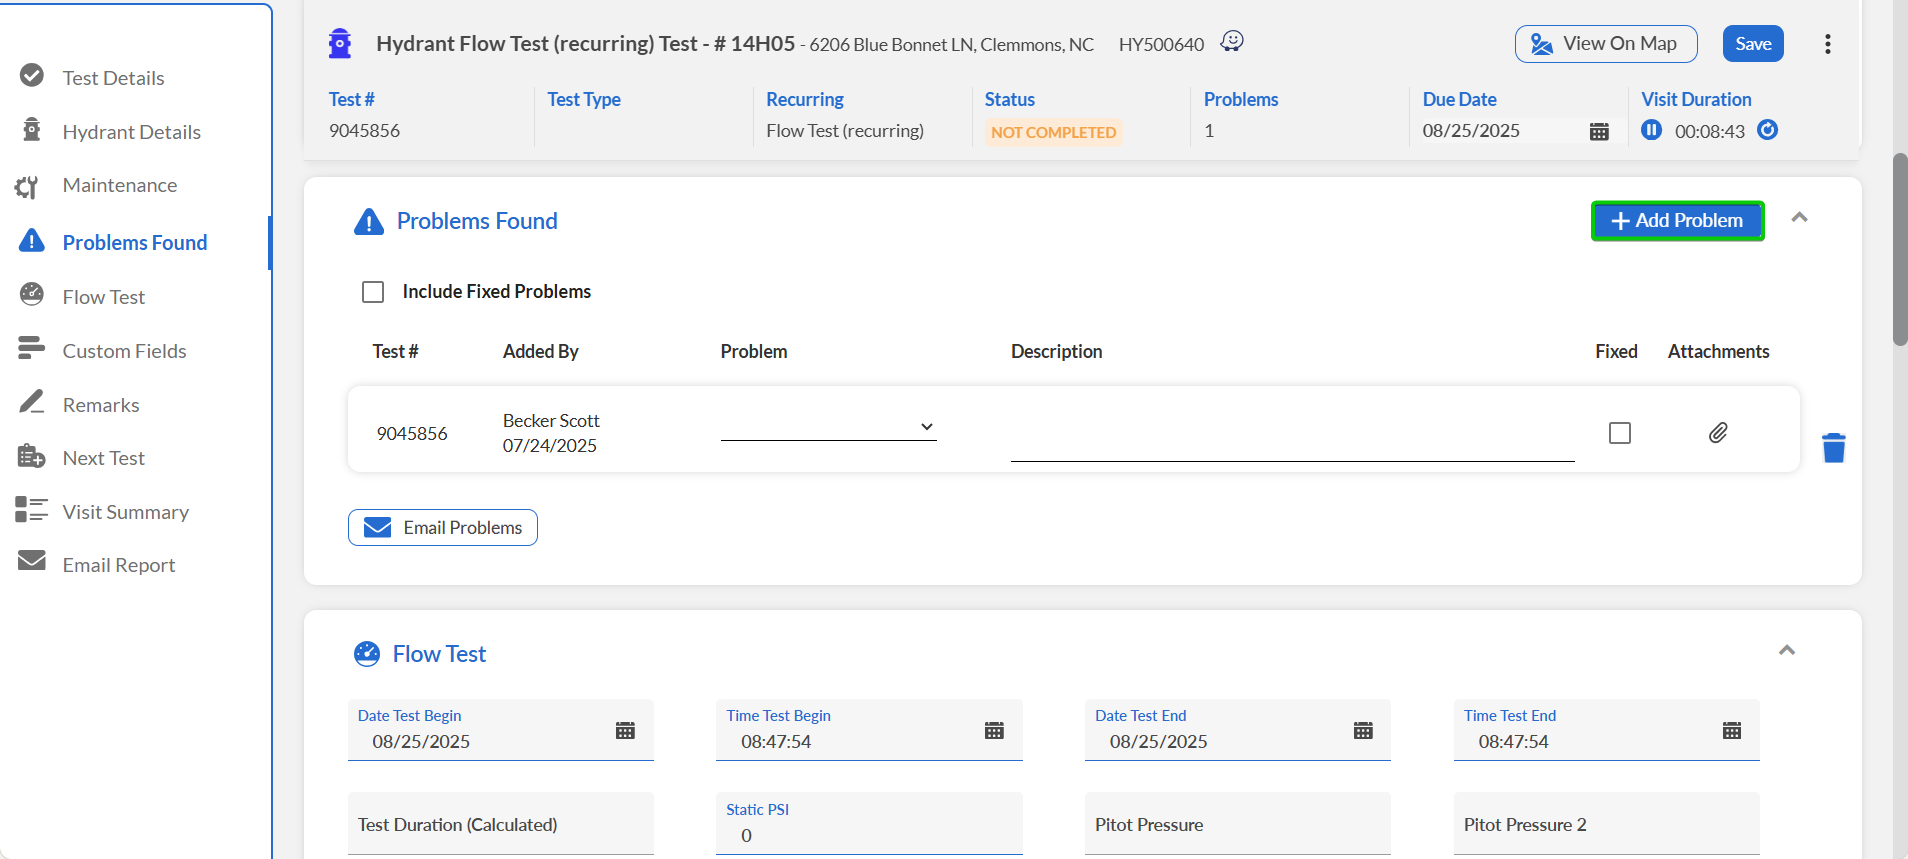
In the Problem column, select the problem type.
In the Description field, enter a detailed description of the problem.
If you fixed the problem, select Fixed.
Using the attachments icon, add documents and/or images regarding the problem.
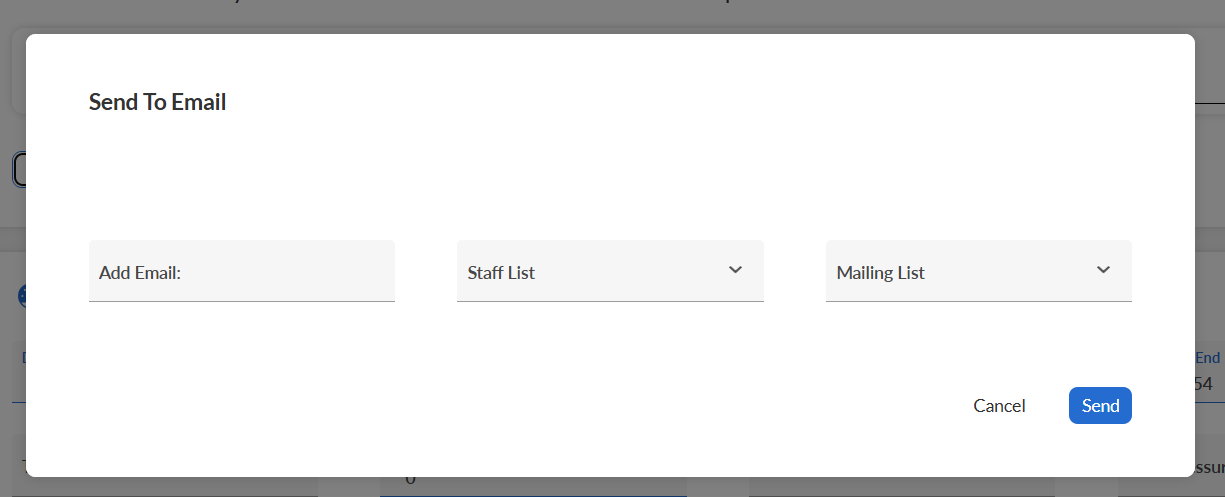
Click Email Problems for urgent issues requiring immediate attention:
In the Email Problems window, enter the recipient's email address. Alternatively, select the appropriate staff list or mailing list from the corresponding dropdown lists.
When done, click Send.