New Clients
This guide explains how to create new MIH clients.
Adding clients
Note: Clients can not be moved automatically between MIH and ePCR modules. Opening an MIH Client for an ePCR Patient must be done manually.
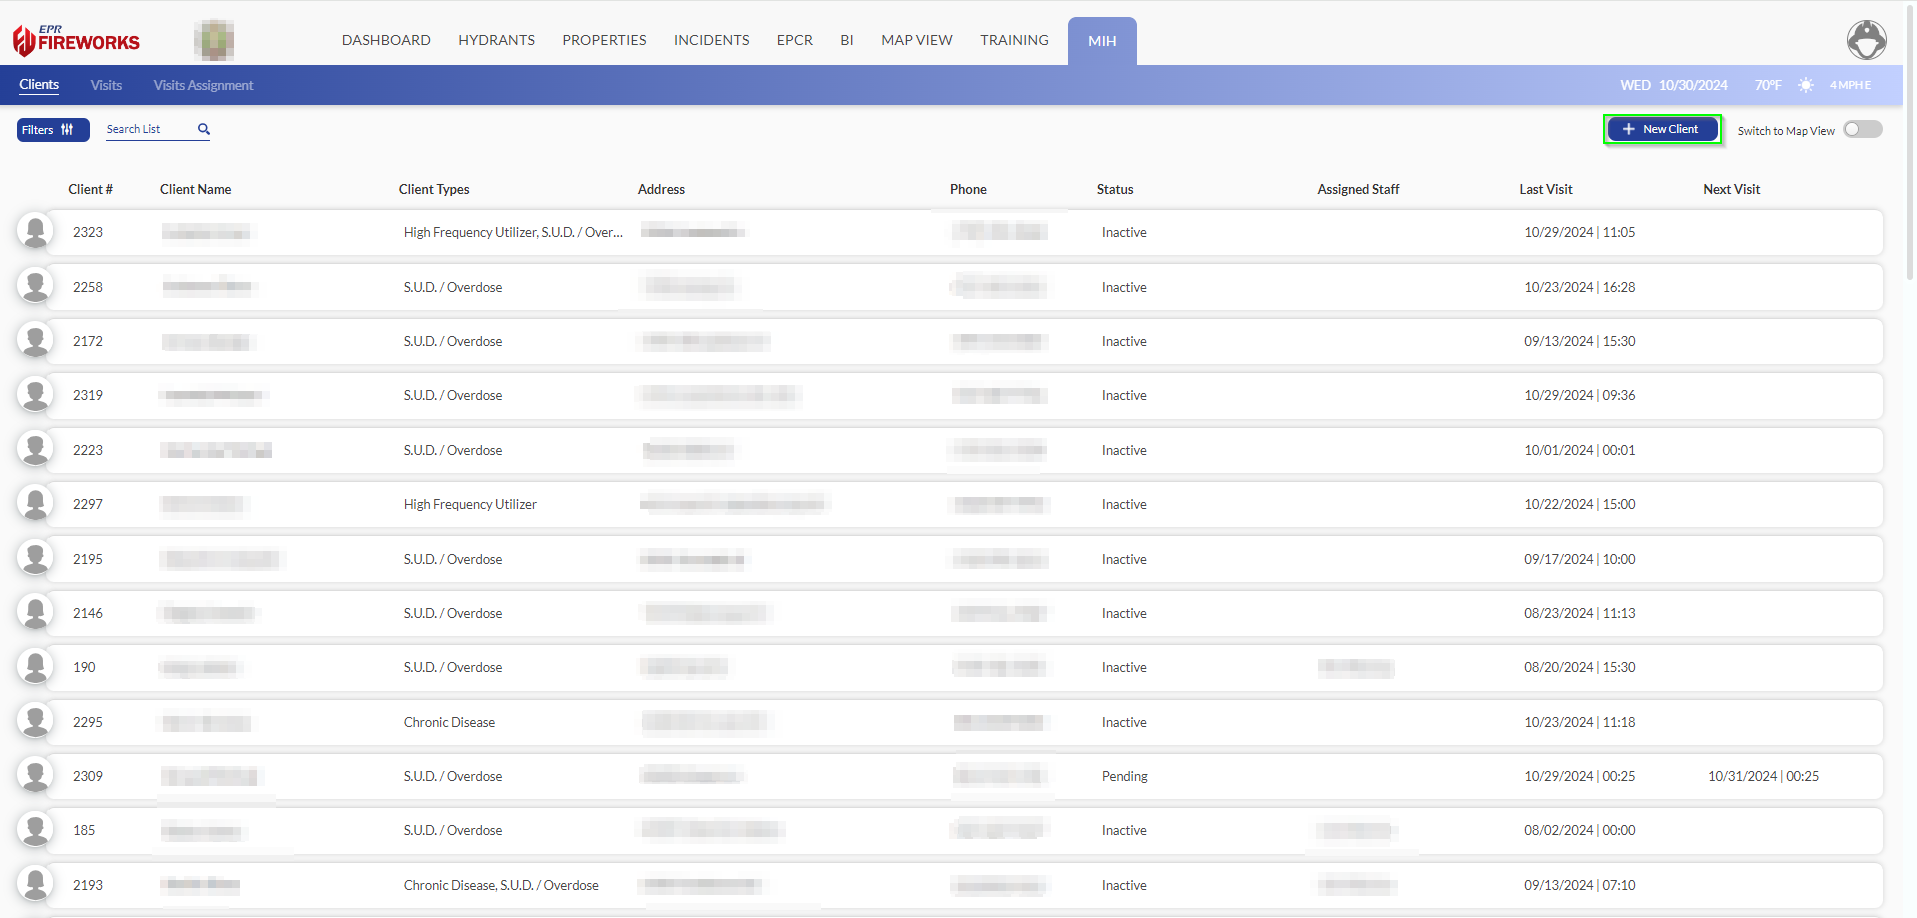
In Clients, click New Client.

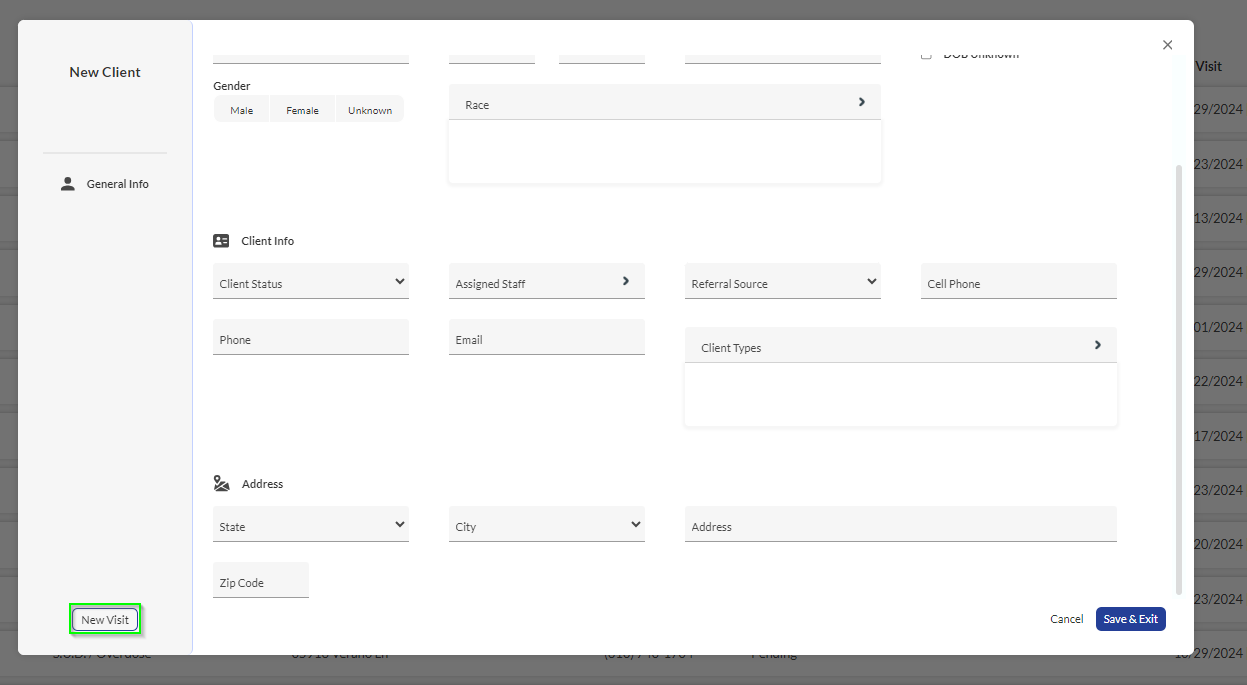
The New Client form will open.
Complete the fields as follows:
Personal Info: client's personal information.
Client First Name
Client Last Name
Social Security #
Weight (LB)
Height (IN)
Date of Birth
Note: If the client’s date of birth is unknown, select DOB Unknown.Gender
Race
Note: You can select multiple races for an individual client.
Client info: The client’s contact details, MIH case details, and staff assignment.
Client Status: Current MIH client status, as defined in the MIH Back-Office.
Assigned Staff: The staff member assigned to this specific client.
Referral Source: Indicates who referred the client for MIH treatment, as defined in the MIH Back-Office.
Cellphone: The client’s cellphone number.
Phone: The client’s landline number.
Email: The client's email.
Client Types: select the client type from the list, as defined in the MIH Back-Office.

Address: The client’s full address.
Note: The Address section is hidden by default. To access it, scroll down until the Address section becomes visible.State
City
Address
Zip Code
Schedule a first visit (optional). If you do not want to schedule a visit, skip this step.
Click New Visit.

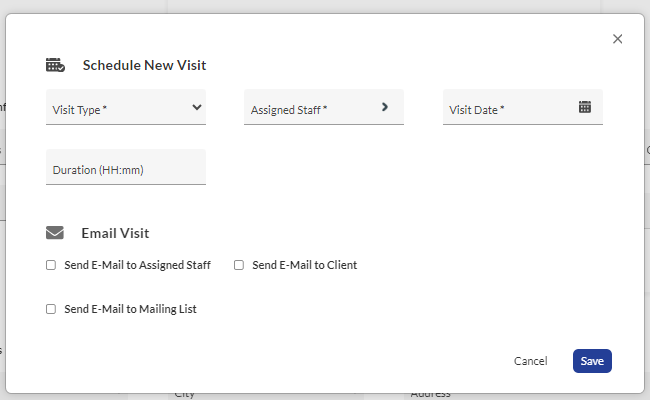
The New Visit form will open in a new window.

Complete the empty fields as follows:
Visit Type: Select a visit type from the list.
Assigned Staff: Select the staff member responsible for this specific visit.
Note: You can assign different staff members to clients and individual visits.Visit Date: Choose the date and time for the visit.
Duration: Enter the length of the visit in hours and minutes (HH: mm).
Email Visit: Select the recipients who will receive email notifications about the visit. The options are as follows:
Send E-Mail to Assigned Staff
Send E-Mail to Client
Send E-Mail to Mailing List: If marked, a dropdown list will appear to the right. Select the mailing list.
You can select multiple Email Visit notifications for each visit.
When done, click Save.
When finished with the New Client form, click Save & Exit.
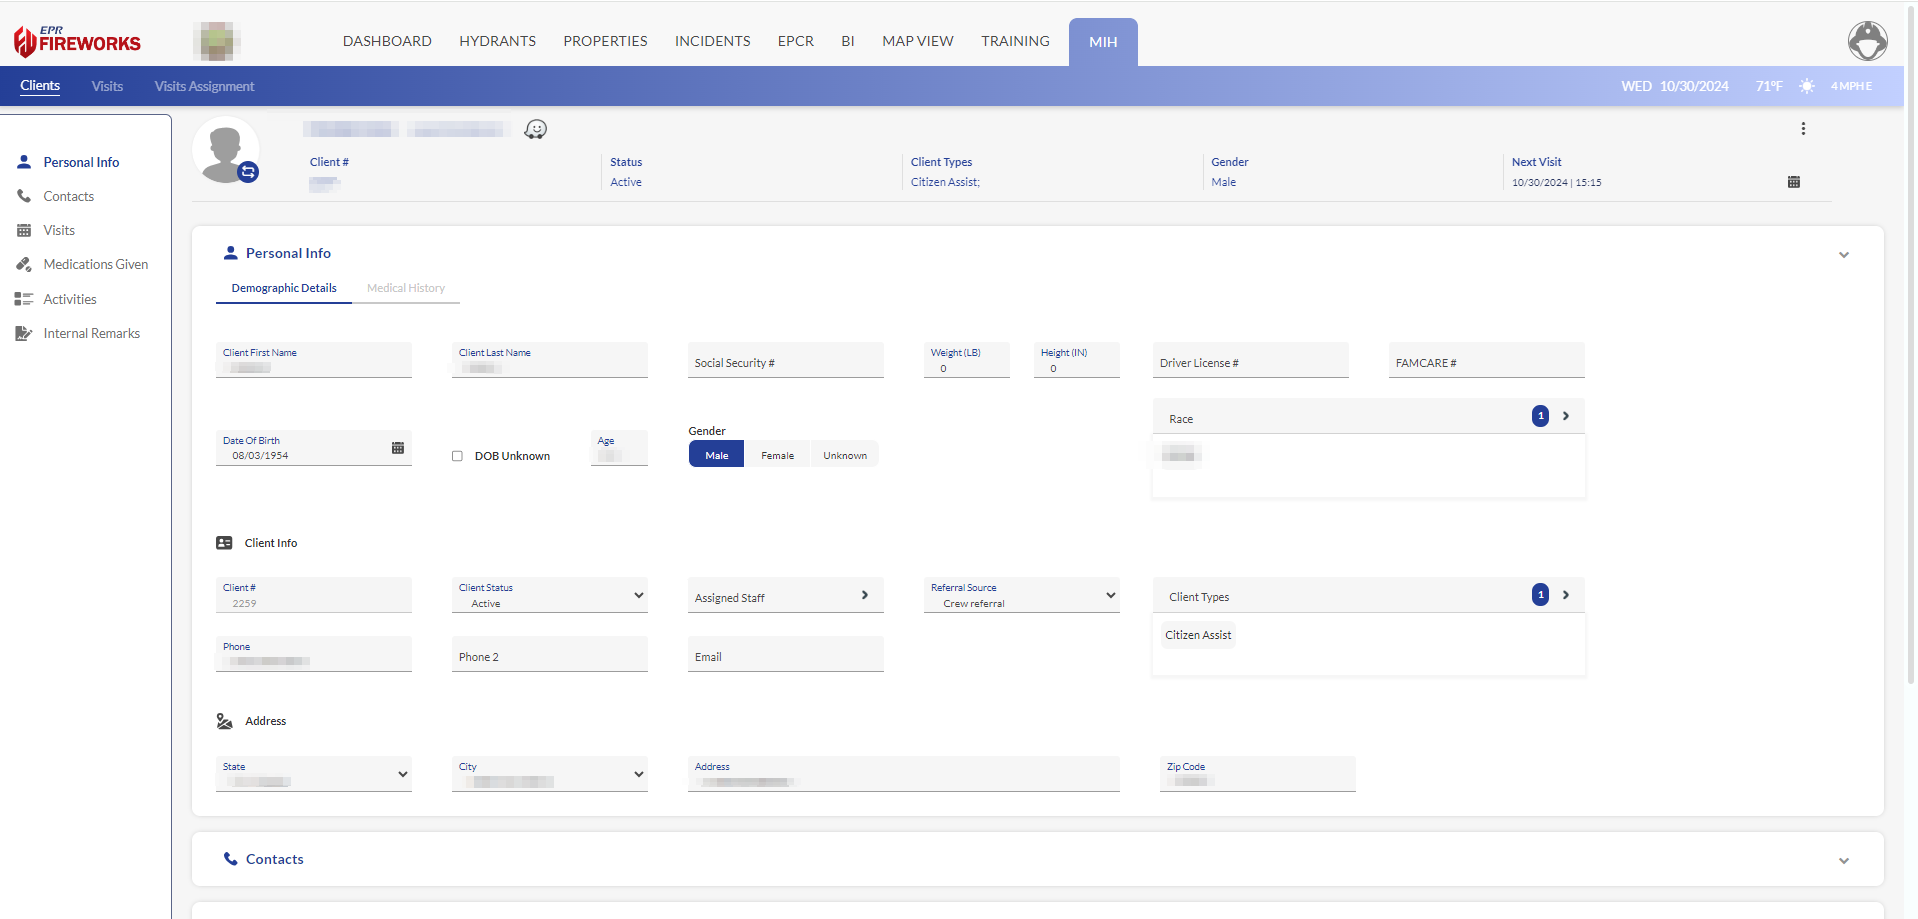
A new client row will appear on the Client page.On the Clients page, click the client's profile photo to the left of the client’s name. The client’s page will open.

Note: The fields completed in the steps above are sufficient to initiate a first visit. To open the visit, click Visits and then click the arrow to the right of the visit.
For further information on scheduling and performing MIH visits, click here.

Adding Medical History and Contacts
Add the client’s medical history:
In the Personal Info section, click Medical History.

Complete the empty fields according to the client’s medical history.
Add contacts:
In the Contacts section, click Add Contact.
Complete the fields.
