CommunityWorks Administrator (Website)
Getting started
This guide explains how to manage your CommunityWorks platform so that you can make fire safety accessible for your community. As an administrator, you can create permit types, design informative and educational dashboards for your customers, and much more. This is your chance to give back to your community.
Logging in
Log in to FireWorks.
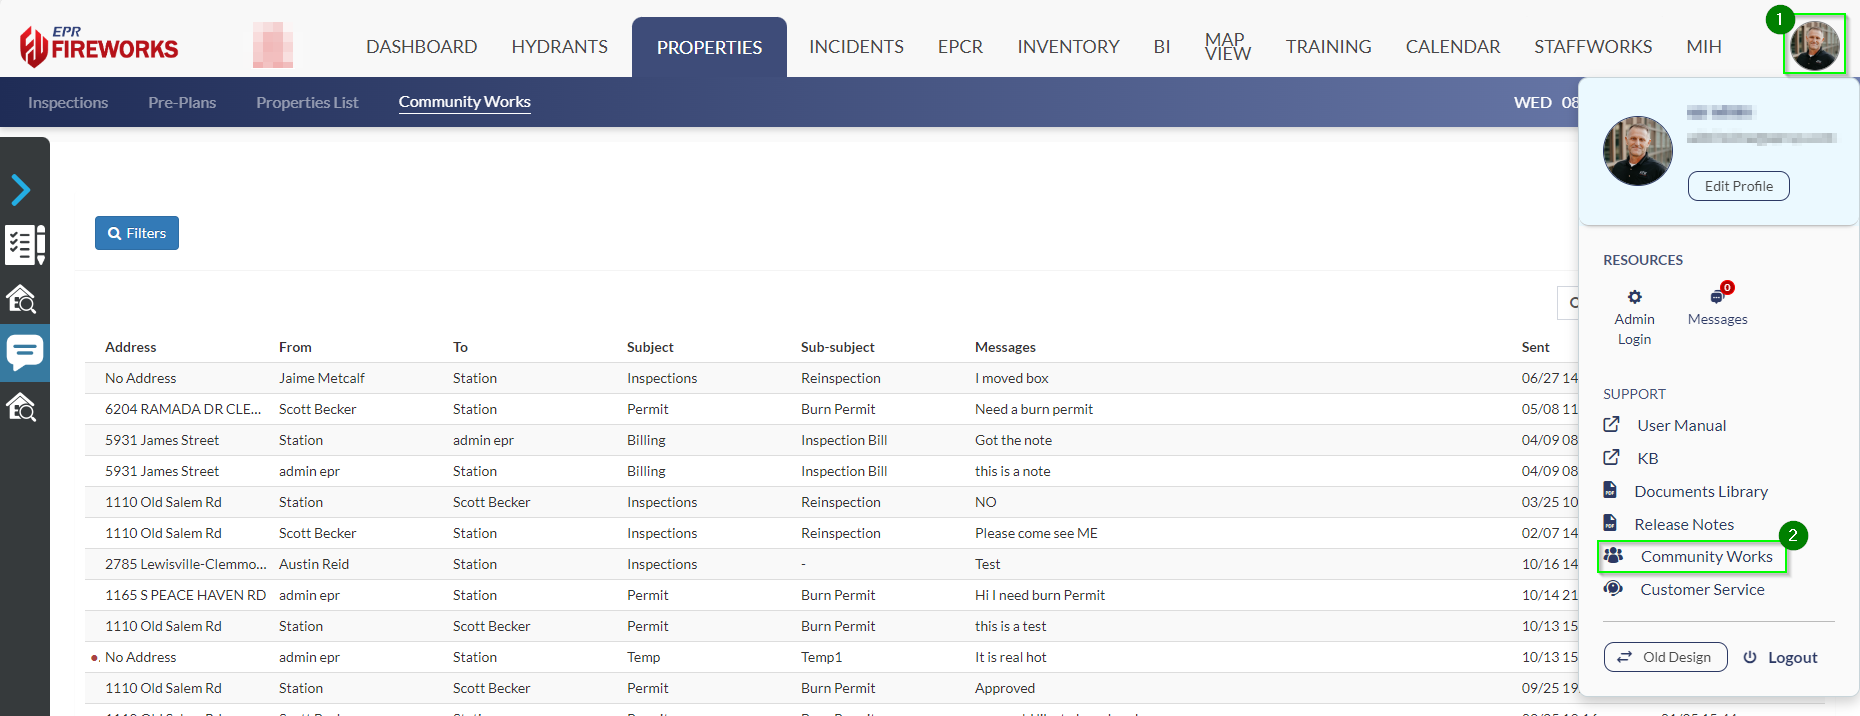
Click the profile image on the right corner, and then click Community Works.
Website settings overview
In the Community guide, we took a deep-dive into the general tabs. In this section, we will take an overview of the Settings sections. Settings can be viewed by administrators only.
Access Settings by clicking ![]() . Community Works settings include the following sections:
. Community Works settings include the following sections:
Section | Description |
|---|---|
Educational content (displayed on the dashboard) | |
Emergency phone numbers (displayed on the dashboard) | |
Links to local services (displayed on the dashboard) | |
Charts illustrating the fire department's achievements (displayed on the dashboard) | |
Permit type management | |
Inspections | Descriptions, approval requirements, and prices for Inspections |
Billing | Descriptions, approval requirements, and prices for permits |
Stats | Displays data on all of the registered users in your account |
Additional Settings |
Note: Sections with a link are explained below in depth.
Dashboard management
The Dashboard displays educational content, important links, emergency phone numbers, personal updates, and fire department charts. This is the where your customers will receive the overview of the fire department before signing up or logging in to CommunityWorks.
In this section, we will explain how to set up all the parts of the Dashboard.
Important: All data published on the Dashboard can be viewed by anyone who has a link. Do not publish sensitive information on the Dashboard.
Adding media to the dashboard
In Main Story, you can add articles and video content to your dashboard. Stories can be either articles or video content. The following procedure describes how to a new story:
In Settings > Main Story, click New Story.
In the dialog box, select the story layout, and then click Choose. A story can be either an article or video content.
Add media and links.
For articles, complete the empty fields as follows:
Date: Enter the date the article will be published on CommunityWorks.
Upload image: Upload an image from your files connected to the article content.
Title: Give a title to your article. You may also add a subtitle (optional).
Story Content: Add the main text of your article..
In addition, you can add social media links according to the icons below (optional). On the dashboard, these links will appear as icons only.
For video content, complete the empty fields as follows:
Insert <video> link: Add a YouTube or Vimeo link.
Note: you can only add a single video per page.Date: Enter the date the video will be published on CommunityWorks.
Title: Give a title to your video. You may also add a subtitle (optional).
Story Content: Add text describing the video (optional).
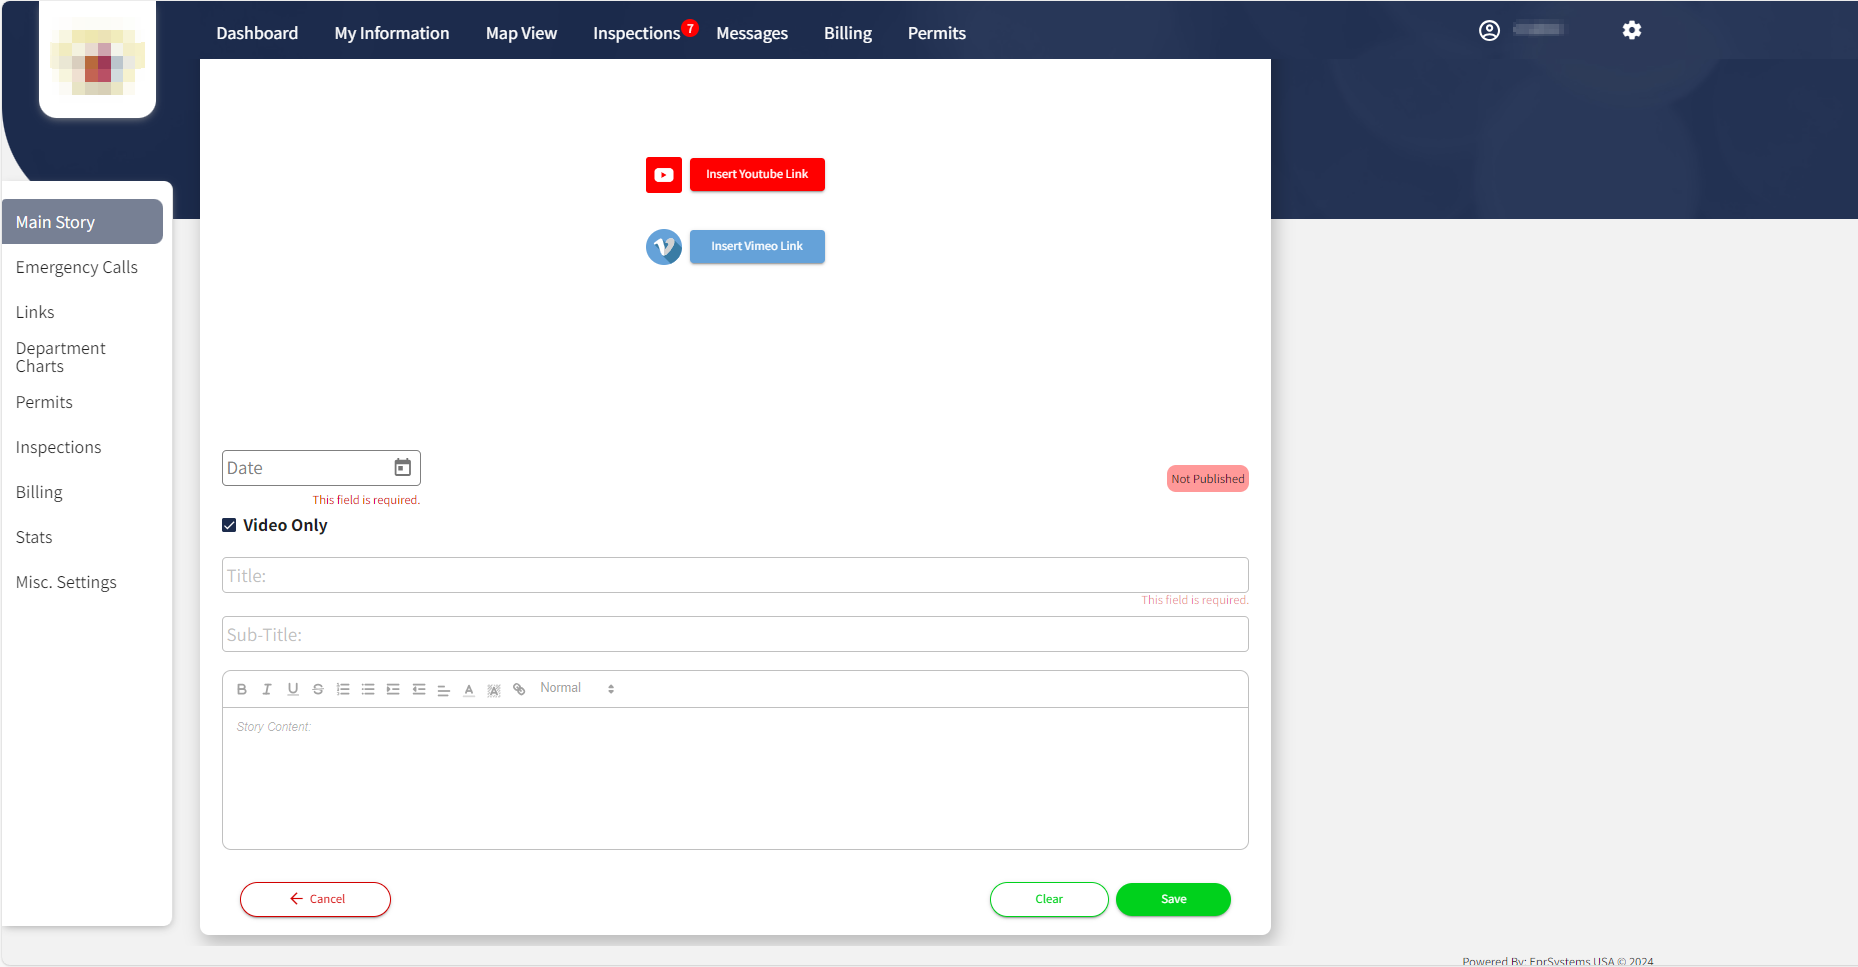
When finished, click Save.
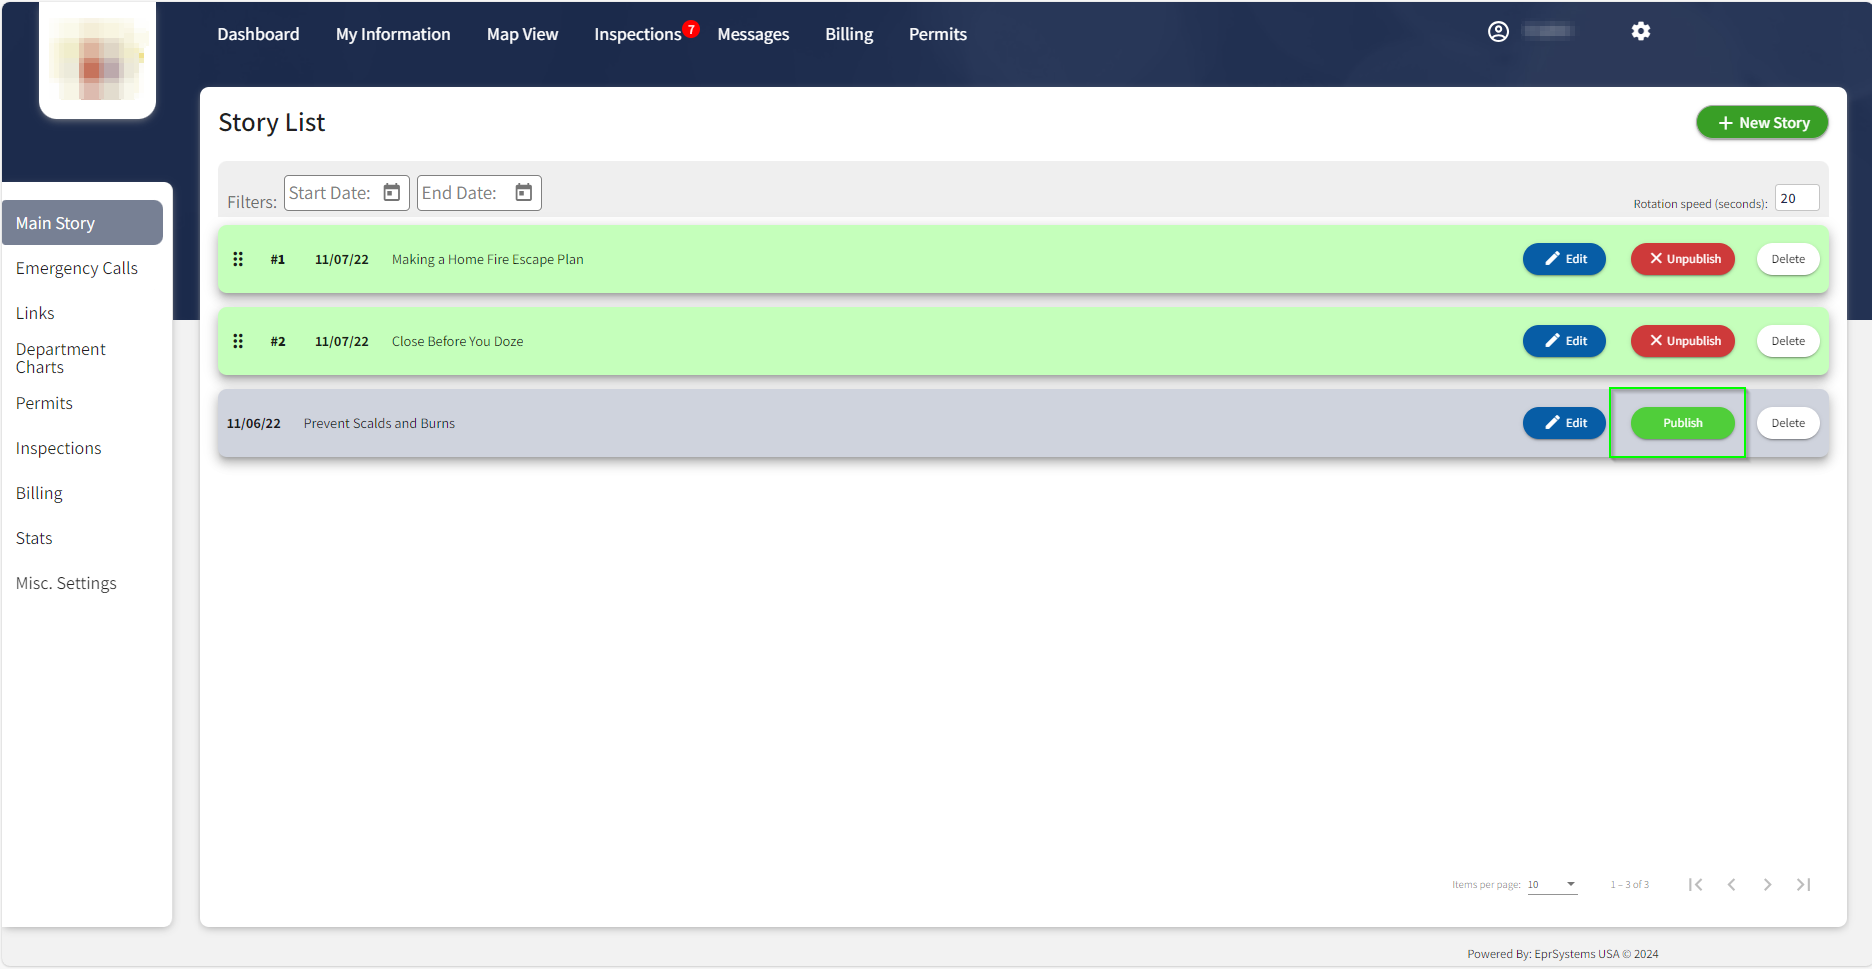
The new story will appear in the Story List.In the new story row, click Publish.
Adding emergency numbers
Emergency numbers need to be as available as possible in case of emergency.
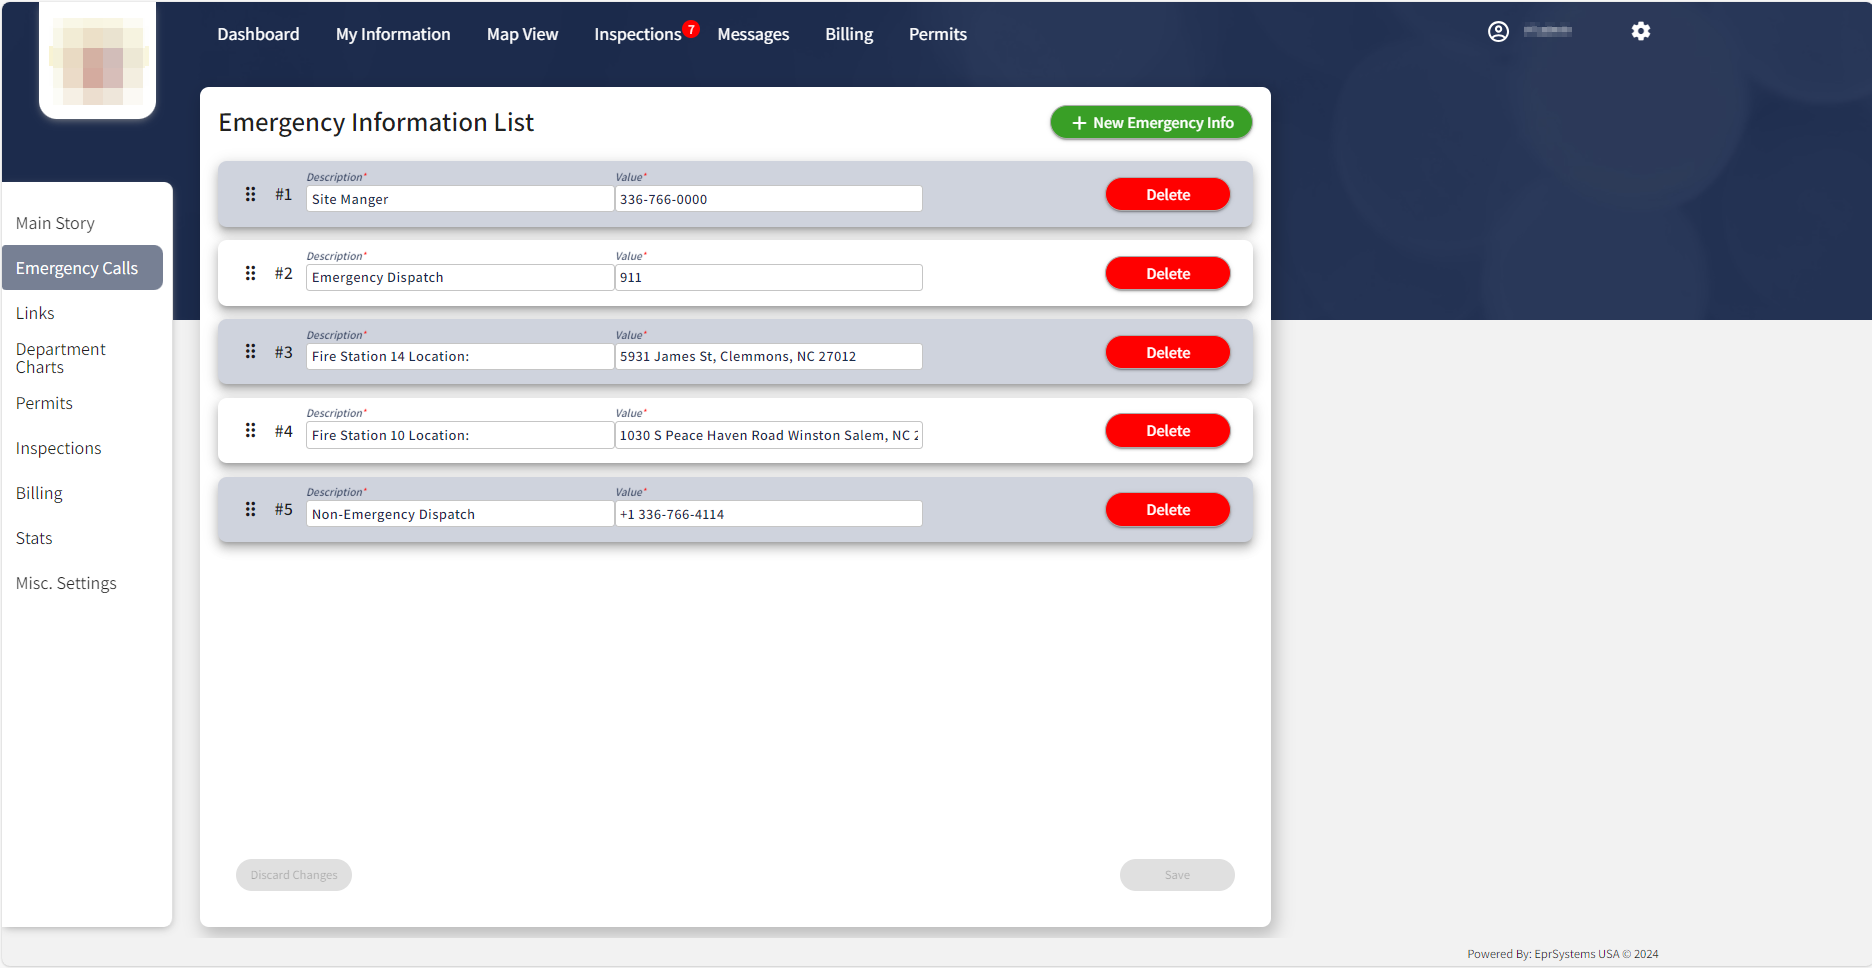
To add an emergency number to the dashboard, do the following:
In Emergency Calls, click New Emergency Info.
A new row opens. Complete the empty fields as follows:
Description: Give a name to the emergency contact.
Value: Add the phone number.
When finished, click Save.
The number and contact name will appear on the Dashboard under Emergency Calls.
Adding public links
Make CommunityWorks a bridge between the fire department and other local services by adding links to their respective websites. In addition you can add links to your social media pages.
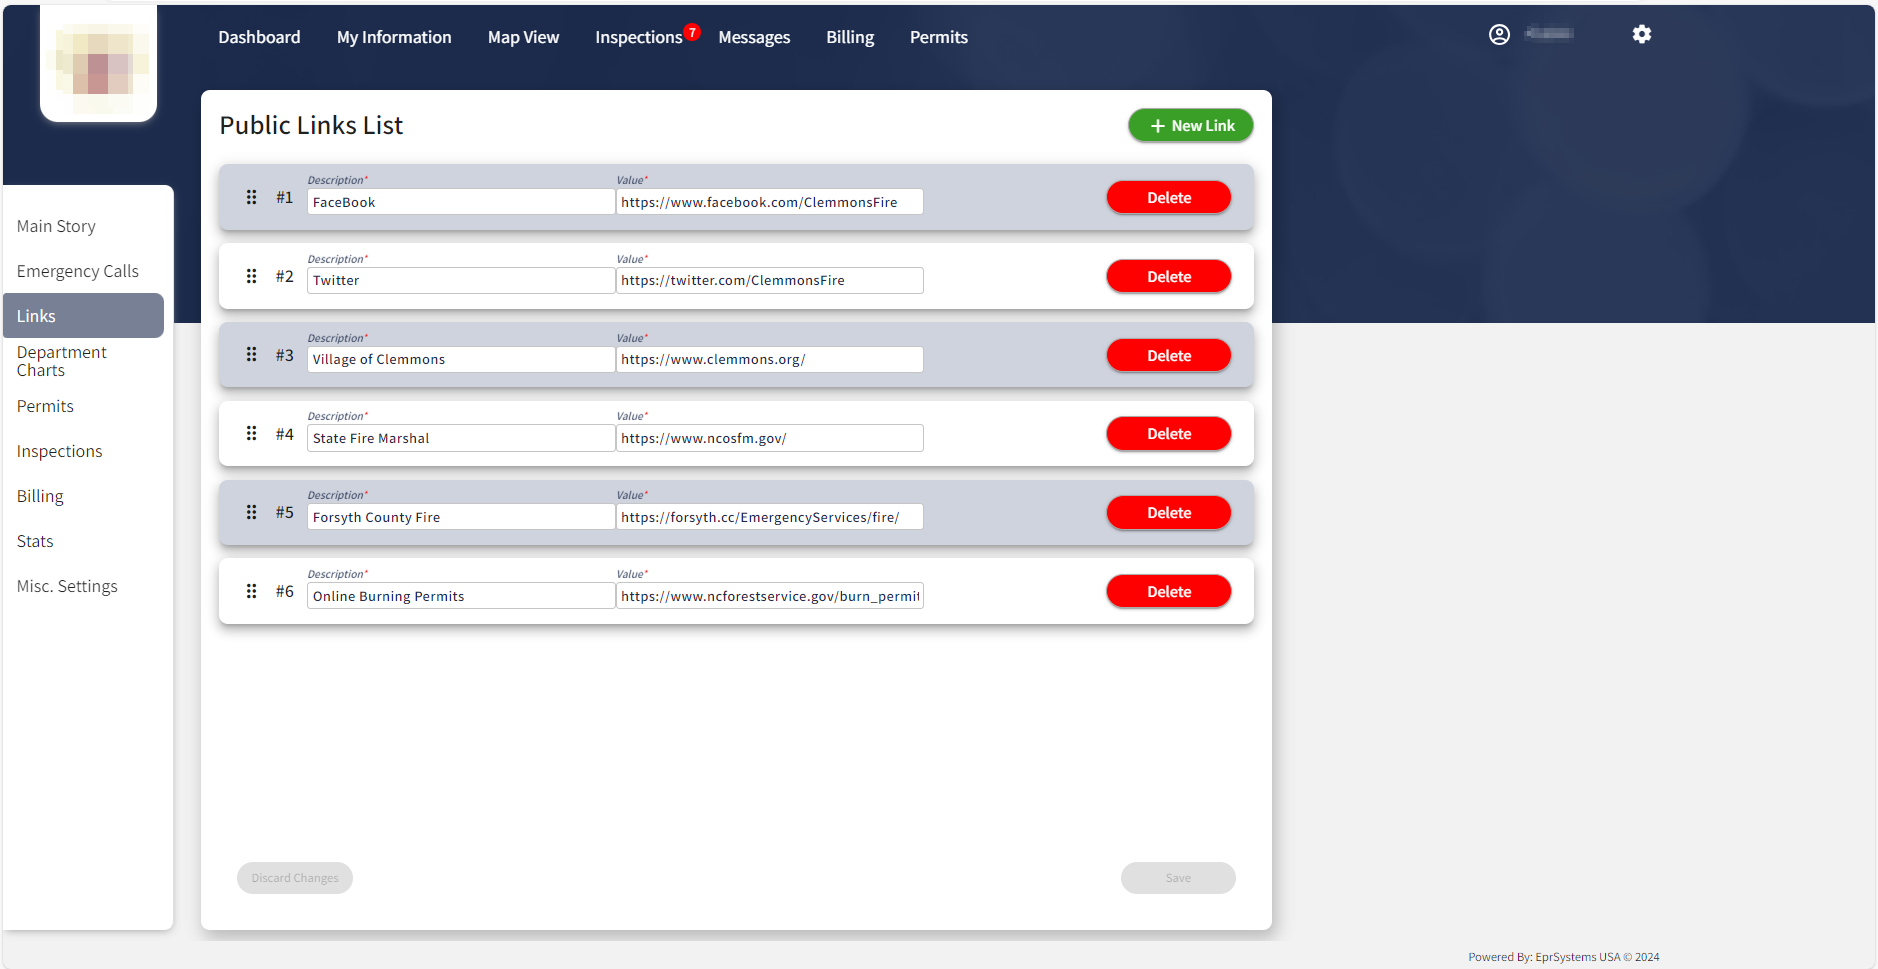
To add a new link, do the following:
In Links, click New Link.
A new row opens. Complete the empty fields as follows:
Description: Give a name to the link.
Value: Add the URL.
When finished, click Save.
The link will appear under Public Records at the bottom of the Dashboard.
Adding Department Charts
Build trust with your community by displaying your fire department’s achievements on the dashboard.
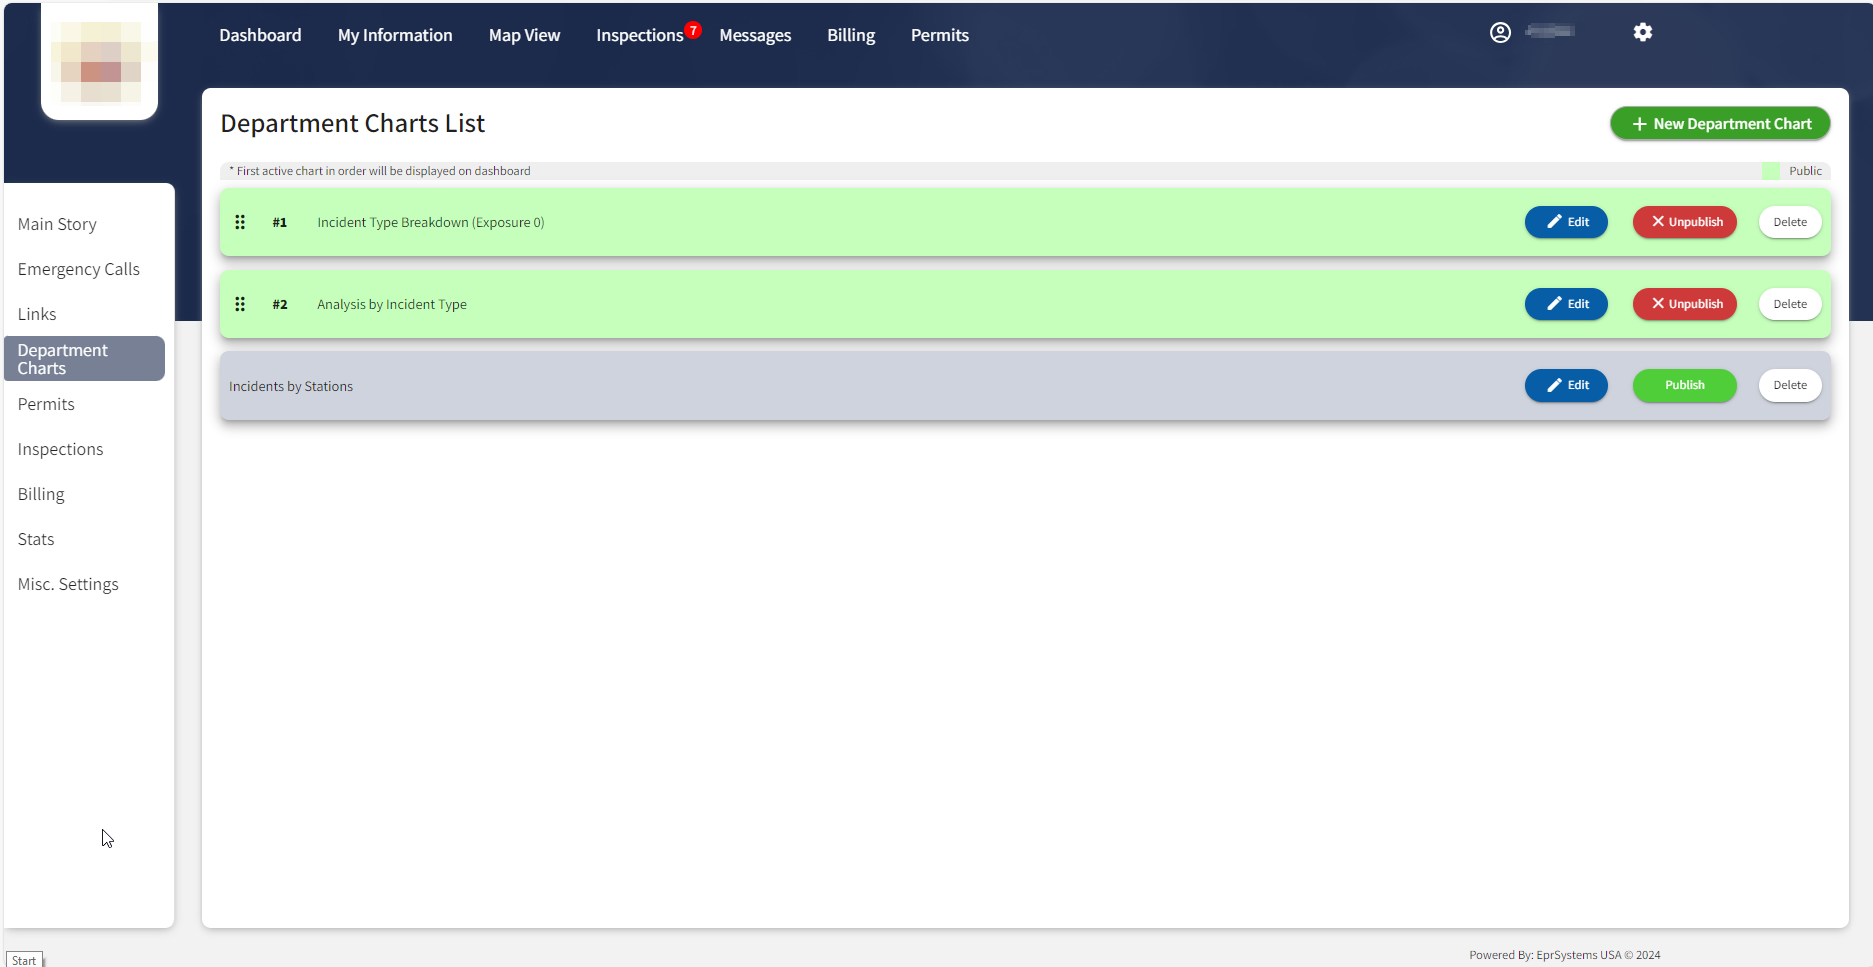
To add a new chart, do the following:
In Department Charts, click New Department Chart.
In the dialog box, select the layout, and then click Choose.
Complete the empty fields as follows:
Title: Give a title to your chart. You can add a subtitle in the Sub-Title field (optional). A sub-title is recommended when the chart illustrates multiple variables.
Insert Link: Add the URL to the chart.
Description: Describe the data in the chart. If there are multiple variables in the chart, explain the first type here.
Second Sub-Title (optional): If the chart displays multiple variables, add a second sub-title to explain each variable separately.
Second Description (optional): Describe the second variable.
When finished, click Save. The chart will appear in the Department Charts list.
In the row of the new chart, click Publish.
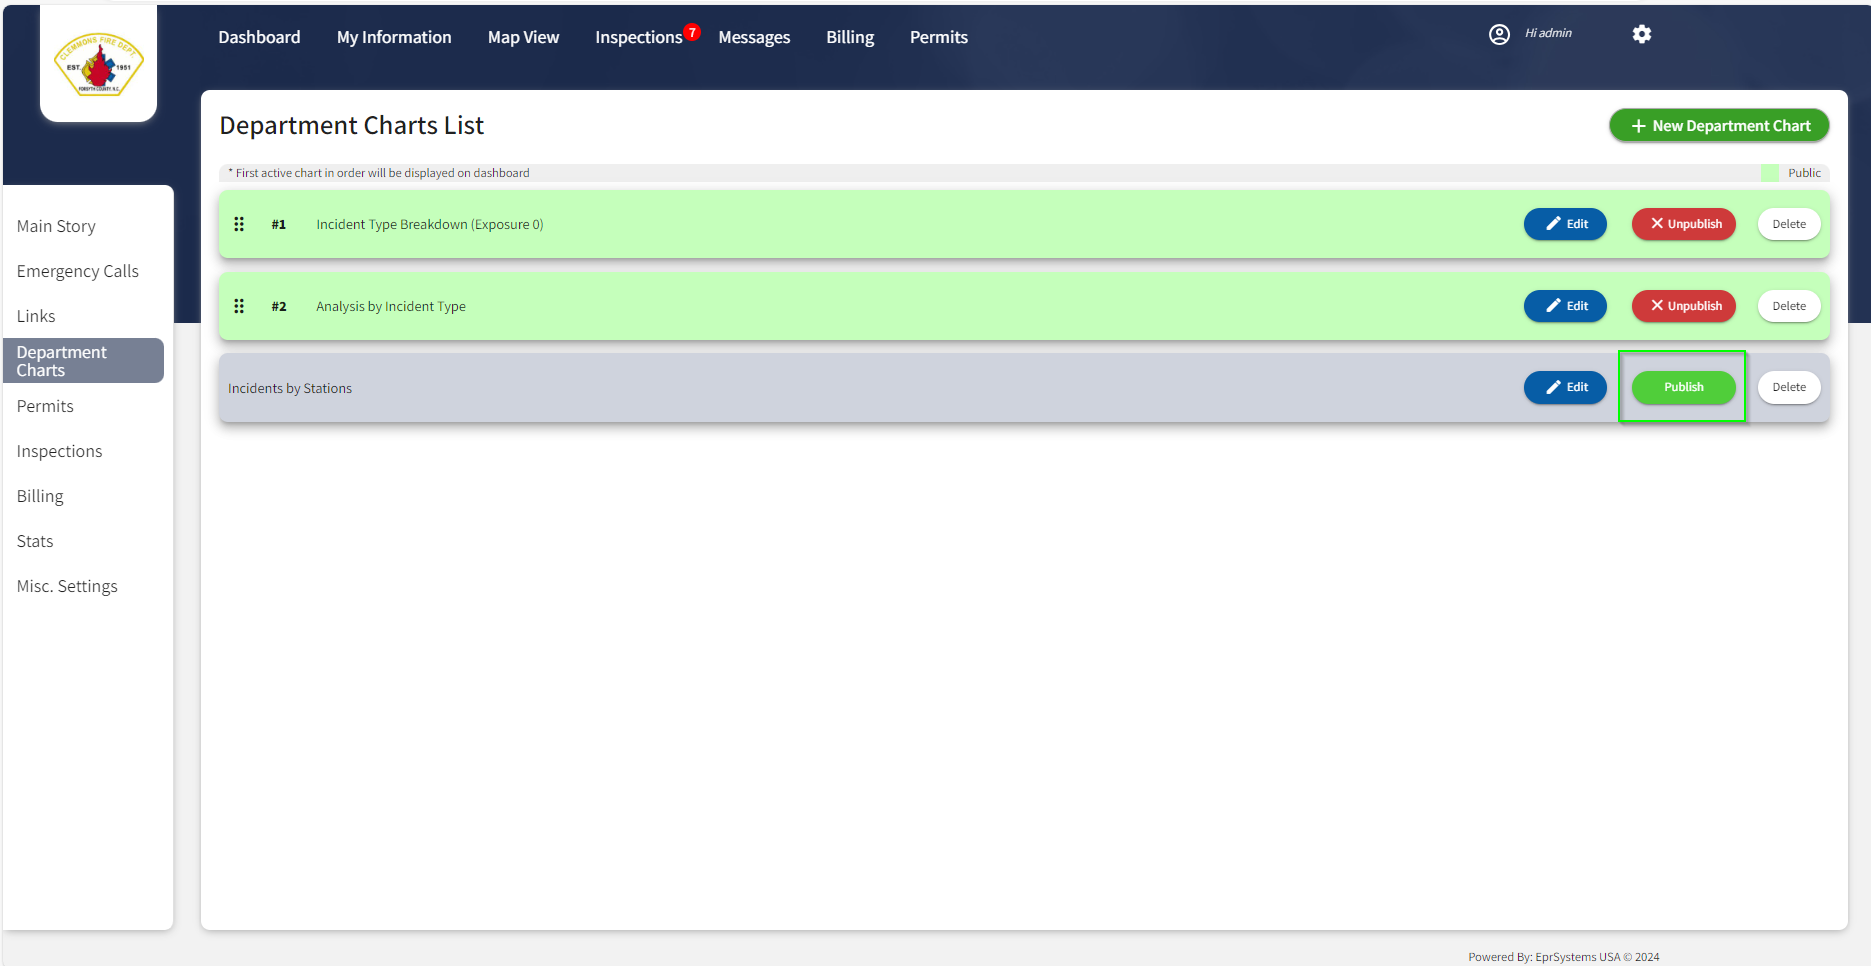
The chart will appear at the bottom of the dashboard.
Permits
This section describes how to create and manage Permit types. For permit request management in FireWorks, see CommunityWorks (FireWorks).
Creating a permit type
This procedure describes how to create permit types for your customers to select when requesting a permit.
In Settings, click Permits, and then click +New Permit.
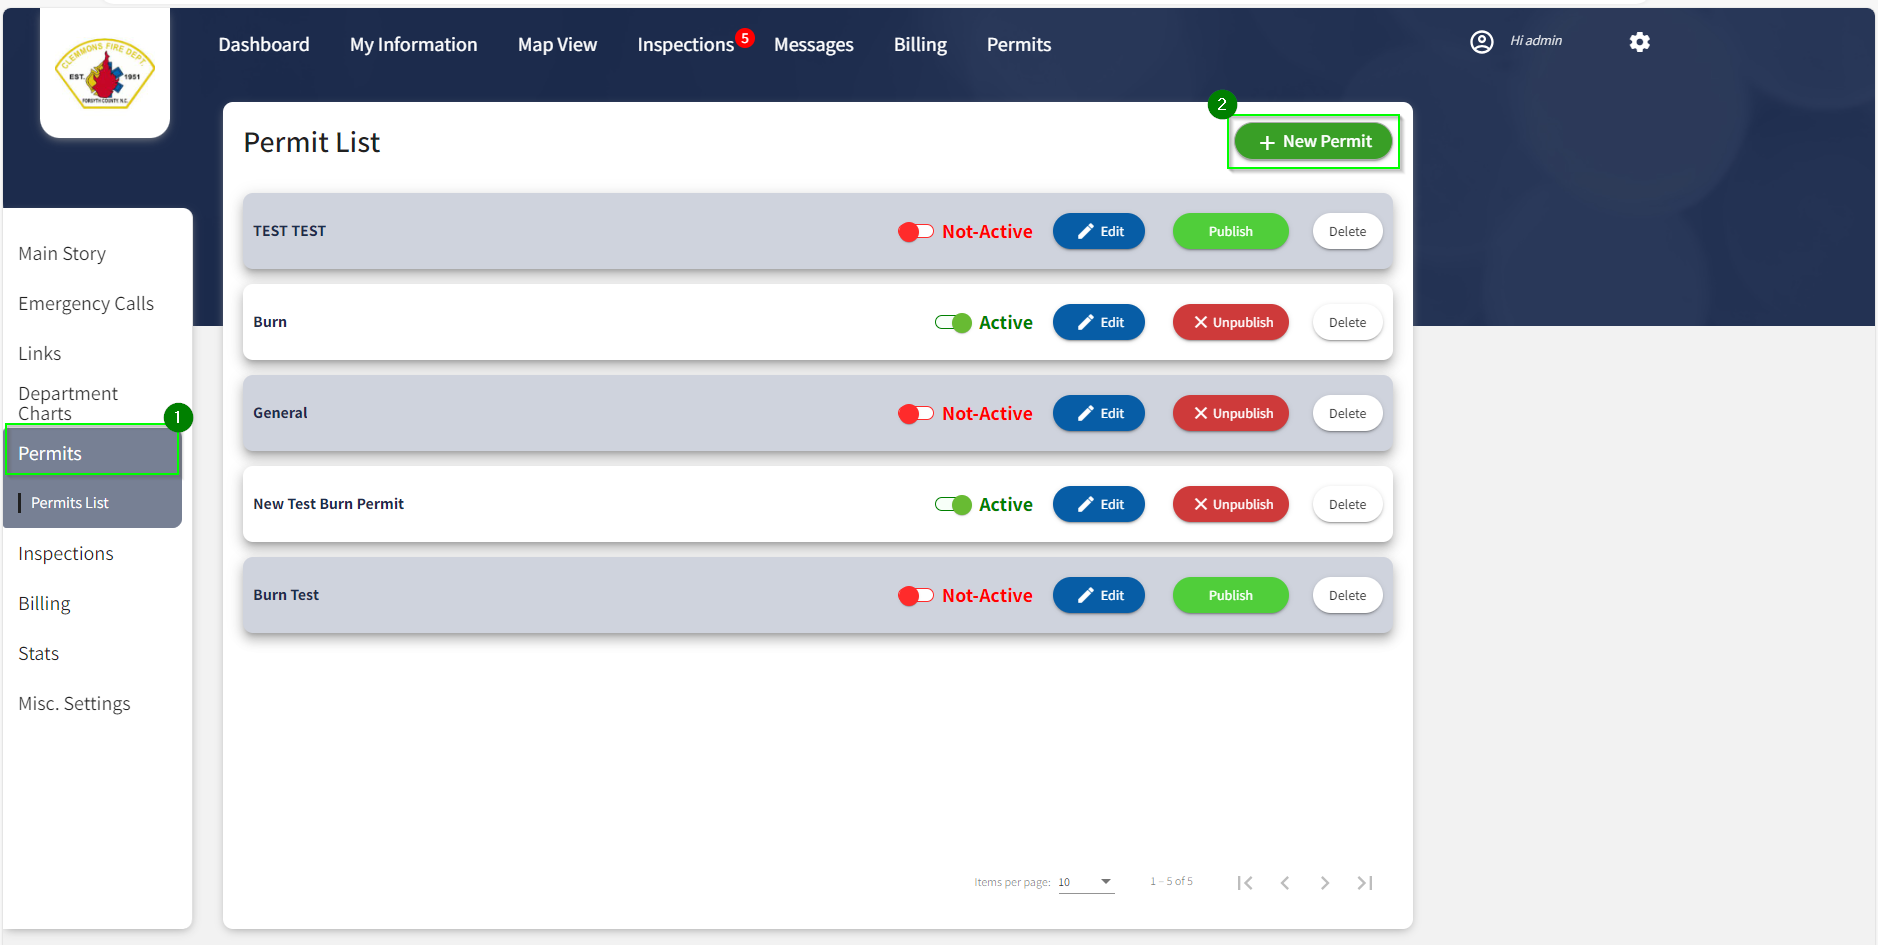
In the dialog box, complete the empty fields as follows:
Permit Title: give the permit a name the citizen will understand.
Permit Description: add additional information relevant for the citizen.
Permit Requirements: add mandatory requirements associated with the permit.
This Permit Requires Activation: If the permit requires special attention, check this box. Once marked, you'll need to reapprove the request each time it is needed.
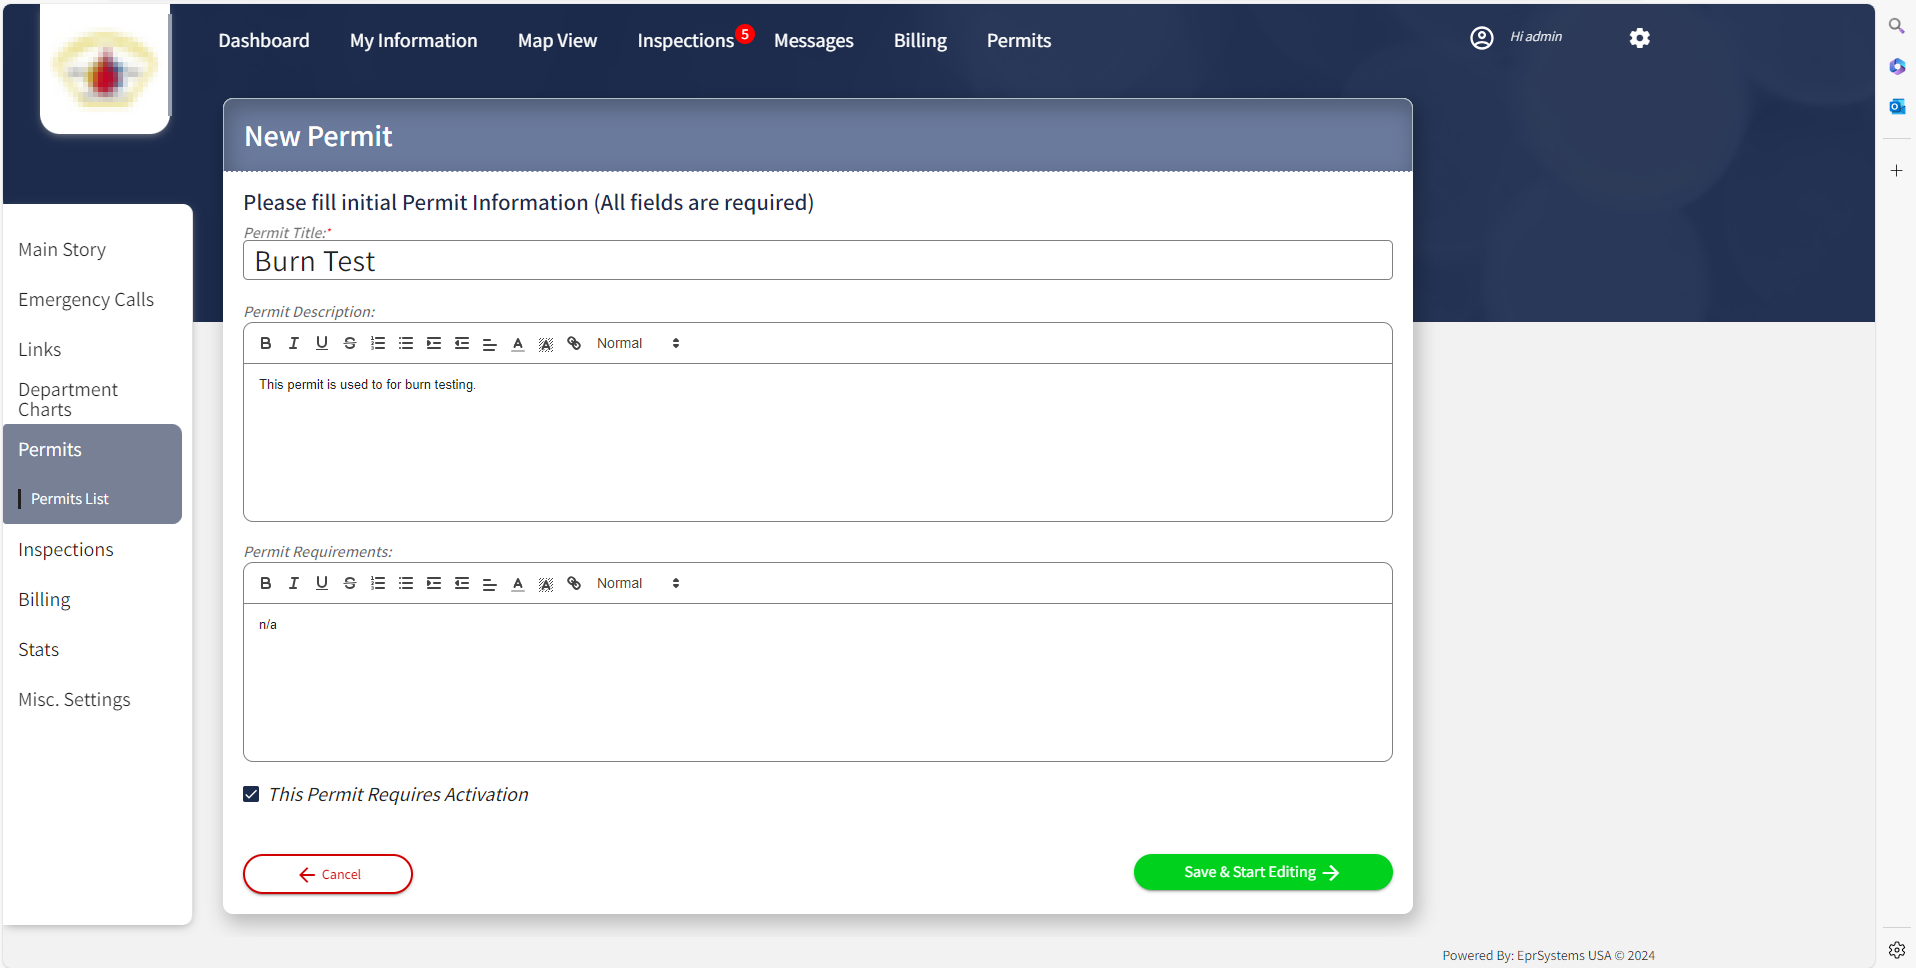
When completed, click Save & Start Editing.
A new permit type is created.
Permit Stages will appear at the top of the page. Click Add Stage.
In the dialog box, select the type of stage as described below, and then click Save. You can add multiple stages to each permit type.
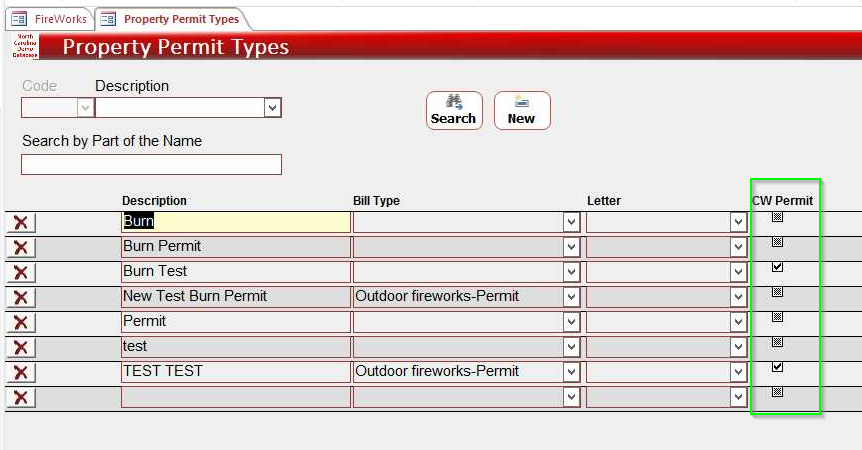
Note: You can view all of your permit types in the back-office. Go to Properties > Settings > Property Permit Types. All Published permits (see below) are marked in the CW Permit column.
Permit stage types
The stage types are as follows:
Stage Type | Description | Options |
|---|---|---|
Application form | Add for instances where additional information is required. There are two types of application forms: Form section and Image section | Form Section: you can add fields such as city, county, state, zip code, date, email, and more. In addition, you can add custom fields, such as lists, checkboxes, radio options, and text fields. Image section: add when you want the applicant to add images to the request. |
Text information | Add for instances where read-only sections are required. | n/a |
Payment | Add for instances where billing is required. For further information on billing types, see Billing below. | Select a Billing Type from the list. |
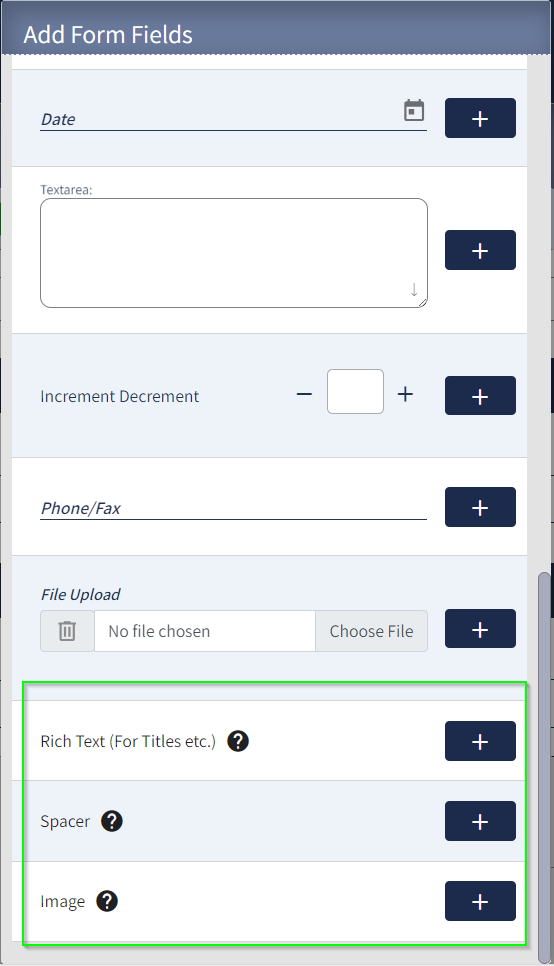
Note: In Application Form > Form Selection, you can enhance the page by adding components such as columns, spacers, rich text, images, and more.
Add components using the Add Form Fields dialog box.
Managing permit types
Manage your permit types through the Permit List.
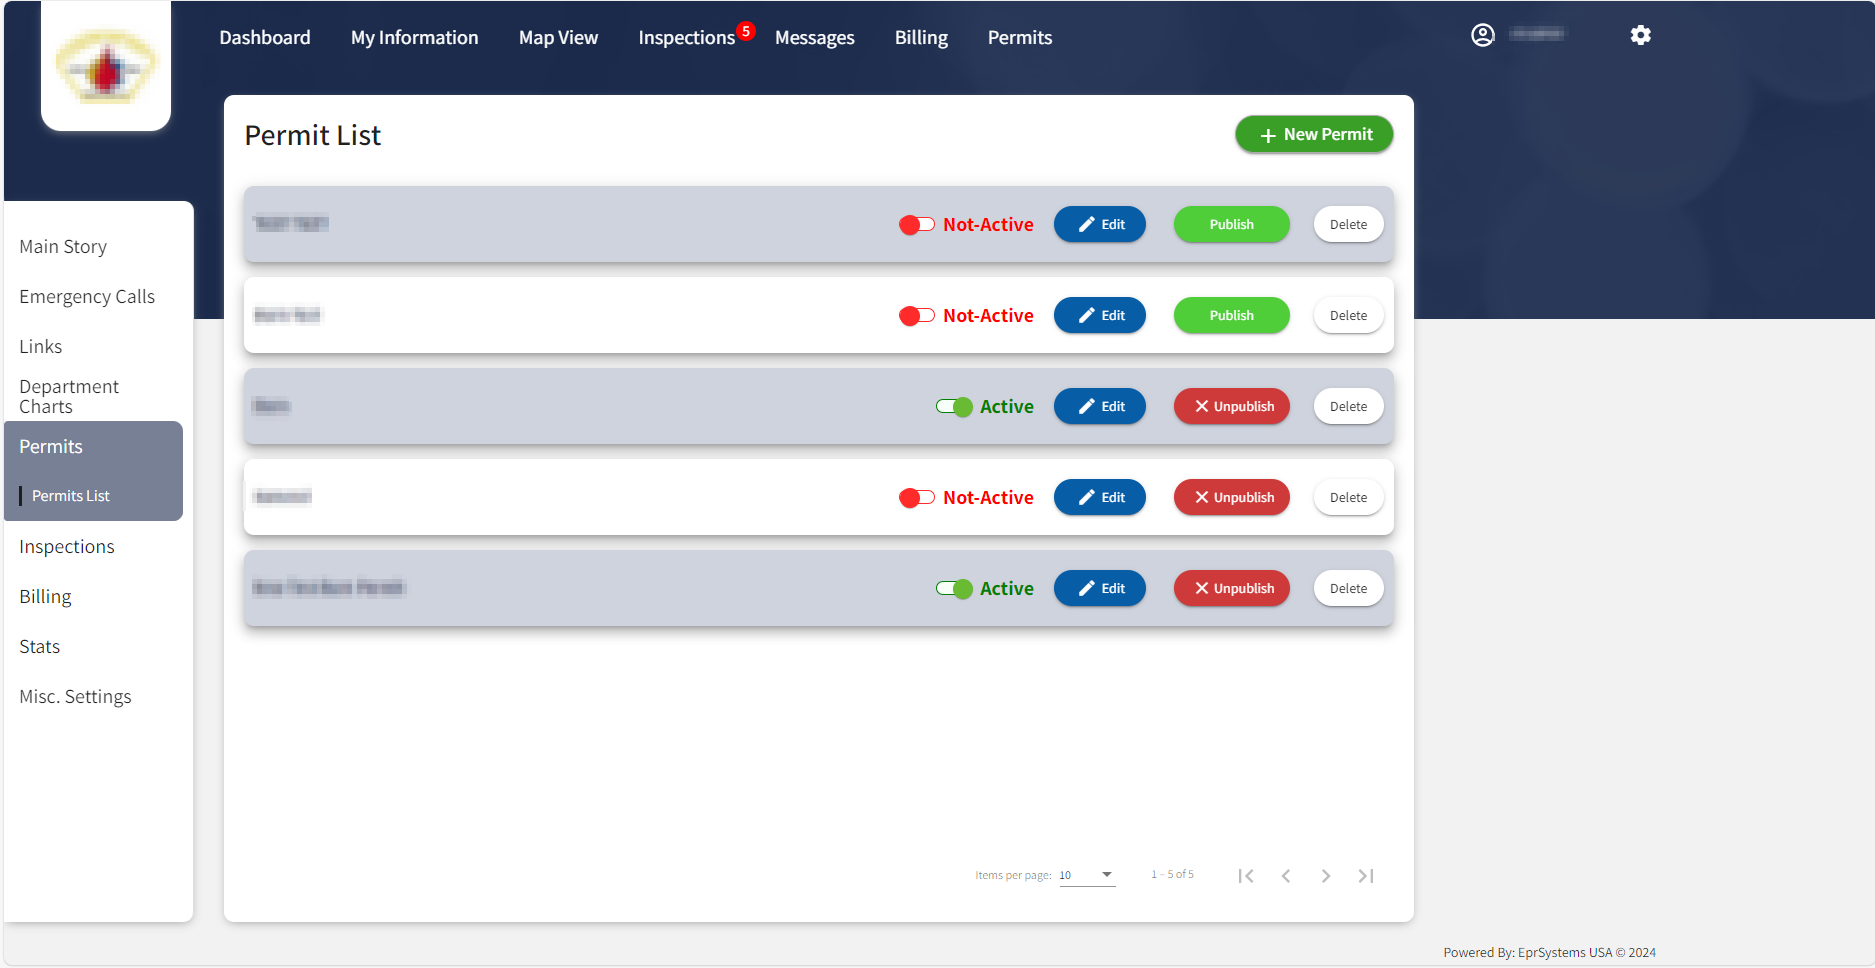
The available permit actions are as follows:
Active/Not Active: Activate a permit so that you will have to reapprove the permit each time, as described above.
Edit: Edit the content of the permit type. This includes adding or deleting stages.
Publish/Unpublish: To make a permit available for citizen request, click Publish. To hide a live permit type, click Unpublish.
Delete: Delete a permit type.
Misc. Settings
In this section we will review all additional settings that appear under the Misc. Settings tab. Misc. Settings includes the following sections:
City and County settings
City/County settings enables you to control location properties for permit types. When selecting a county or city, the user can only select the counties and cities from the list here.
Adding counties
To add a county, do the following:
In City/County, click Add County. A new row will appear in the County list.
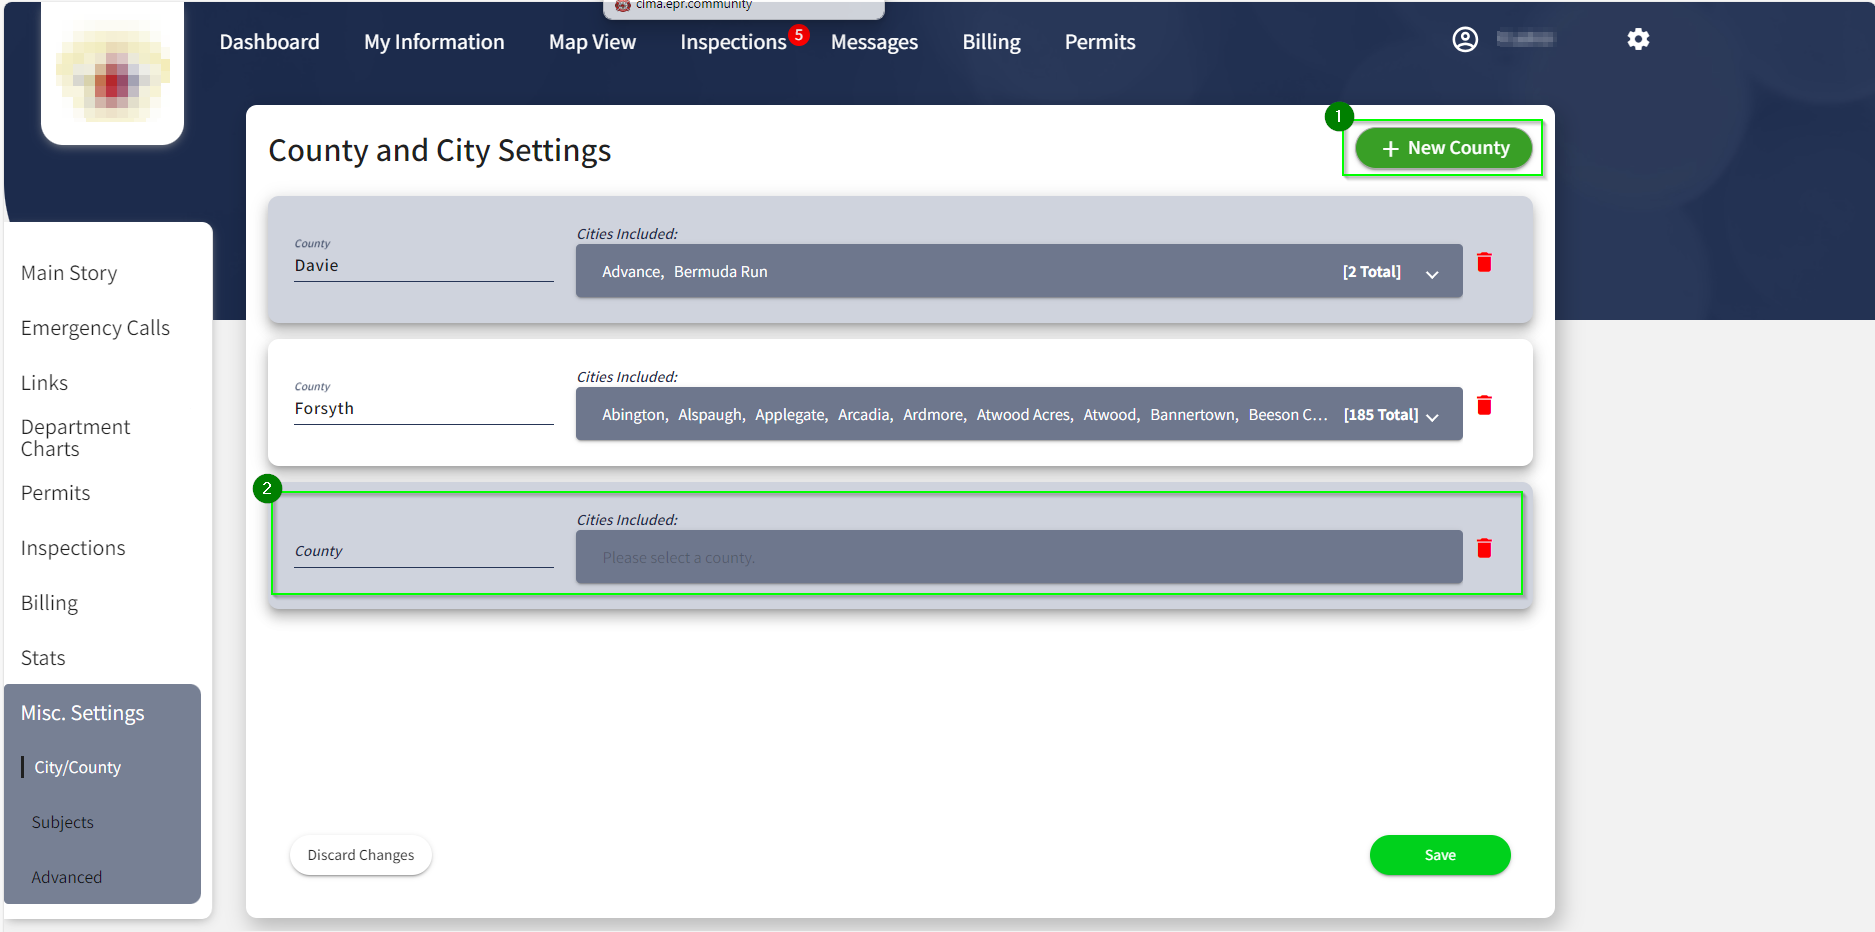
In the new row, in the County field, begin to type the name of the county, and then select county from the drop-down list that appears.
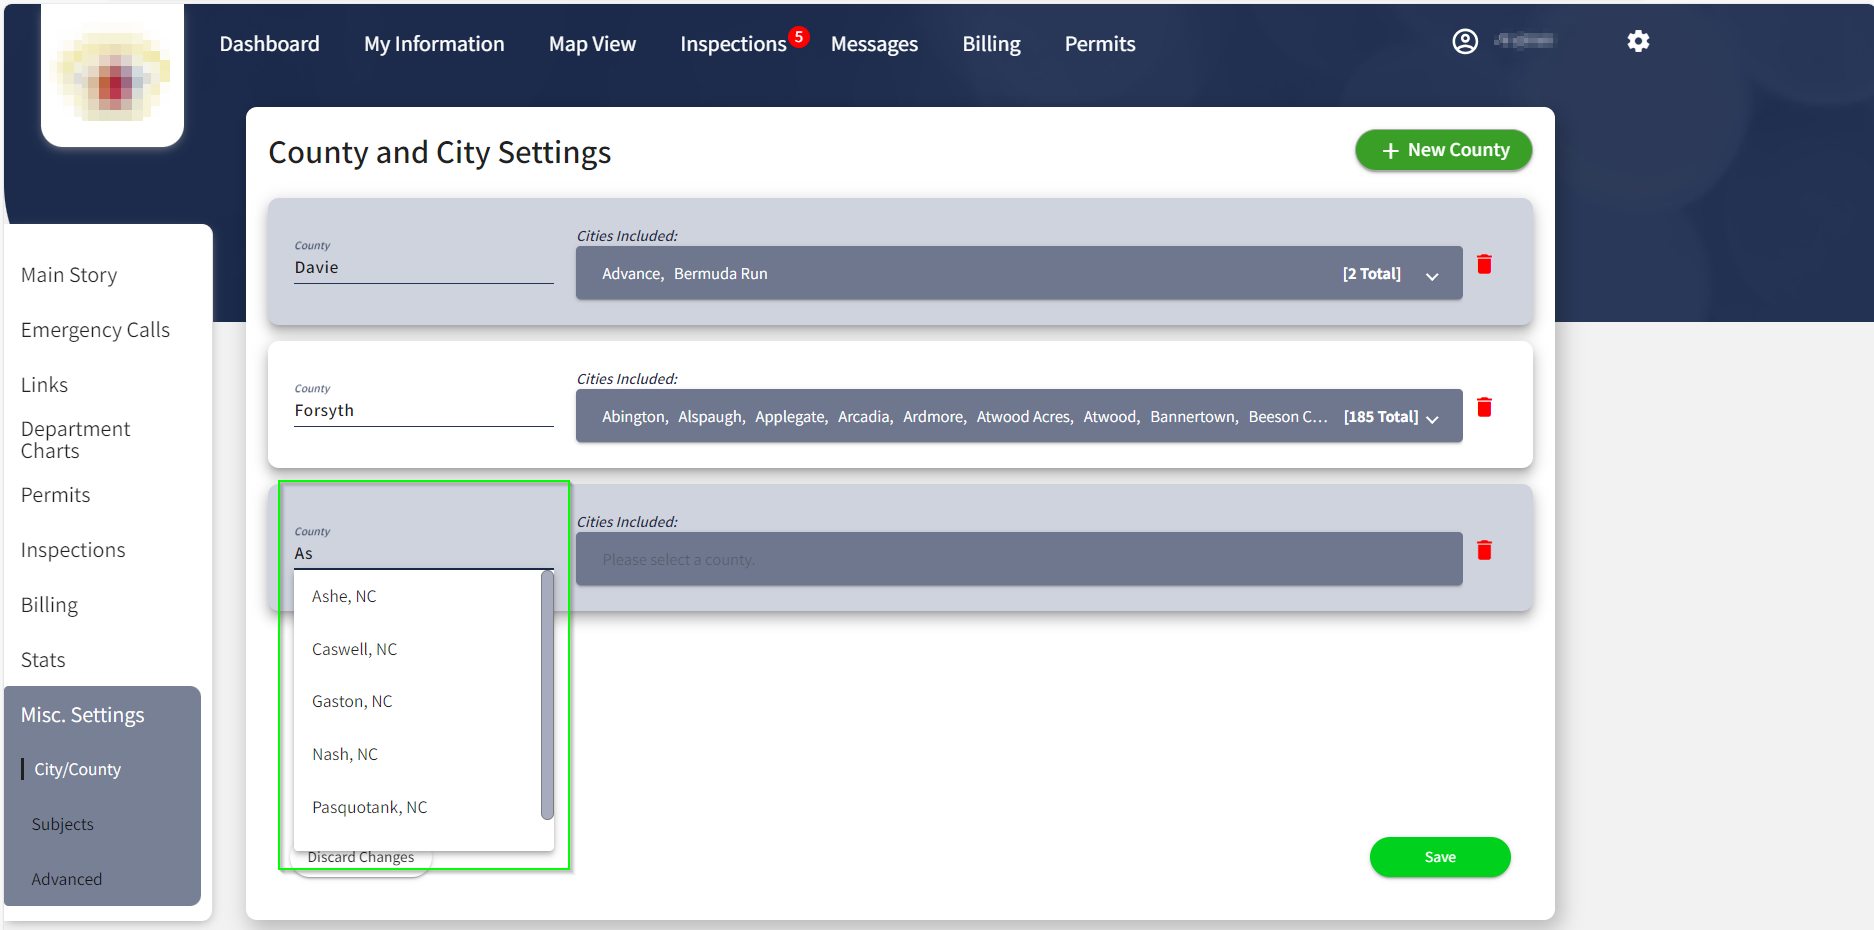
Managing cities within the county
By default, all the cities in the county are added automatically. If you want to make only specific cities available for the user, do the following:
In the row of the county, click on the Cities included field. A drop down menu will open.
In the left column of the menu, select the cities you want to make available. These cities will appear in the left column.
When finished, click Save.
Subject settings
In Subject Settings you can control which types of messages users can send from their Community Works account. Each subject has sub-subjects. There a built-in and custom subjects. Built in subjects can be made visible or hidden, but cannot be deleted. Custom subjects are always visible, but can be deleted.
Built-in subjects
There are three built-in subjects: Billing, Inspections, and Permits. You can hide these subjects or make them visible, by clicking on the eye to the left of the row.
Adding custom subjects
To create a new subject, click Add Subject. In the new row, complete the subject and sub-subject fields. You can add multiple sub-subjects.
Advanced settings
In Advanced Settings, you can manage section visibility, email notifications, and Request permissions as follows:
Section | Visibilty | Request permissions | Email notifications |
|---|---|---|---|
Inspections | Can be hidden by setting Inspection menu is visible to the citizens to Off. | Enable Inspection requests by setting Citizen can send requests for new inspections to On. | Manage who will receive notifications on Correction of Violations by adding the email address to the list. |
Permits | Can be hidden by setting Permits menu is visible to the citizens to Off. | Enable Permit requests by setting Citizen can send requests for new permits to On. | Manage who will receive notifications on Permit Requests by adding their email address to the list. |
Billing | Can be hidden by setting Billing menu is visible to the citizens to Off. | Enable Billing requests by setting Citizen can send requests for new billings to On. | Manage who will receive notifications on Billing Requests by adding their email address to the list. |
Messages | n/a | n/a | Manage who will receive notifications on New Messages by adding their email address to the list. |
