
Narrative
Overview
The Narrative tab allows you to document the complete story of your incident response in the EPR FireWorks ePCR module. Create comprehensive incident narratives using automated generation, manual entry, or voice dictation to capture all aspects of patient care and operational response.
Before You Start
Complete all required sections of the ePCR (Incident, Times, Patient, Assessment, Disposition)
Ensure all patient data, vital signs, and treatments have been entered
Verify the accuracy of all entered information before generating a narrative
Creating an Incident Narrative
If a narrative already exists for the NERIS incident, use the Copy From Incident Narrative feature to copy the narrative to ePCR.
Generate a Standard Narrative from Field Values
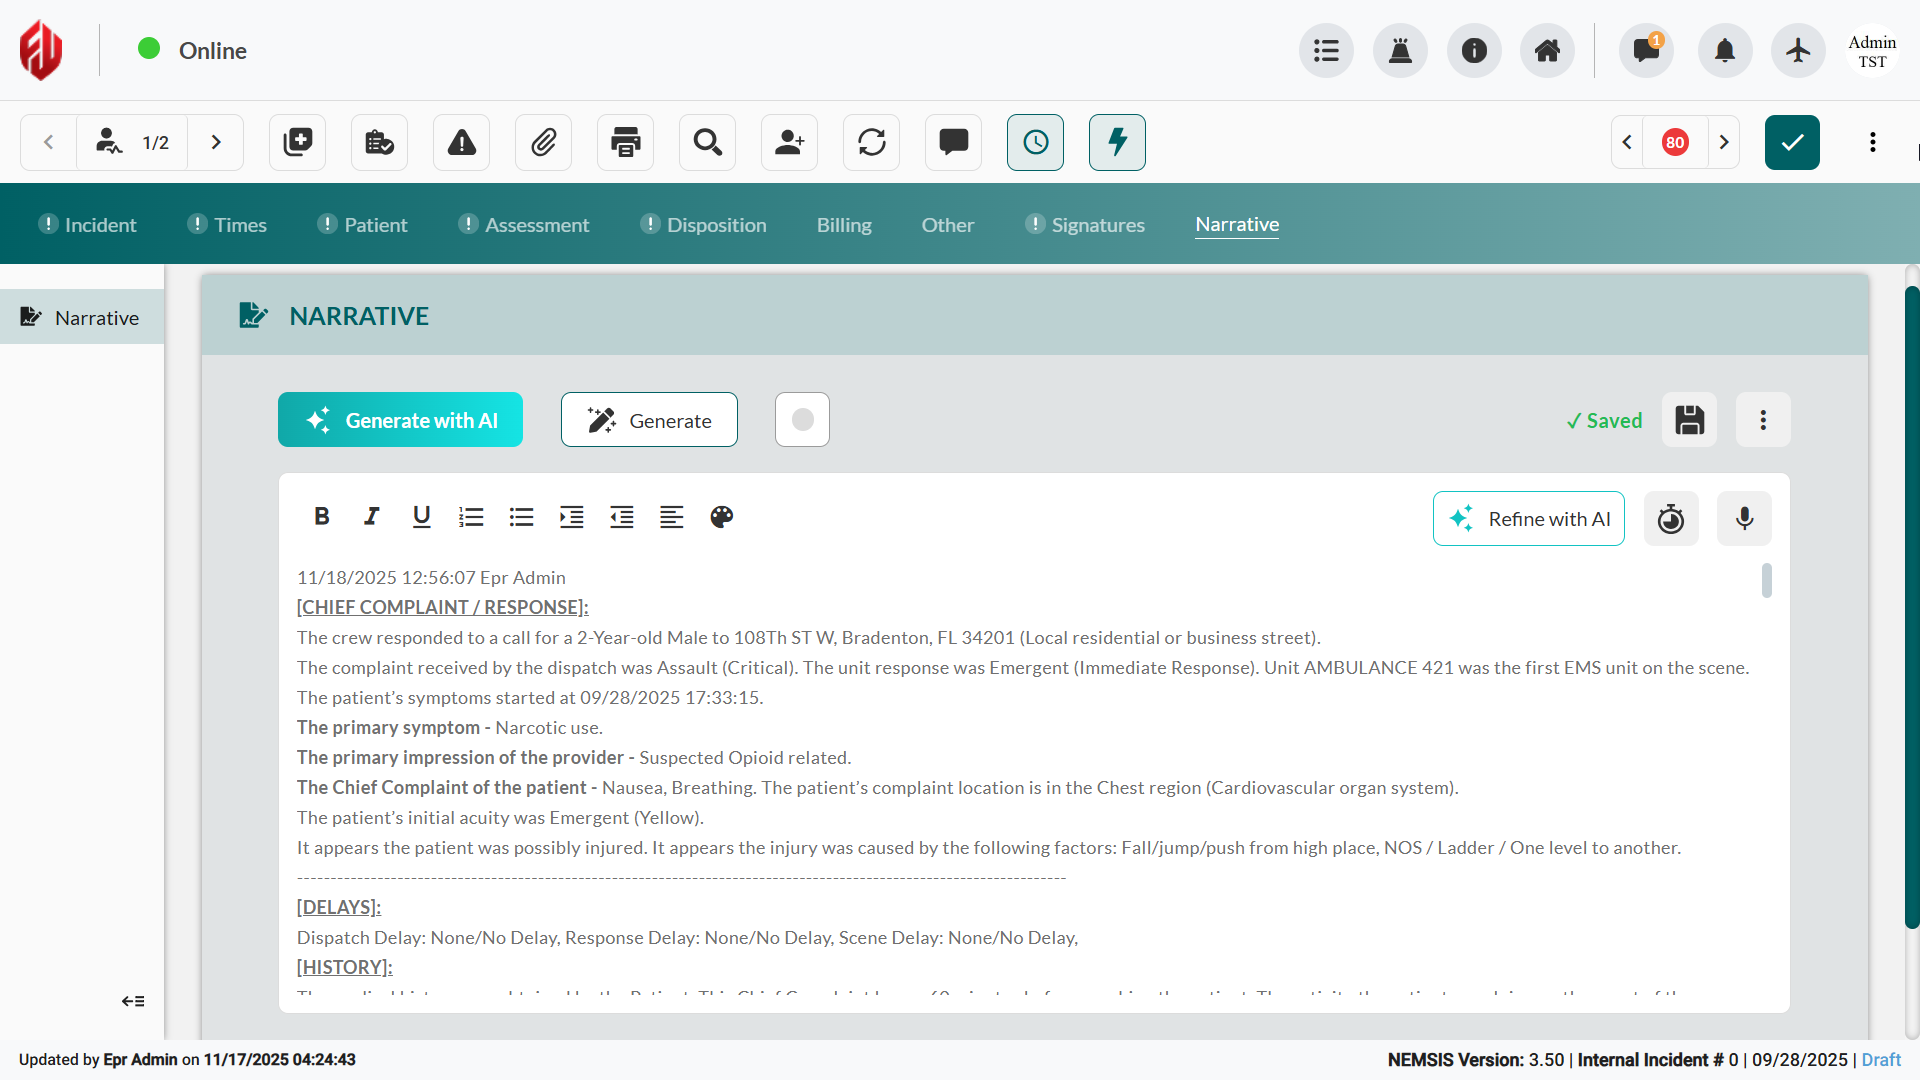
EPR FireWorks can automatically compile all entered ePCR data into a structured narrative organized by standardized sections.
Navigate to the Narrative tab.
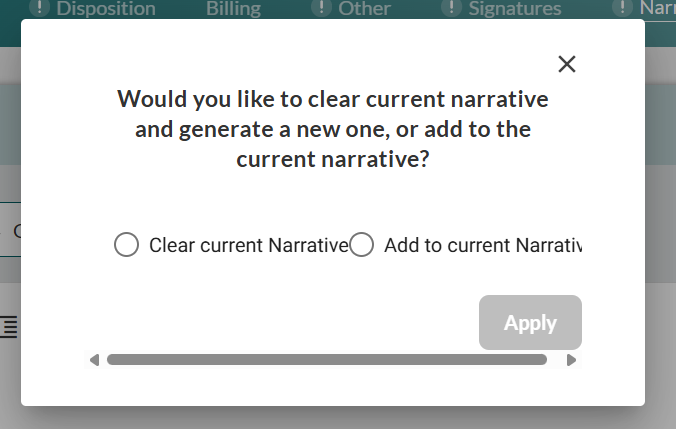
Click Generate to create a field-based narrative.

Select whether to replace the current narrative (where applicable) or add to the existing one.
Result: EPR FireWorks compiles all entered ePCR data into a structured narrative organized by standardized section headers.
Generate an AI-Enhanced Narrative
EPR FireWorks can create an AI-enhanced narrative with customizable style, format, and focus areas.
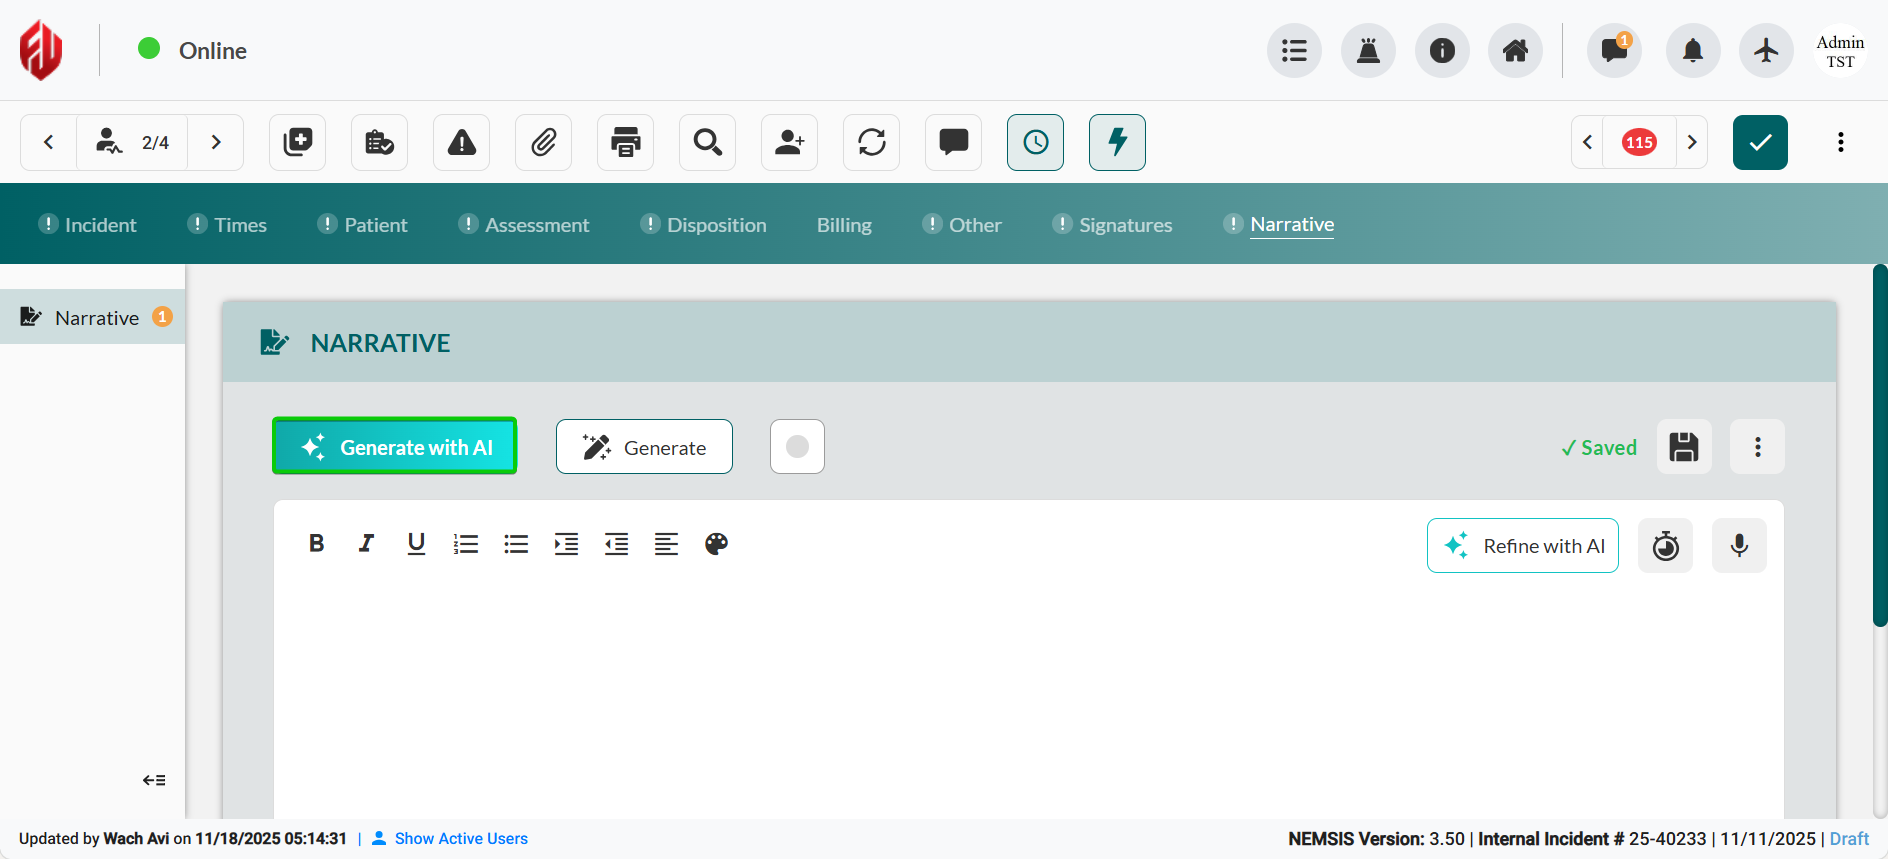
Click Generate with AI to open the AI generation dialog.
Configure Style Enhancement. Select your preferred narrative style from the Style Enhancement dropdown (Professional, Standard, or Basic).
Select Format Conversion. Choose your narrative structure from the Format Conversion options:
Narrative: Traditional free-text format (default)
SOAP: Subjective, Objective, Assessment, Plan format
CHART: Chief complaint, History, Assessment, Rx (treatment), Transport format
Define narrative focus areas. Select the quality parameters for AI generation by checking or unchecking Focus Areas:
Completeness: Ensures all entered ePCR data is included
Clarity: Optimizes readability and comprehension
NEMSIS Compliance: Aligns narrative with NEMSIS 3.5 standards
Medical Terminology: Uses appropriate clinical language
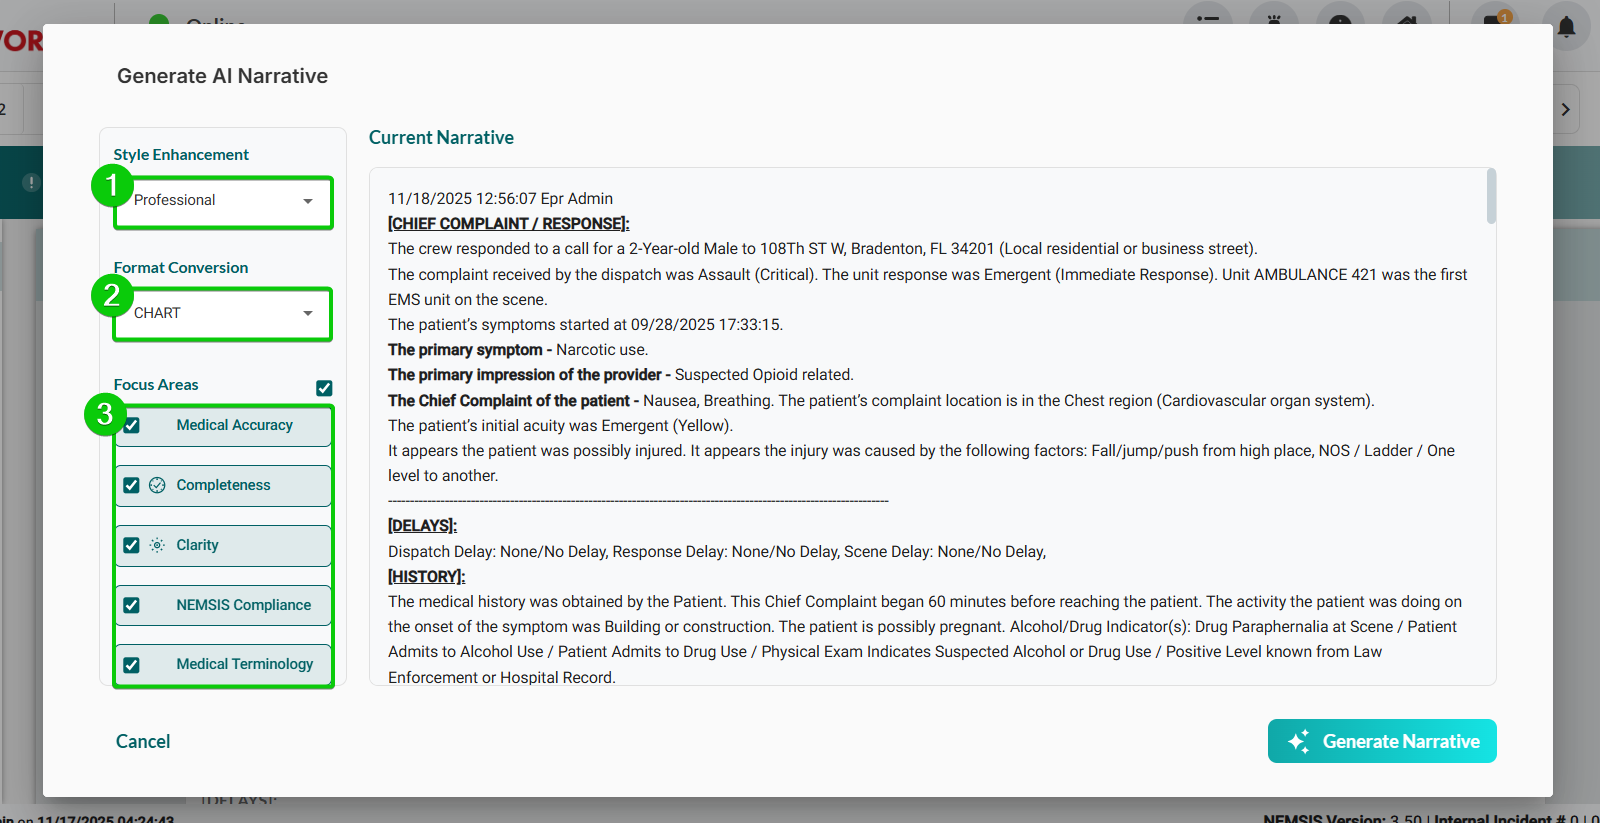
Click Generate Narrative to create the AI-enhanced narrative.
Review and acknowledge narrative accuracy. Review the proposed narrative, and then select the checkbox confirming AI generation accuracy.
Click Apply Enhancement.
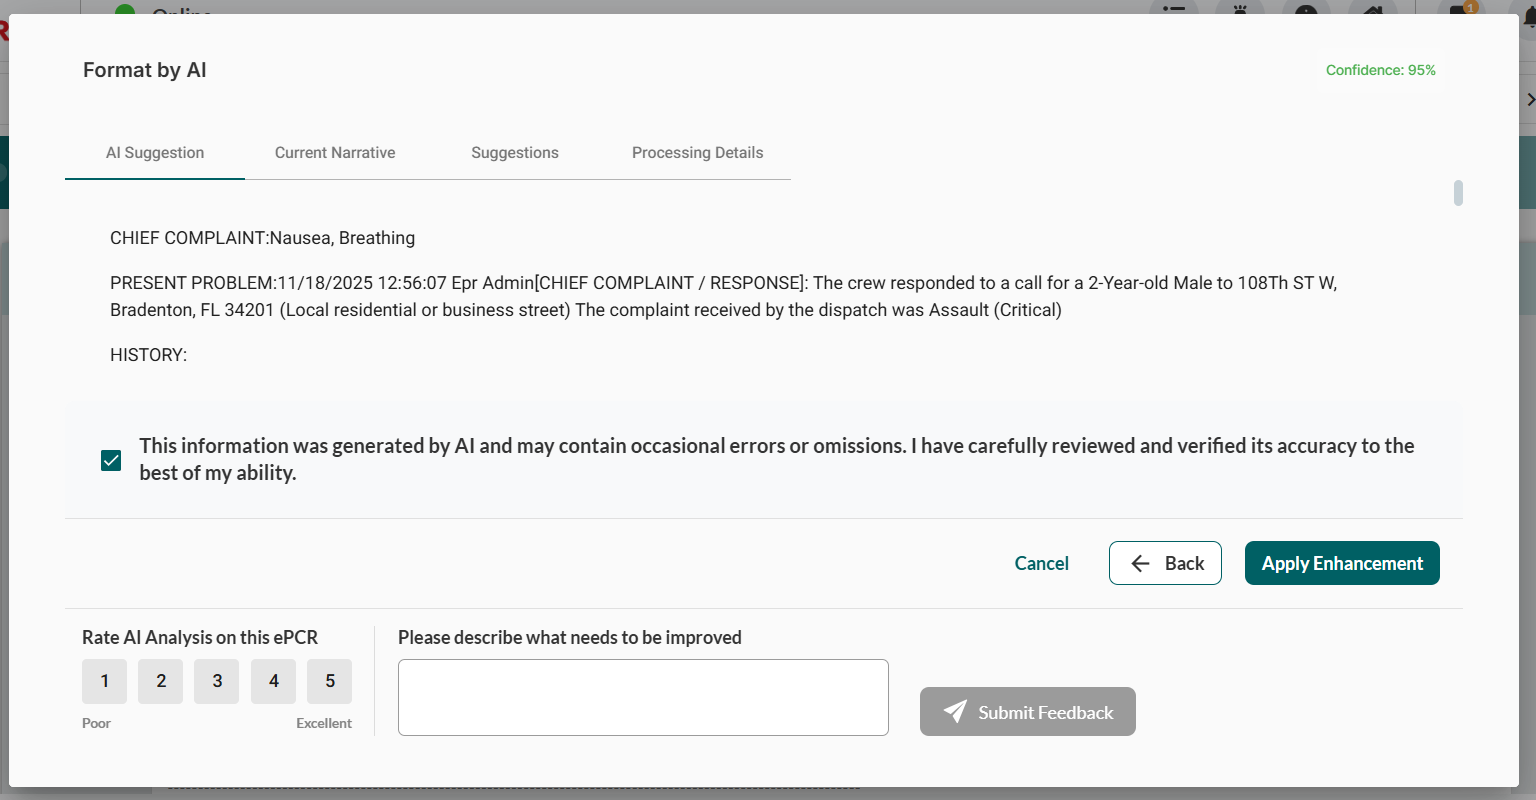
Result: The AI-generated narrative replaces all existing content in the Narrative editor with automatic save confirmation.
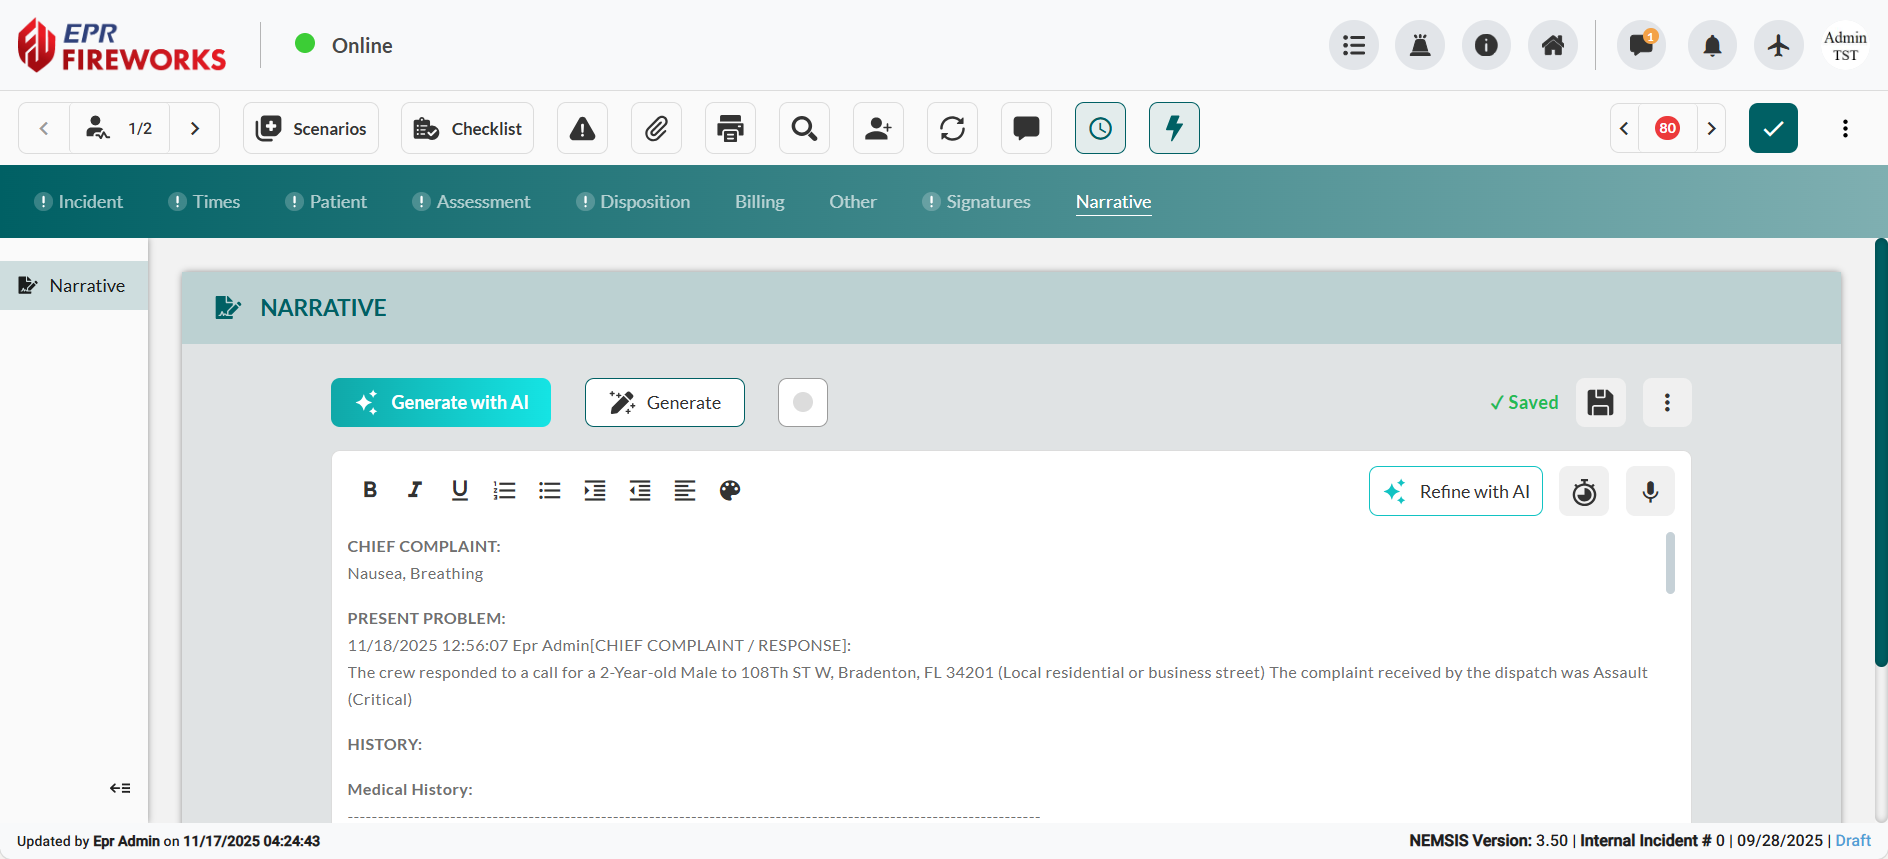
Create a Manual Narrative
Position your cursor where you want to begin entering text.
Type your narrative.
Use the Timestamp icon to add the current date, time, and your name to the narrative.
Format your narrative using the toolbar options.

Result: Your manually entered narrative is saved automatically as you type.
Using Voice Dictation for Narrative Entry
EPR FireWorks supports speech-to-text conversion for rapid narrative documentation.
Position your cursor where you want dictated text to appear.
Click the microphone icon in the toolbar to activate voice dictation.

Speak your narrative clearly into your device's microphone.
Review the transcribed text for accuracy and make any necessary corrections.
Result: Spoken content is transcribed into a text narrative.
Managing Narrative Content
Refine Existing Narrative with AI
Enhance selected narrative text using the AI generation dialog with the same customization options.
Select the text you want to refine in the narrative editor.
Click Refine with AI to open the AI generation dialog.
Configure enhancement settings using Style Enhancement, Format Conversion, and Focus Areas options.
Review the refined content in the preview panel.
Acknowledge the AI disclaimer by checking the accuracy verification checkbox.
Click Apply Enhancement to replace the selected text with AI-refined content.
Result: The selected text is enhanced with AI-generated improvements based on your configuration settings and saved automatically.
Access Additional Narrative Options
Click the three-dot menu icon in the upper right corner of the Narrative section.
Select from available options:
Copy From Incident Narrative: Import narrative from another incident
Narrative History: View previous versions of the narrative
Clear: Remove all narrative content
Submit the Completed ePCR
Submit the completed ePCR for review and finalization.
Review all completed tabs to ensure required fields are present. Verify that all mandatory sections contain complete and accurate information.
Click the Completed icon at the top right corner of the main ePCR toolbar.
Resolve validation errors. If the validation pop-up appears, review the listed issues, navigate to the relevant tabs, and complete or correct the indicated fields.
Important: You cannot submit the ePCR until all validation issues are resolved.
Result: The ePCR is locked for editing, ready for review.