
ePCR - Release Notes
December 2024 Build 2.853
Adding QC Remarks to the Printed Report
We added the option to include QC Remarks in printed ePCR reports.

Note: This feature is available only for users with QC permissions.
QC Review Filters
You can now filter the patient list according to Primary Care Provider (ePCR Filters > General > Primary Care Provider).
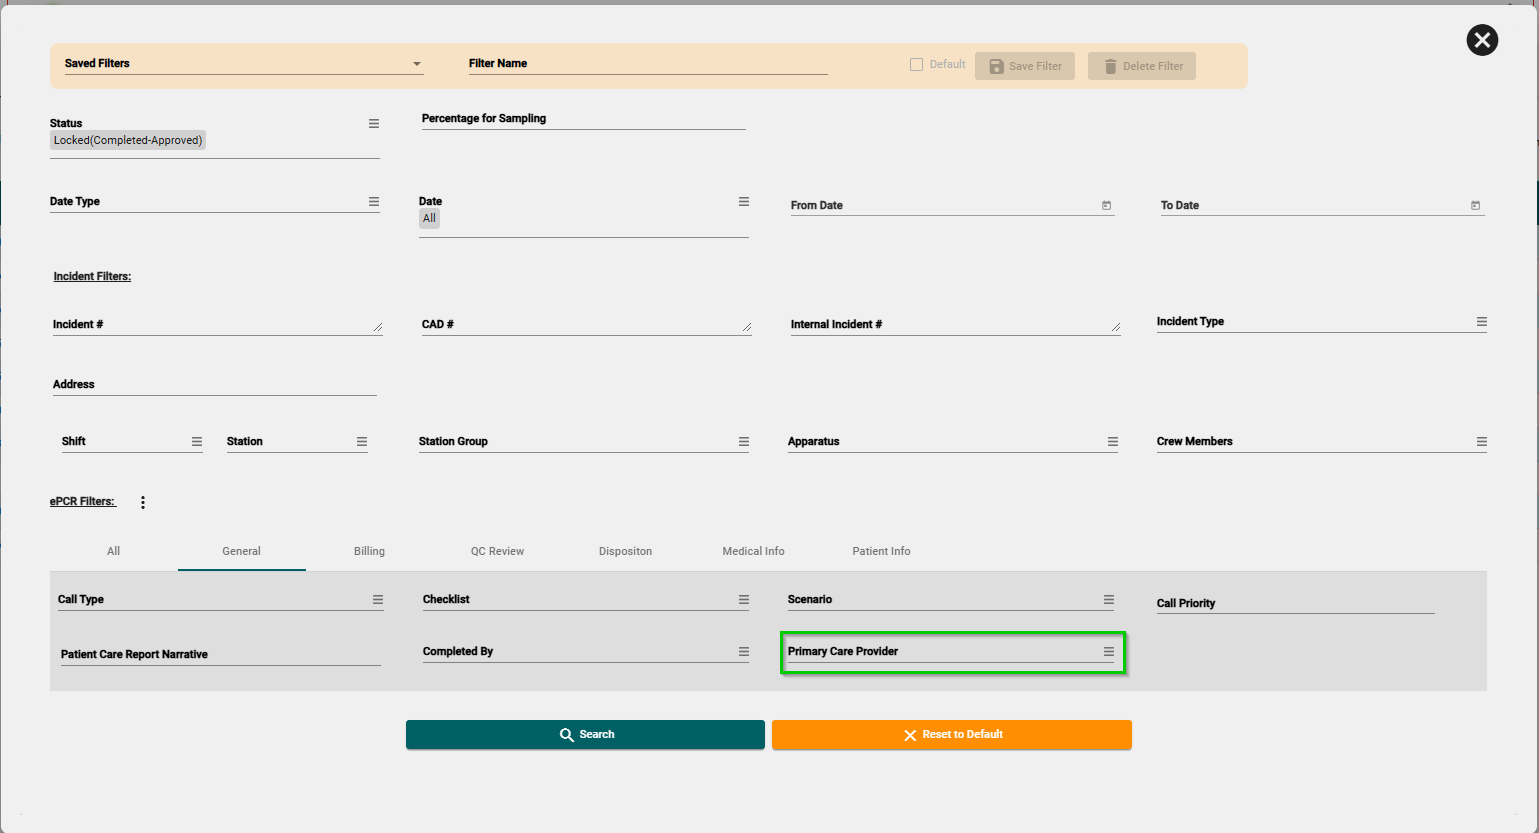
The Primary Care Provider is determined according to the Primary Care Provider signature within the ePCR.

Note: This feature is available only for users with QC Review.
Adding ‘Other File’ Attachments to the Patient List
You now have the option to add attachments categorized as Other File to the Patient List. Other File attachments will be included with the ePCR in XML format during transmission.
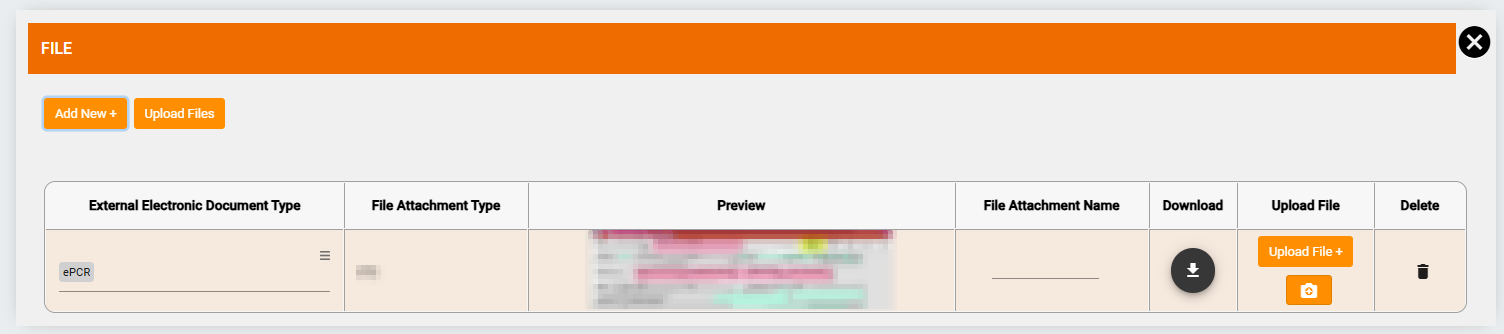
To add an Other File, click the hamburger menu next to the incident row and select Other File.

After adding Other File attachments, the ![]() icon will appear to the right of the incident row. Click the icon to view or add additional files.
icon will appear to the right of the incident row. Click the icon to view or add additional files.

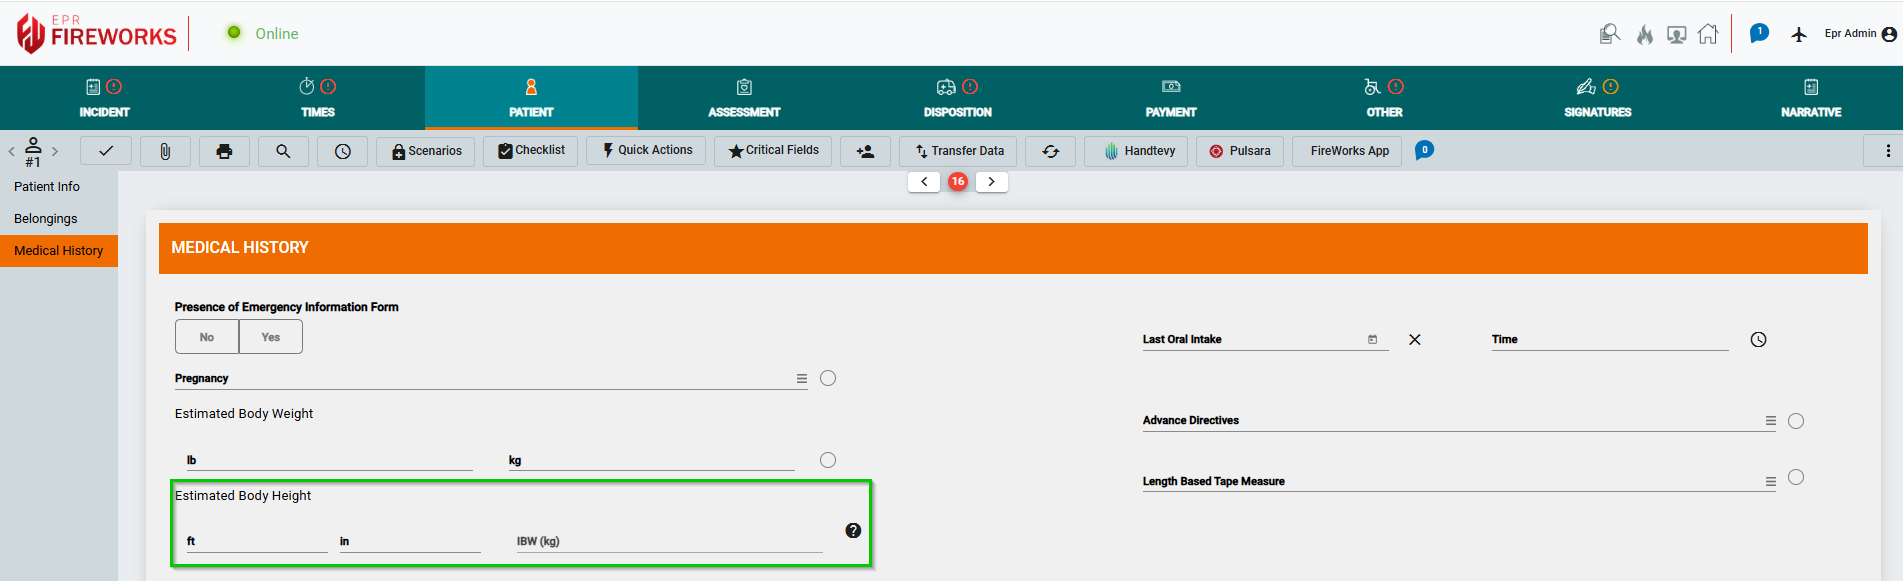
Patient > Medical History
In the Patient section, you can now record the Estimated Body Height in both feet (ft) and inches (in).
December 2024 Build 2.852
Adding QC Remarks to the Printed Report
We added the option to include QC Remarks in printed ePCR reports.
Note: This feature is available only for users with QC permissions.
QC Review Filters
You can now filter the patient list according to Primary Care Provider (ePCR Filters > General > Primary Care Provider).
The Primary Care Provider is determined according to the Primary Care Provider signature within the ePCR.
Note: This feature is available only for users with QC Review.
Adding ‘Other File’ Attachments to the Patient List
You now have the option to add attachments categorized as Other File to the Patient List. Other File attachments will be included with the ePCR in XML format during transmission.
To add an Other File, click the hamburger menu next to the incident row and select Other File.
After adding Other File attachments, the ![]() icon will appear to the right of the incident row. Click the icon to view or add additional files.
icon will appear to the right of the incident row. Click the icon to view or add additional files.
Patient > Medical History
In the Patient section, you can now record the Estimated Body Height in both feet (ft) and inches (in).
ePCR Summary
LIVE
We added the following actions to ePCR Summary. These actions can be found at the top of the summary page.

Action | Description |
|---|---|
| Opens the messenger chat related to the ePCR |
Opens the ePCR in a separate window | |
| Opens the ECG attachments associated with the ePCR |
| Reopens the ePCR |
ePCR Patient List
LIVE
We’ve added the messenger chat bubble to the Patient List, just as it appears in QC Review.

Back-Office
ePCR Elements
As announced previously, the ePCR Elements page is now live. ePCR Elements is a consolidated configuration page that provides an overview of all elements while allowing control over which sections appear on the website.
For the initial announcement, click here.

Auto Reporting
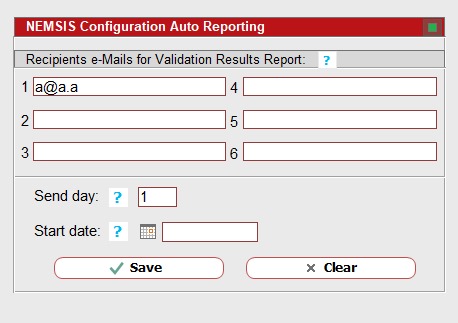
In compliance with Florida state requirements, we added NEMSIS Configuration Auto Reporting:
Go to Management > Department Settings > Department Configuration > ePCR.
Enter the email addresses of recipients for the Validation Results Report.
In the Send day field, specify the day of the month on which the reports will be sent.
In the Start date, specify the initial date on which auto reporting will begin.
Click Save.
Back-Office
ePCR Elements
As announced previously, the ePCR Elements page is now live. ePCR Elements is a consolidated configuration page that provides an overview of all elements while allowing control over which sections appear on the website.
For the initial announcement, click here.
Auto Reporting
In compliance with Florida state requirements, we added NEMSIS Configuration Auto Reporting:
Go to Management > Department Settings > Department Configuration > ePCR.
Enter the email addresses of recipients for the Validation Results Report.
In the Send day field, specify the day of the month on which the reports will be sent.
In the Start date, specify the initial date on which auto reporting will begin.
Click Save.
October 2024 Build 2.851
Patient List
Crew members can now see patients' names for ePCRs in which they were involved, even if they don't have HIPAA permissions.
ePCR PDF
We added a Custom Fields section to the ePCR PDF report.
September 2024 Build 2.85
Master Patients List
To avoid patient duplicates within the ePCR module, we added the Show Suspected Duplicates button to Master Patients List
By clicking Show Suspected Duplicates, the system will display all suspected duplicates currently in the list. Suspected duplicates are color-coded according to similarity. Patients with the highest similarity are shown in a darker shade, while those with lower similarity are displayed in lighter shades of the same color.
To merge duplicates, click Merge. In the Merge Suspected Duplicate window, click Select to the left of the duplicate you want to merge.
The merged patient is displayed for confirmation at the bottom of the window. Click Complete Merge.
September 2024 Build 2.849
Scenarios
You can now mark Linked Presets as Auto Run. Auto Run presets will load them automatically to the scenario.
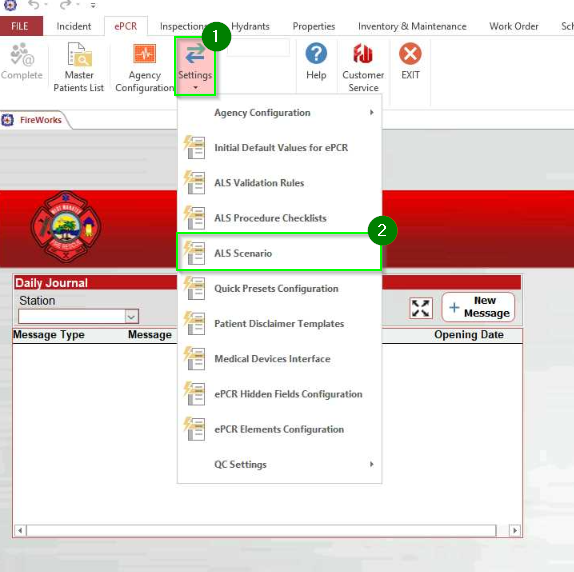
To set Linked Presets as Auto Run, in the Back-Office, go to ePCR > Settings > ALS Scenario.
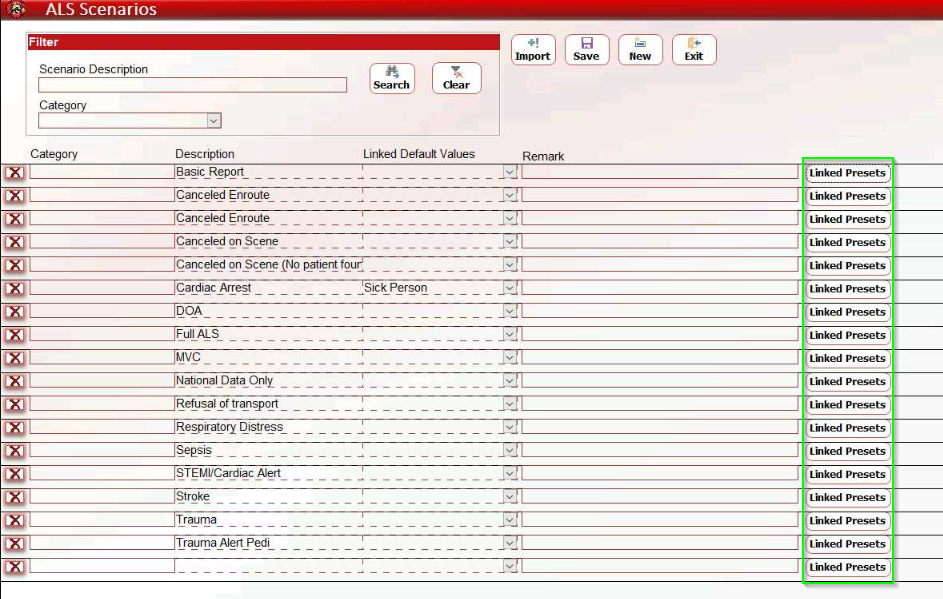
Select the scenario from the list. Click Linked Presets on the row of the scenario you selected.
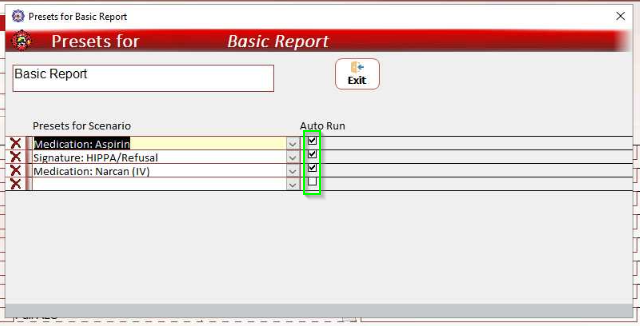
The Presets dialog box will open. In the Auto Run column, mark the presets you want to load automatically.
Load Auto Run presets. In FireWorks ePCR, click Scenario. If you have linked presets marked as Auto Run, you will receive the following message:
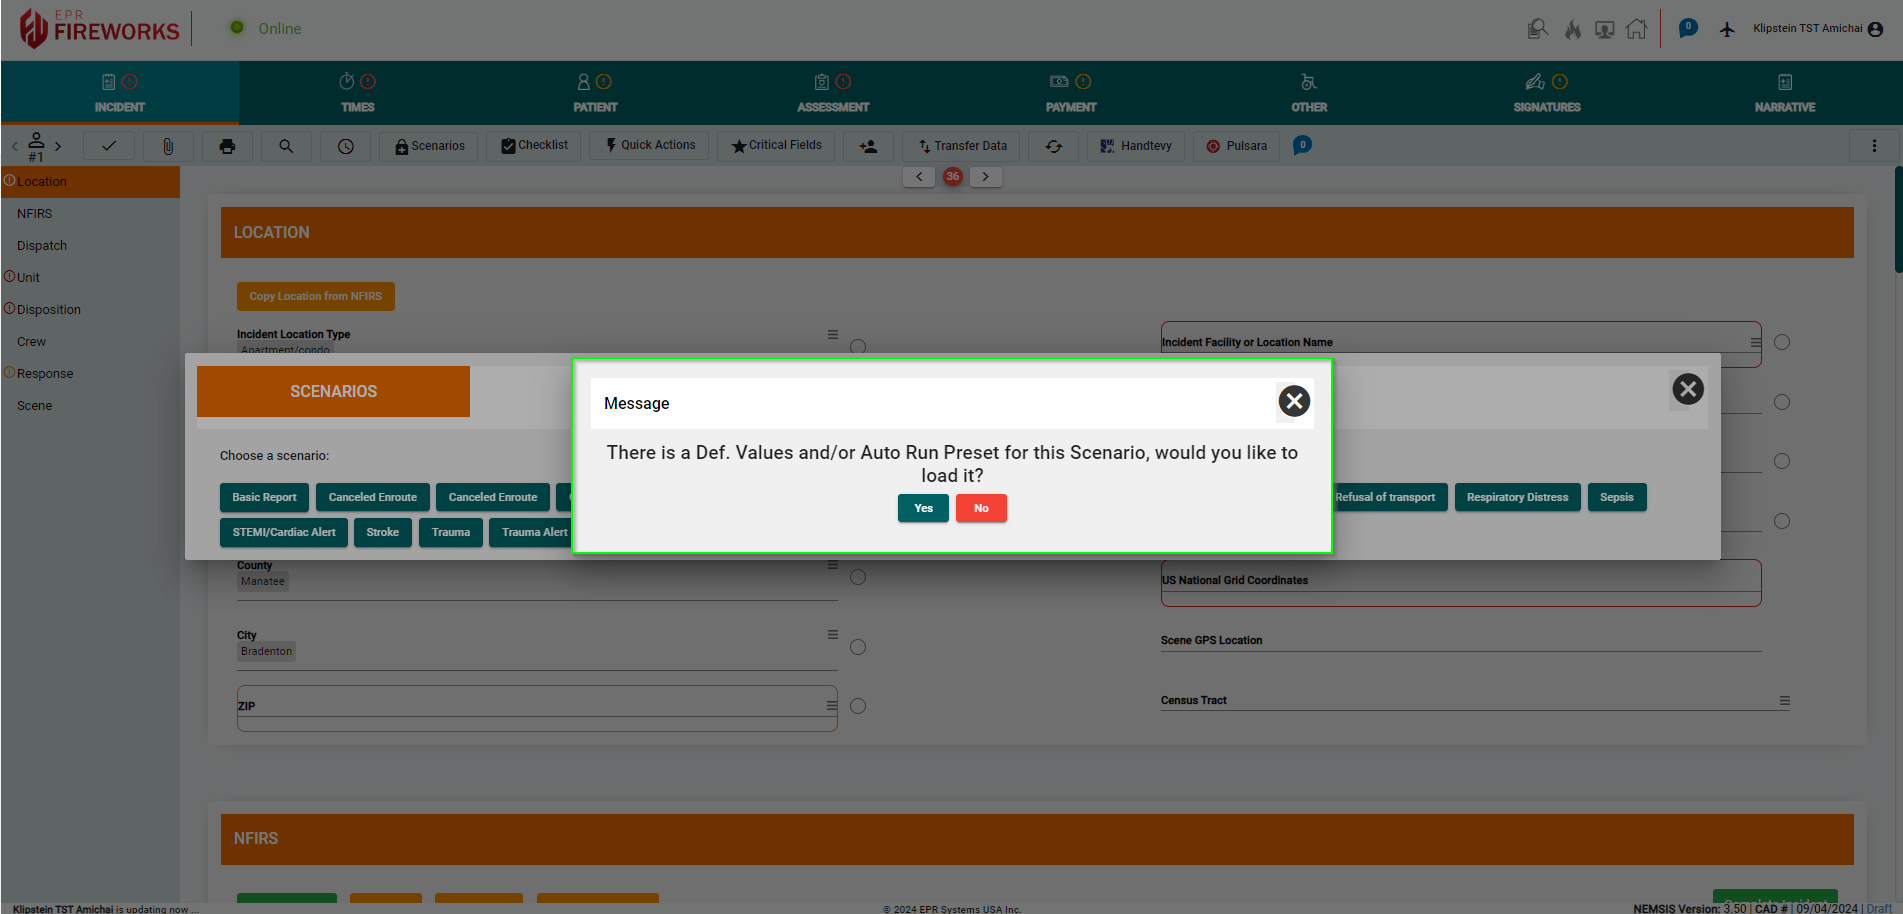
Click Yes to load the presets into the appropriate sections.
September 2024 Build 2.848
Quick Actions
Patient time
For agencies that complete ePCR during incidents, we added an option to set Patient Time to the current time.
If the Patient Time field is empty, you will receive the following message:
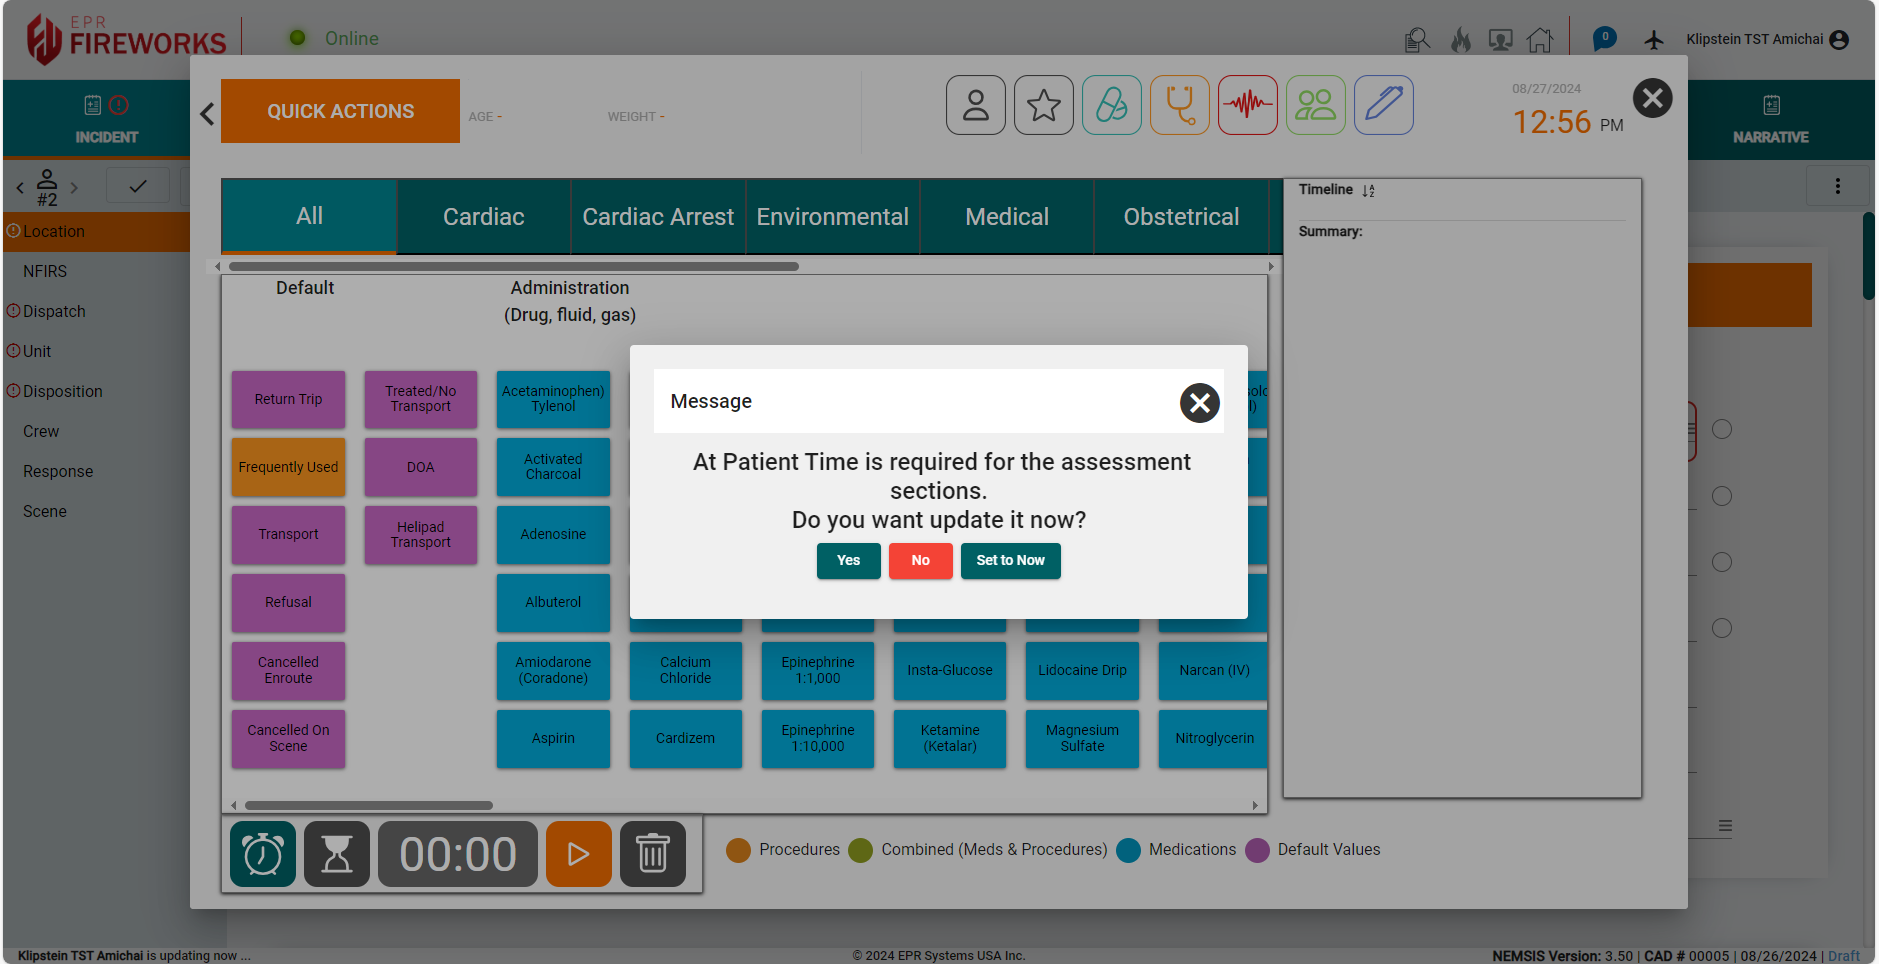
To set Patient Time to the current time, click Set to Now.
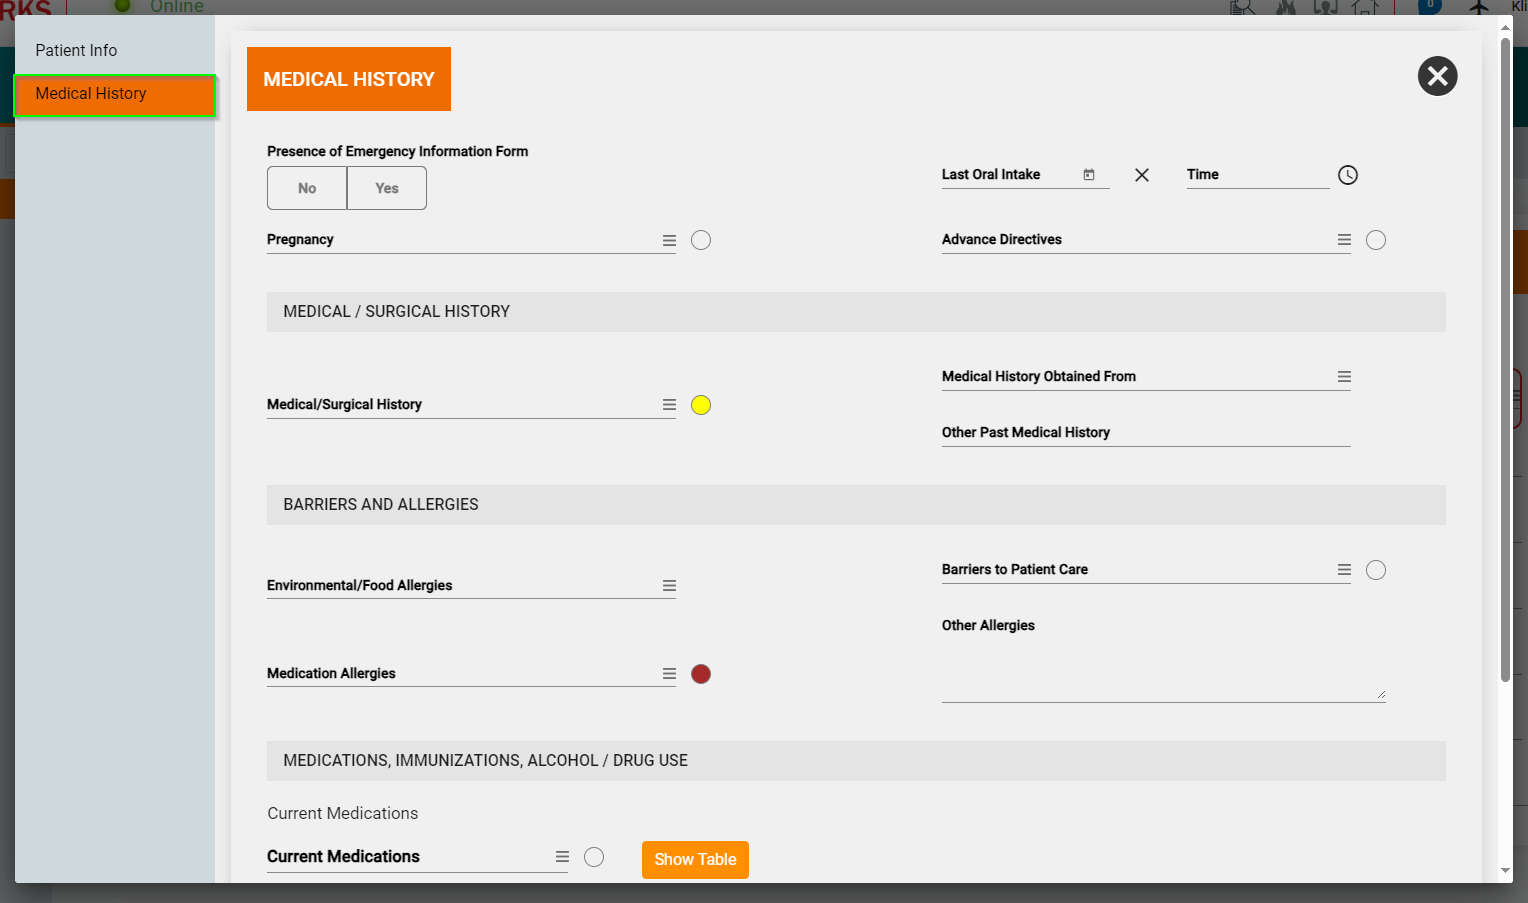
Medical info
To make your response more efficient, in Quick Actions > Patient info, we added Medical History to be completed during the incident.
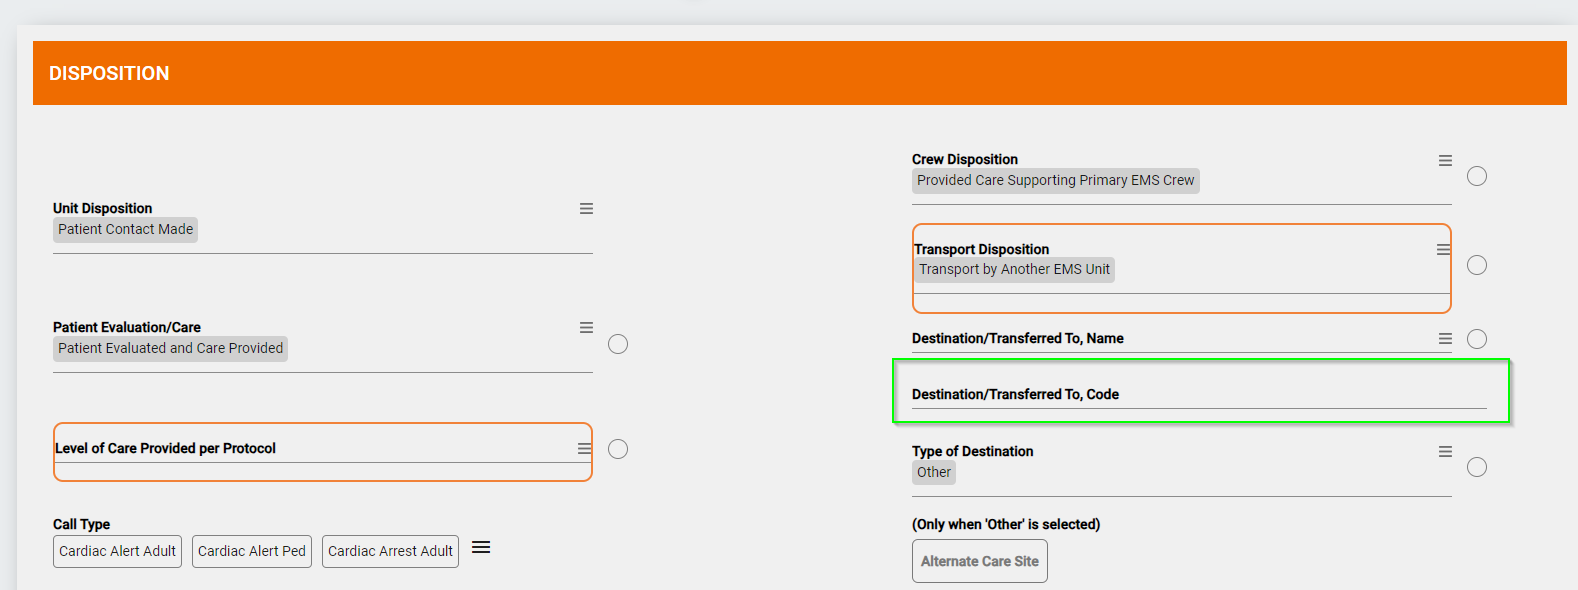
Disposition
You can now enter Destination/Transferred To, Code without a need to add the Destination/Transferred To, Name as well.
Note: This update is in compliance with Florida state regulations.
August 2024 Build 2.847
Times screen
We condensed the Times info section to fit the screen. Our updated Times info section now shows both the date and the time to limit confusion.
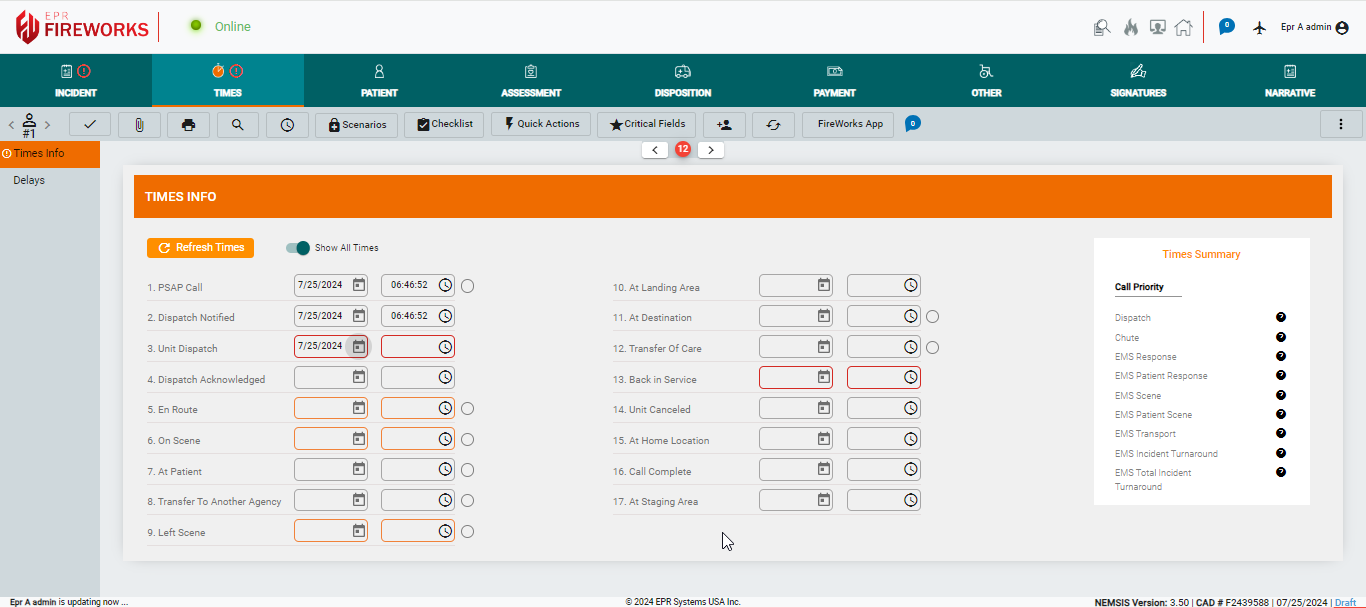
In addition, we created a short view of the page that includes only the common fields you’ll need at the scene. The short view does not include the following fields: Transfer to Another Agency, At Landing Area, Unit Cancelled, and At Home Location.
To view the short display, disable Show All Times.
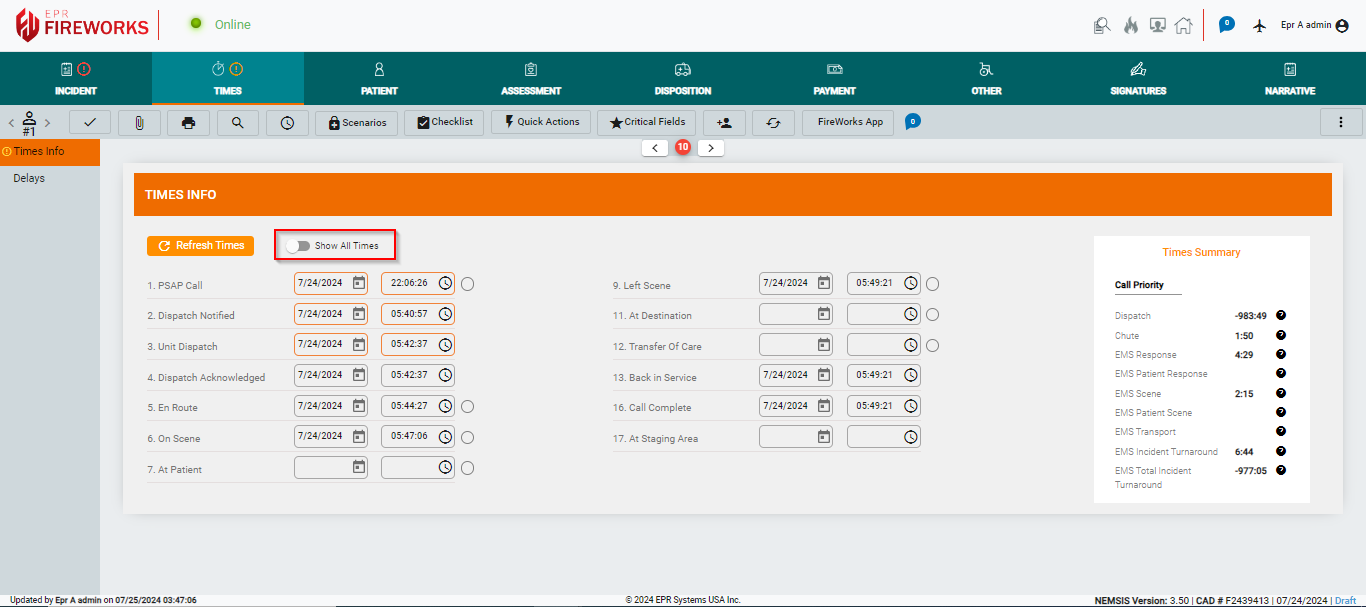
Note: We removed the Now and Clear features from the main view. These features now appear in Time Picker and Date Picker.
Back-Office
ePCR Elements (Coming Soon)
We consolidated all ePCR Elements to a single configuration page divided into sections and tabs, giving you an overview of all of your elements. You can choose to hide certain elements, set some as Required, create custom lists for specific elements, and set default values for others.
Note: You can still configure elements using the separate configuration pages.
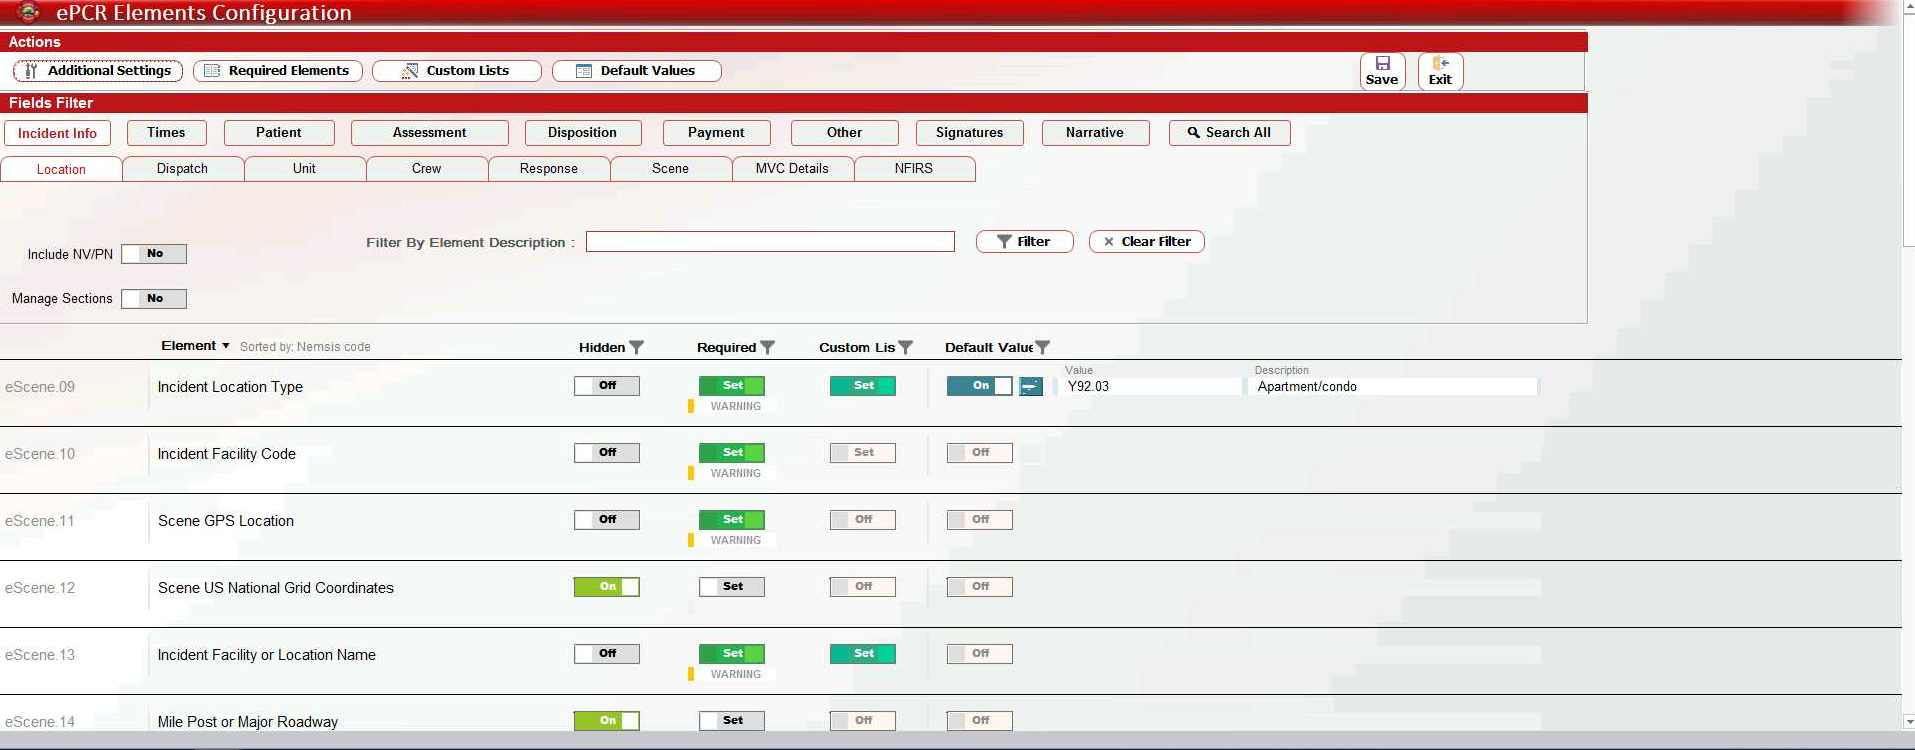
In addition, we added the Manage Sections feature, so that you can now decide which sections you want to display on the website.
