Inventory Check
Overview
Completing inventory checks verifies apparatus and warehouse stock levels to maintain minimum requirements and track item conditions. This procedure documents current quantities, identifies shortages, and generates supply reports for procurement and operational planning on daily, weekly, monthly, quarterly, bi-annual, and annual schedules.
Before You Start
Prerequisites
Inventory check pages allow you to conduct apparatus and warehouse checks.
Ensure appropriate permissions
Use a tablet with a stable internet connection
Clear browser cache if experiencing slowness
Accessing Inventory Items
From the Inventory list, locate your desired apparatus or warehouse.
Expand the row and select the check frequency (daily, weekly, monthly, quarterly, bi-annual, annual).
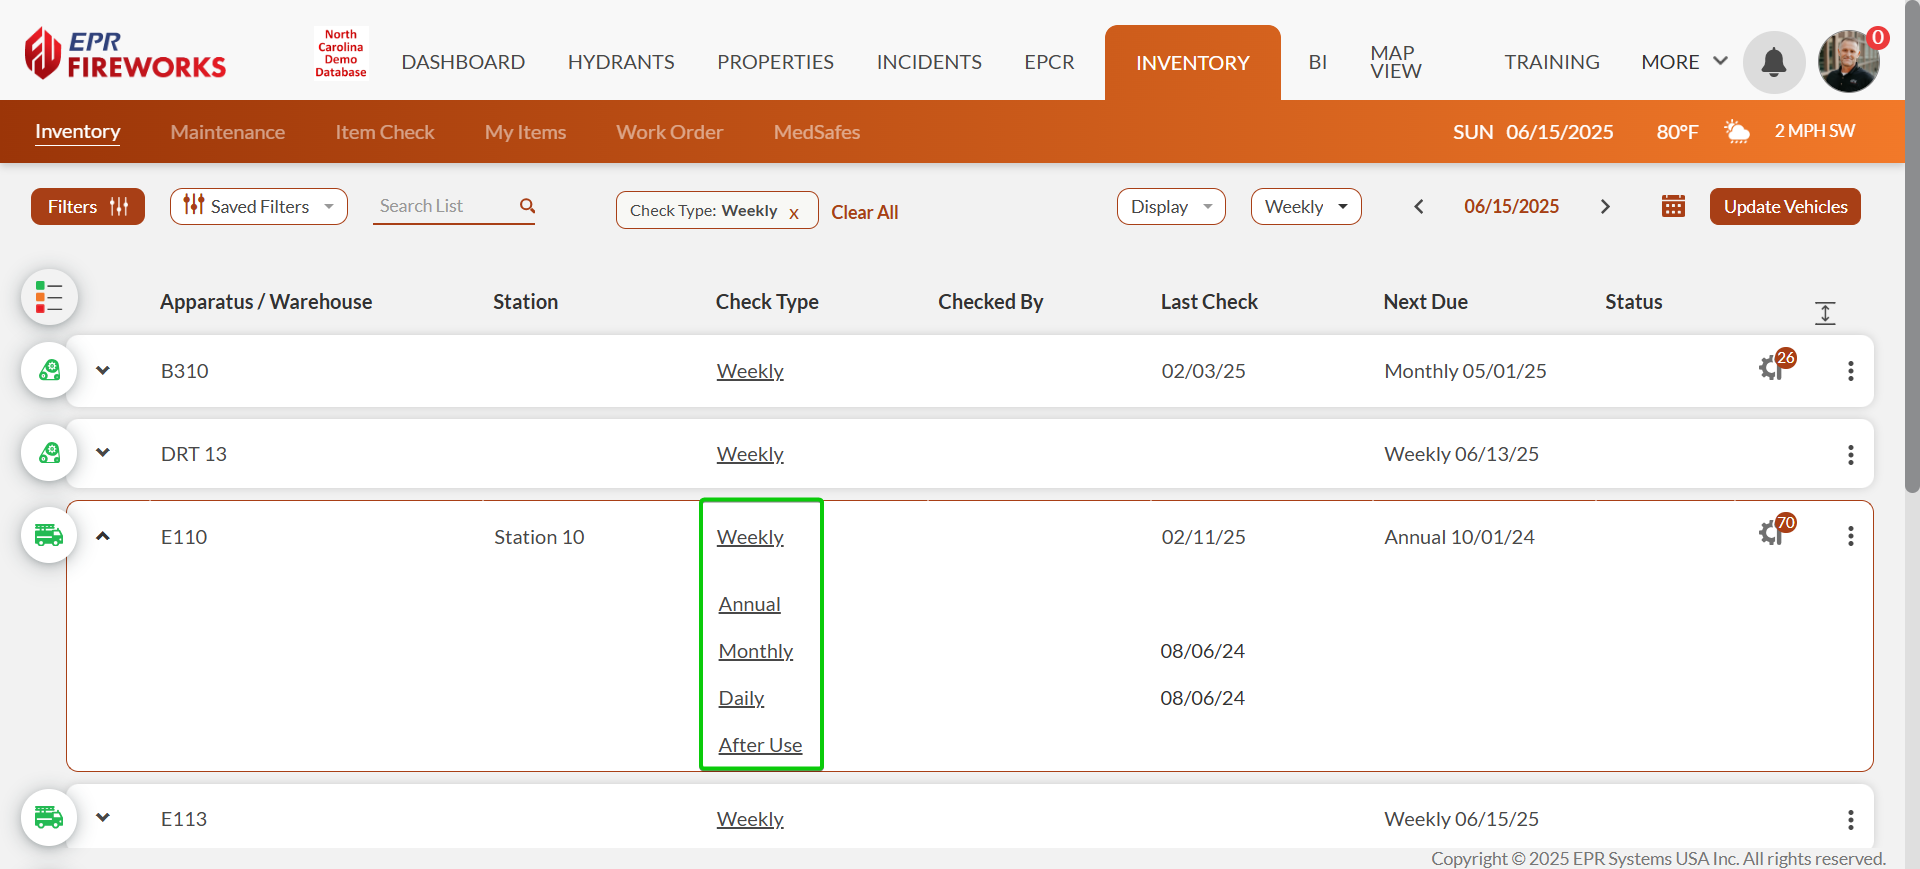
Note: Alternatively, you can select the check type from the Check Summary section within the check page.
Review the previous checks and apparatus/warehouse details. See Check Interface Guide for full information on these sections.
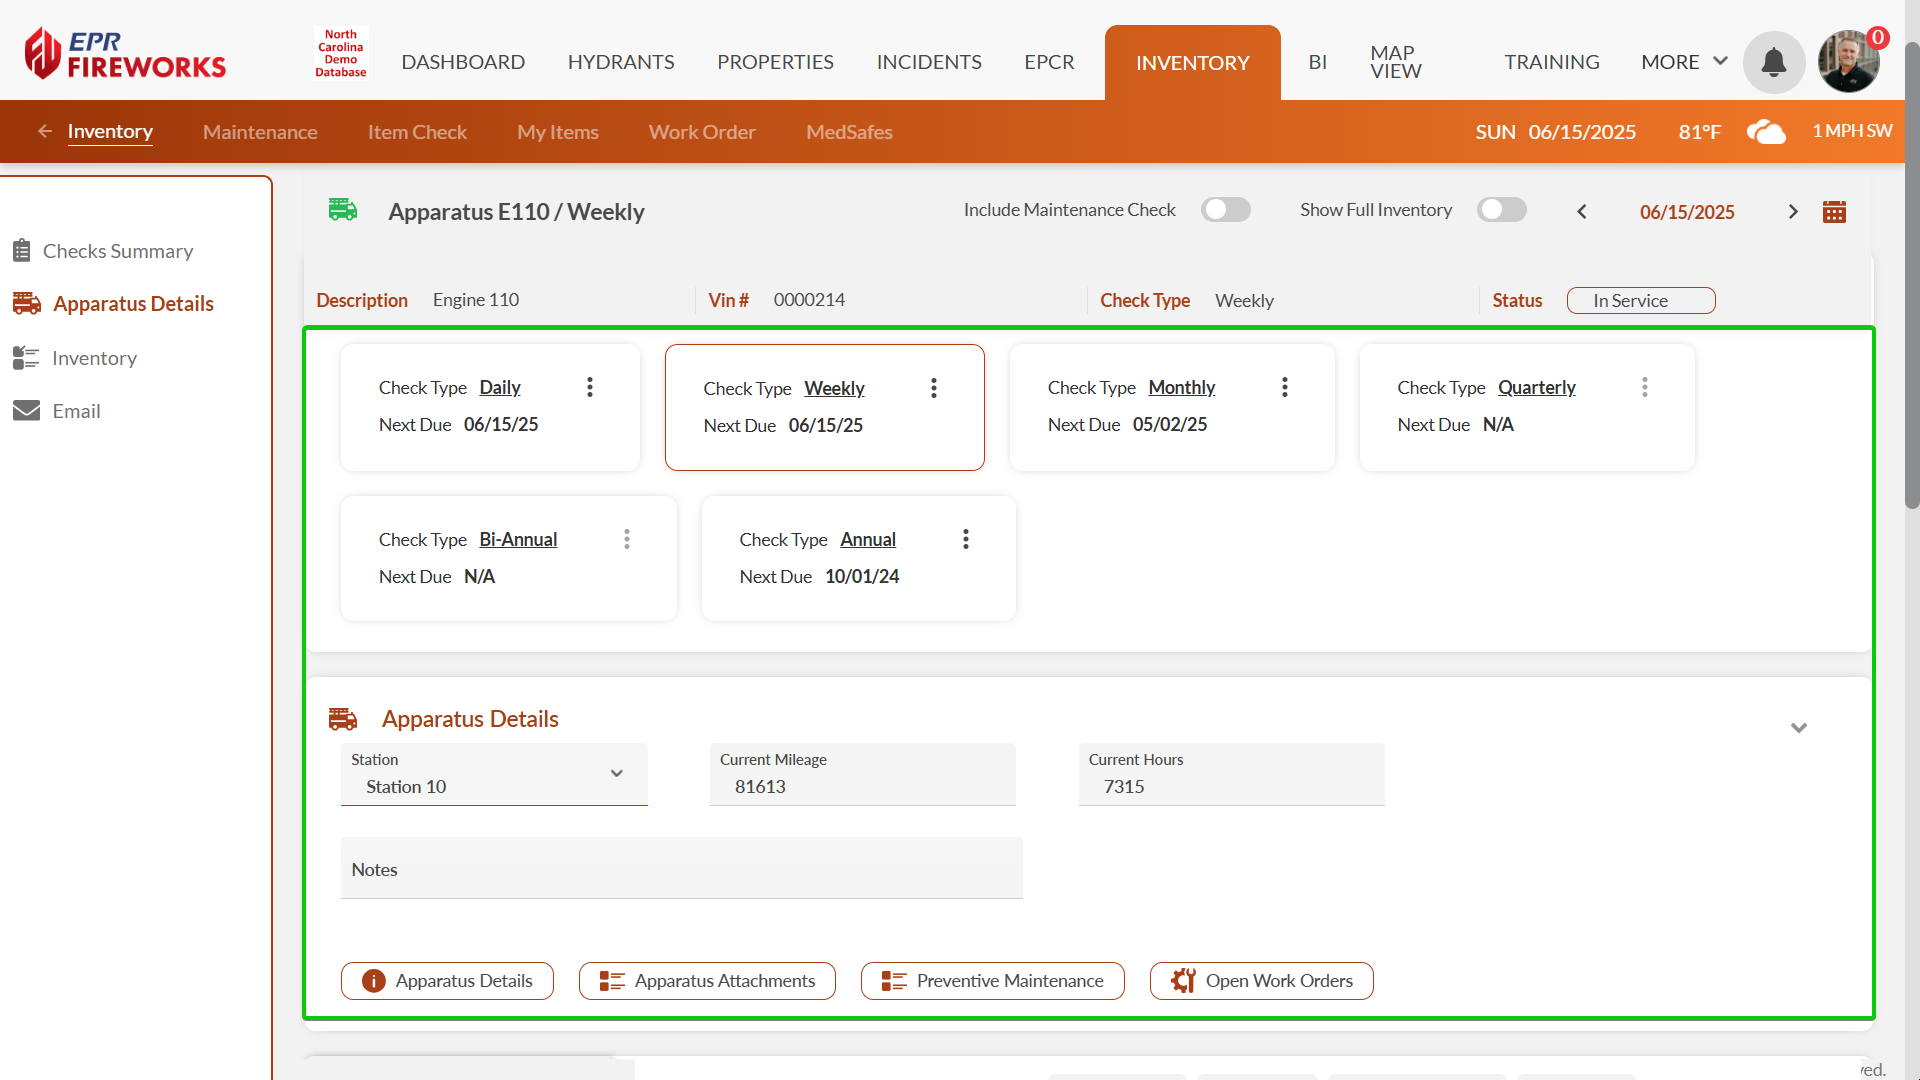
Conducting the Check
Verifying Stock Levels
Scroll down to the Inventory location display.
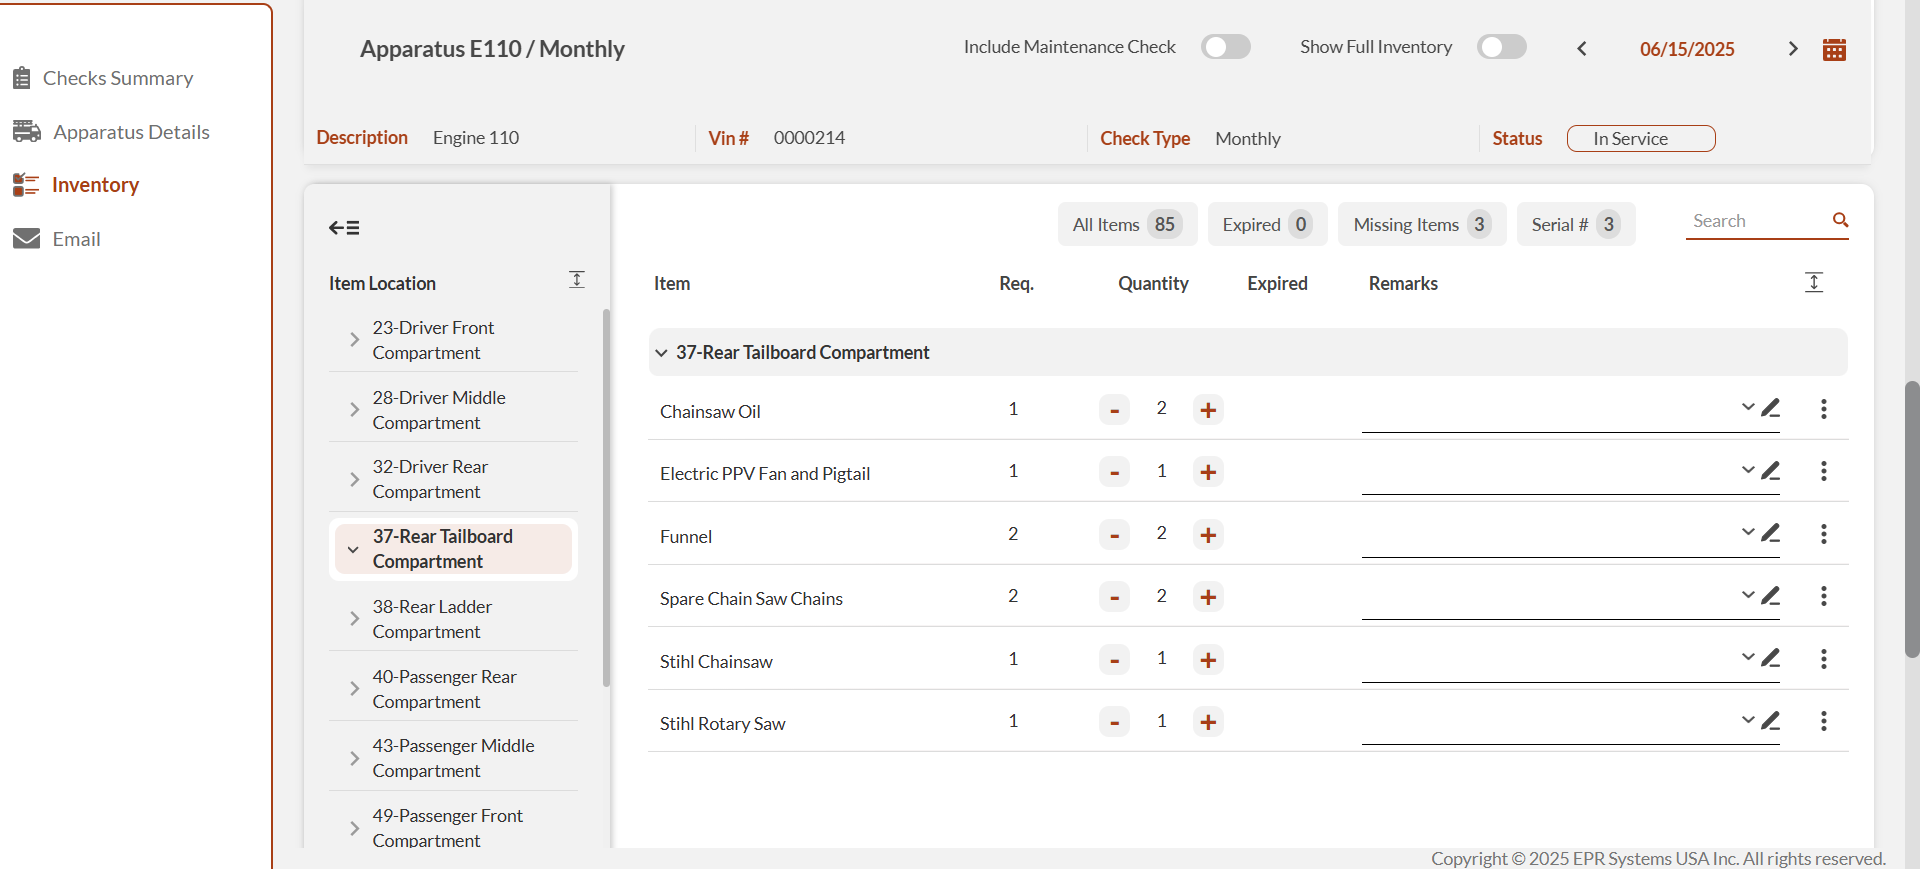
Using the Item Location sidebar, select the item’s location and sublocation (if applicable).
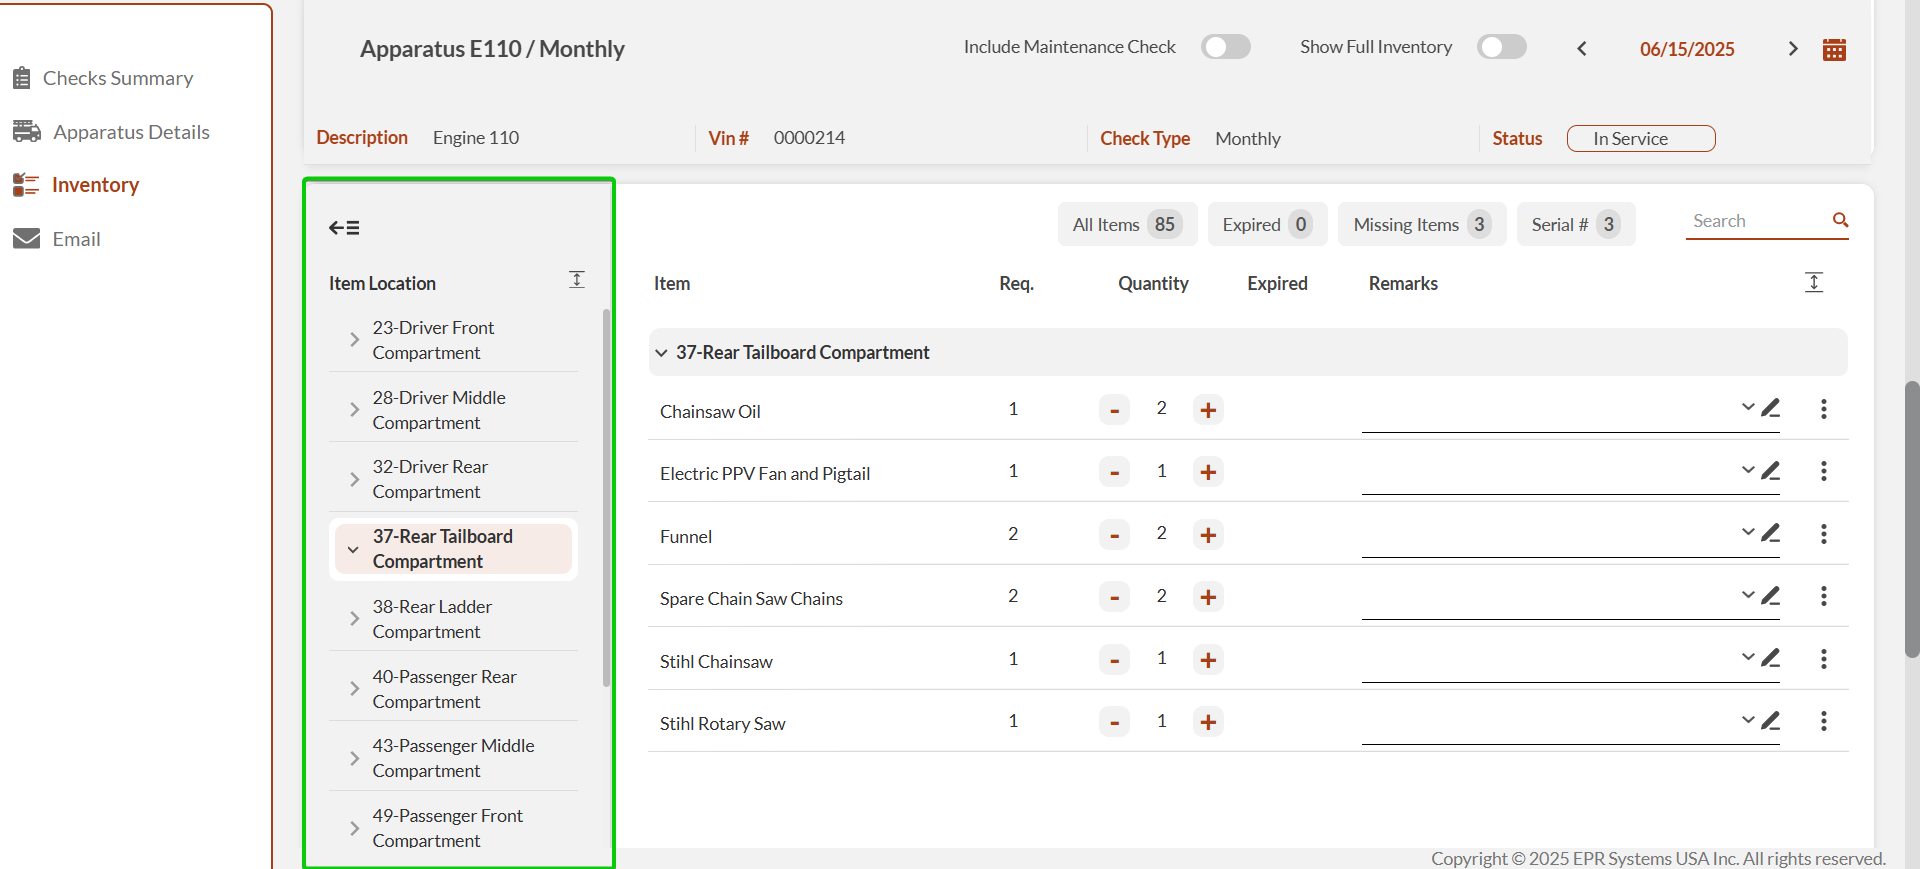
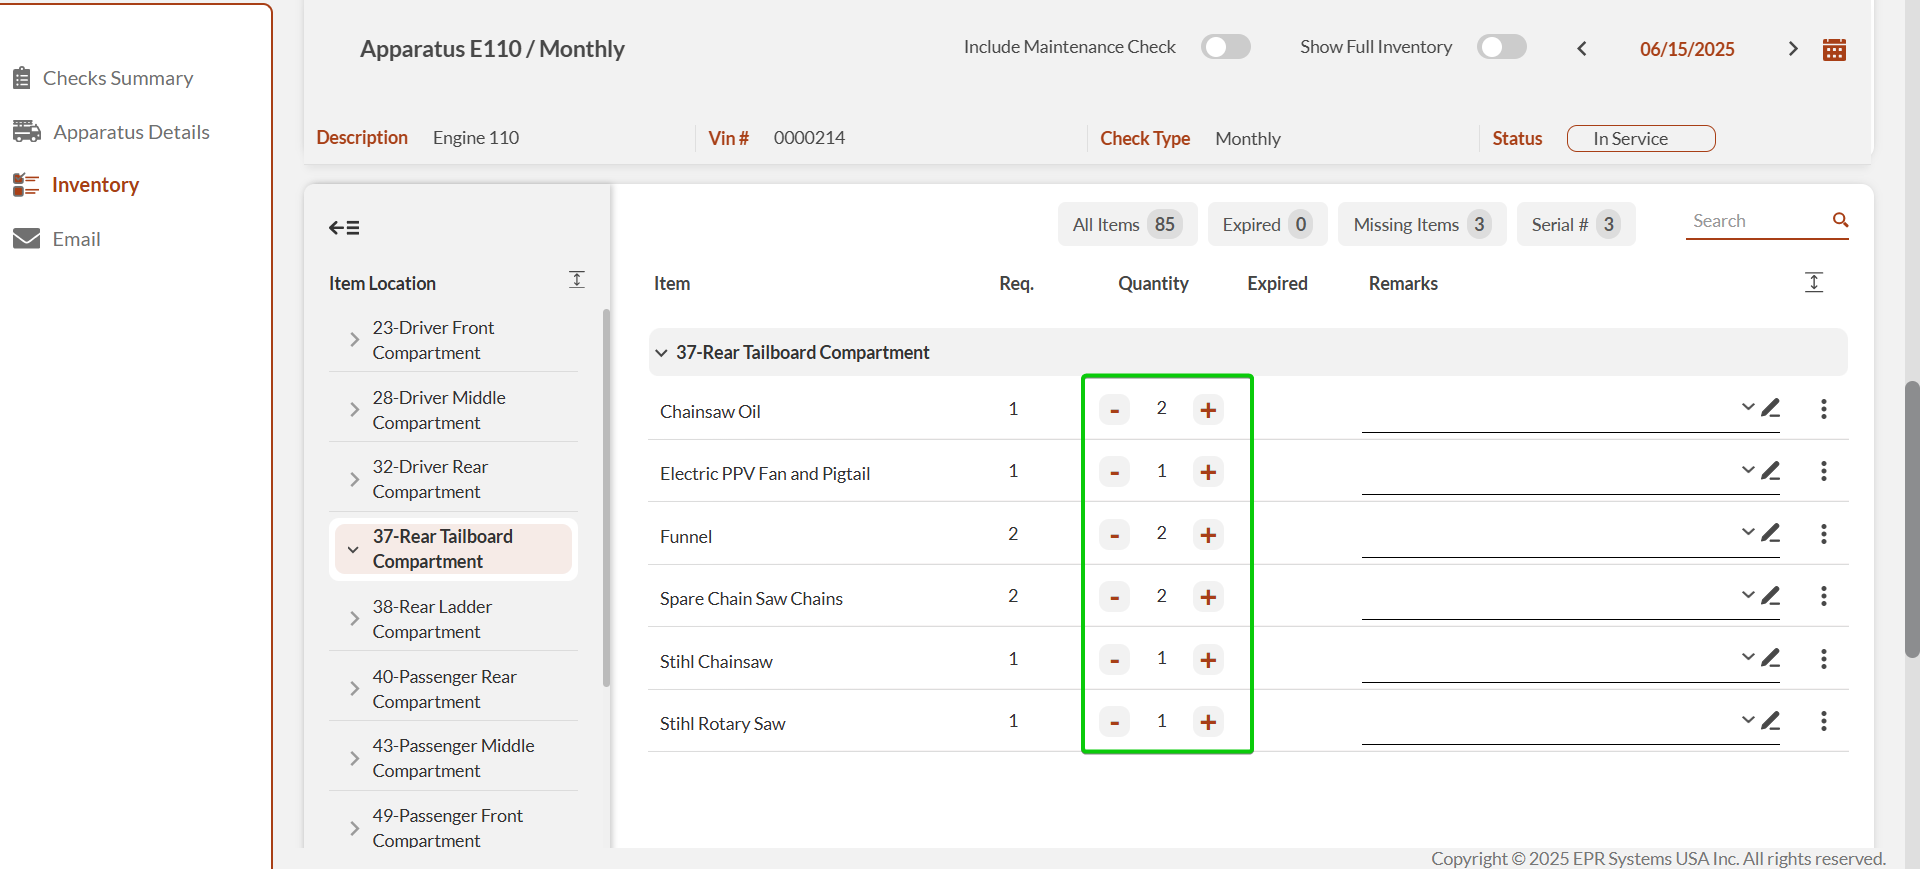
Count physical items and compare to displayed quantities.
Update quantities using the +/- signs to the left and right of the number.
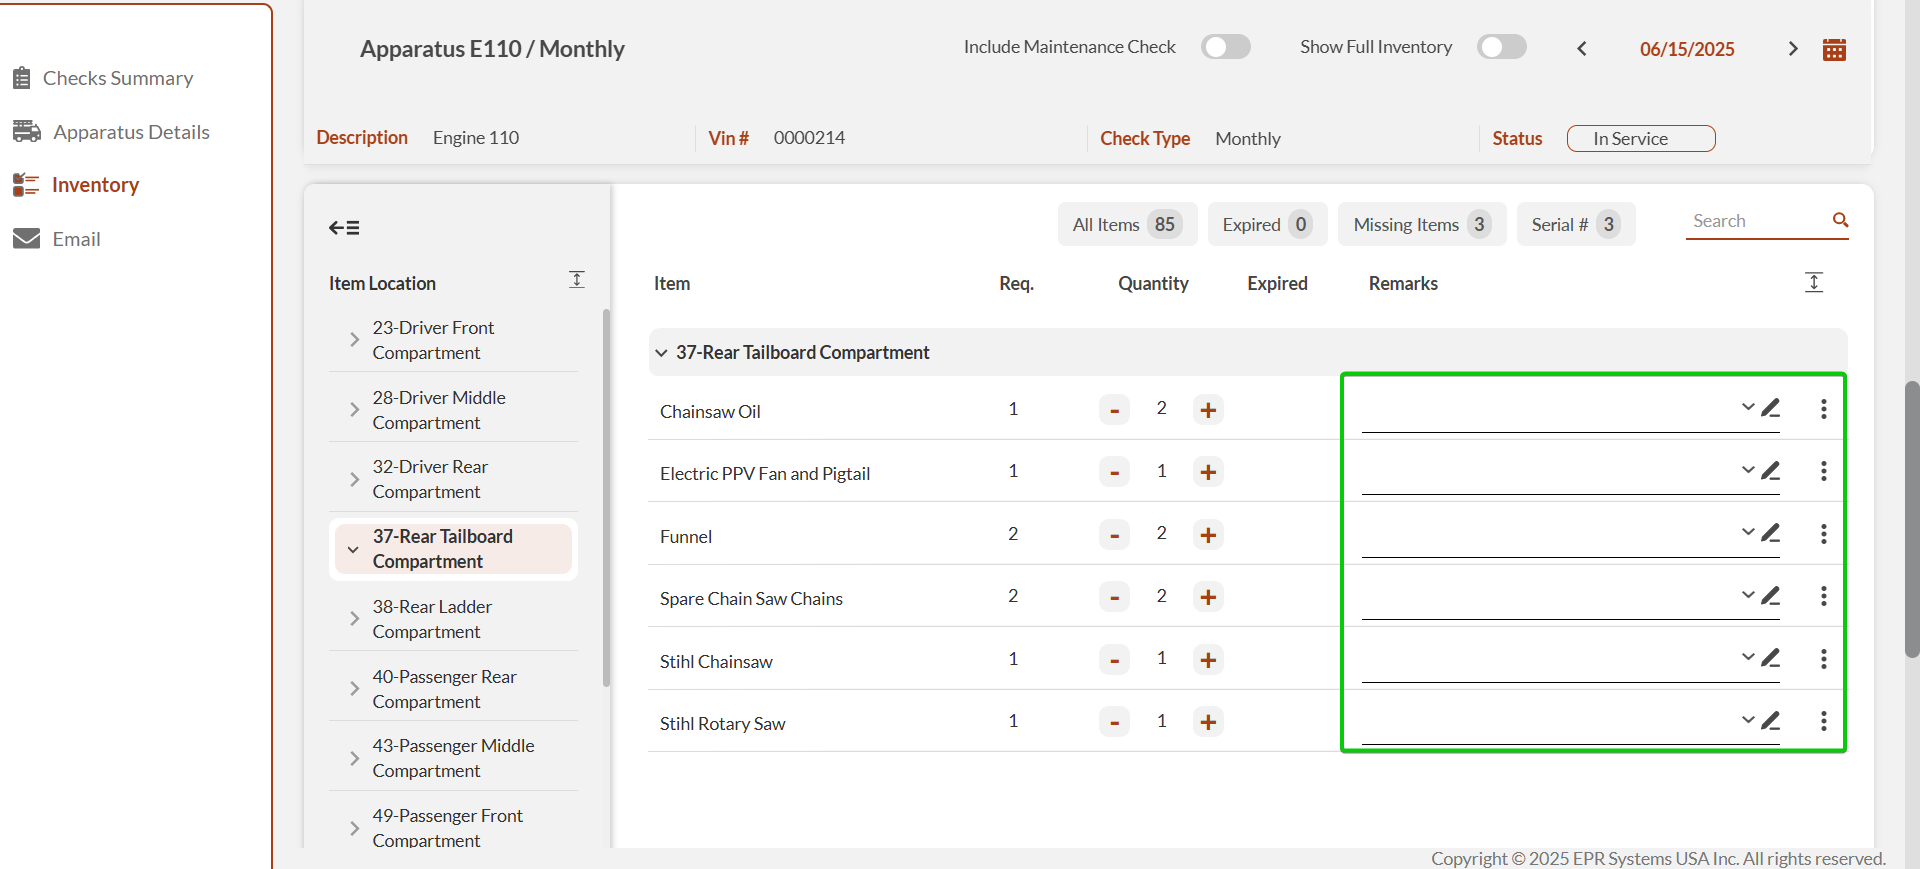
Add remarks using the text field or pencil item for preset options.
Important: Pay attention to status indicators:
Adequate Stock (black text): Quantities meet minimum requirements
Low Stock Alert (red text): Quantities below minimum requirements
Missing Item Alert (exclamation icon): Items absent from previous checks
Combining with Maintenance Checks
Save time by enabling Include Maintenance Check at the top of the page to complete maintenance and inventory checks in a single workflow
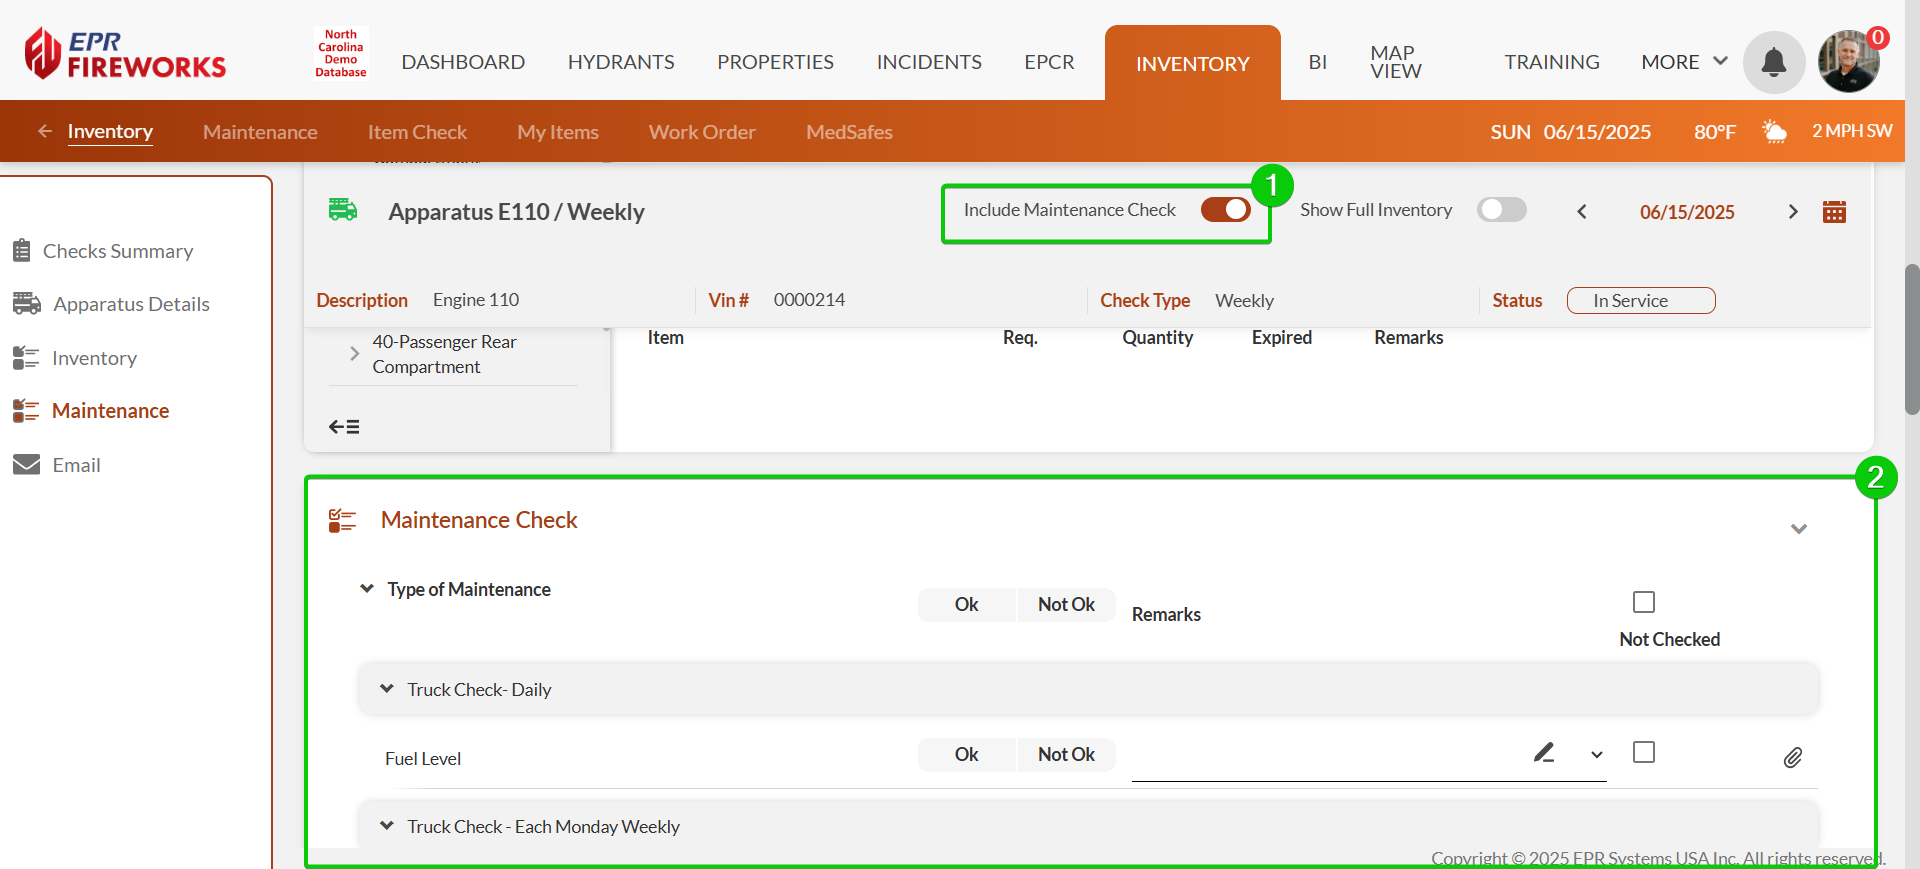
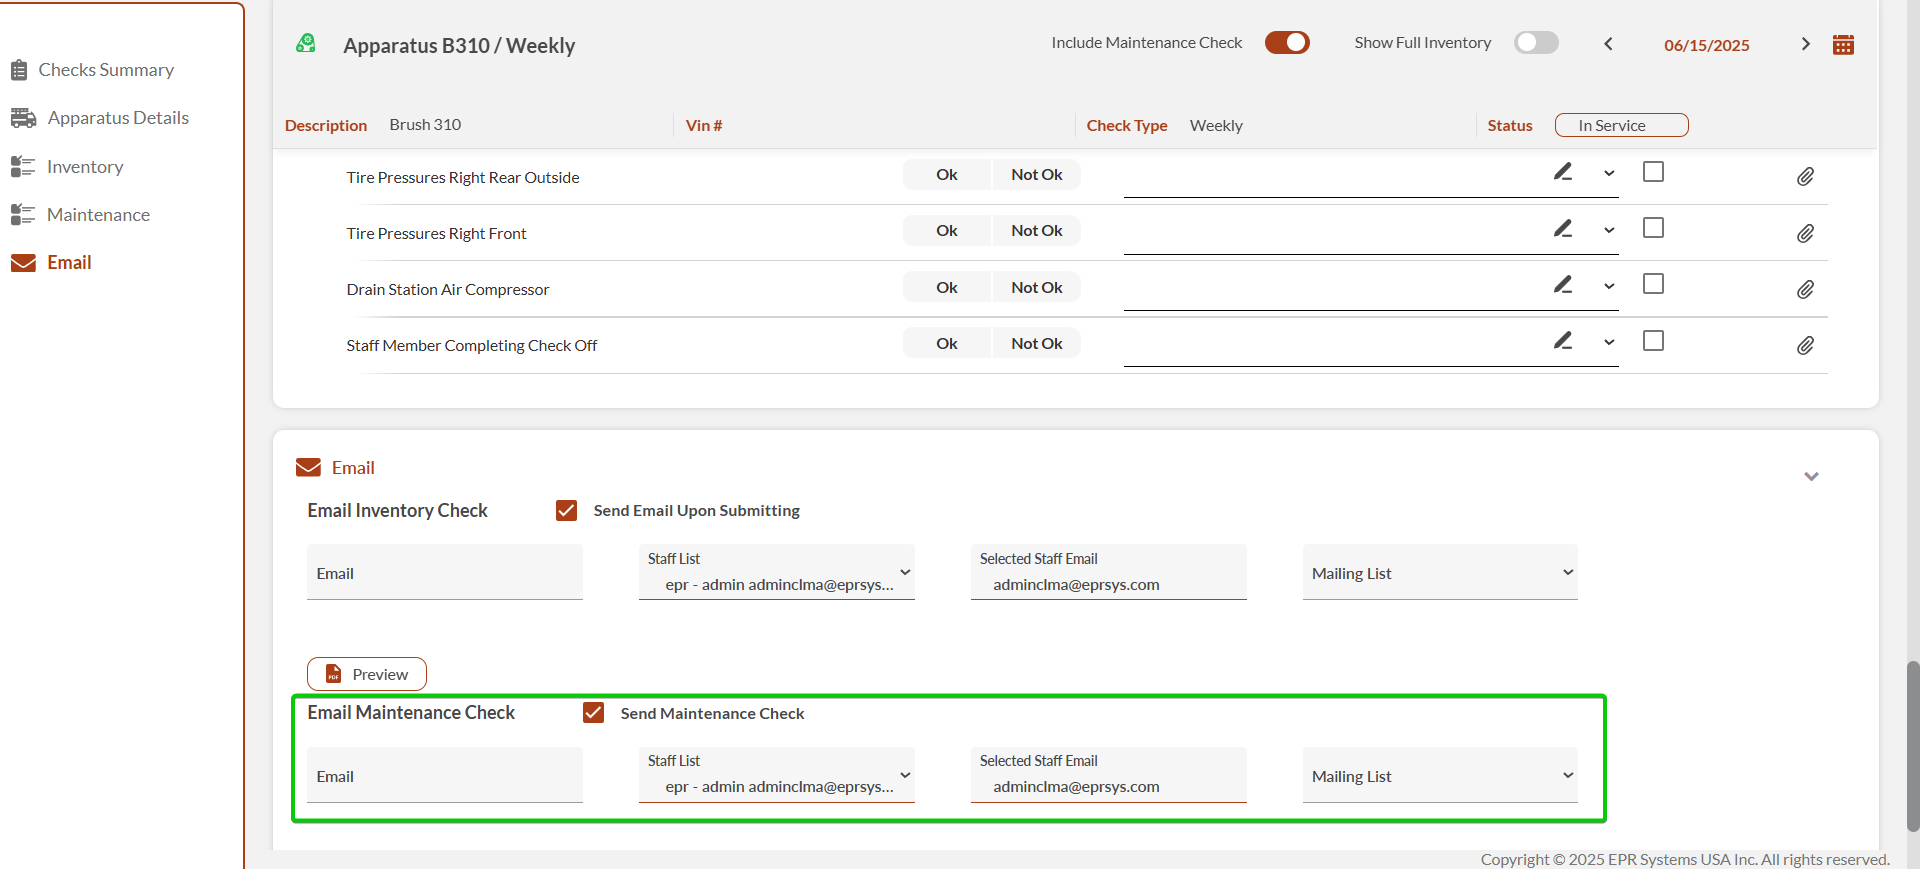
Note: a second row appears in the Email section below for separate maintenance email configuration.
Managing Item Issues
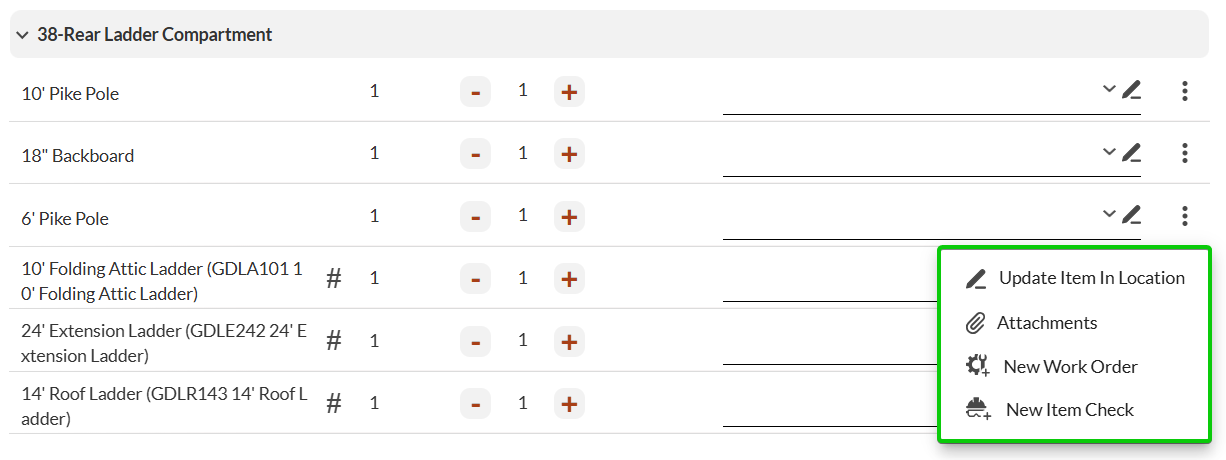
After completing quantities, use the three-dot menu on the right to perform the following item actions:
Update Item in Location: Modify the location details of the item.
Attachments: Add or manage attachments associated with the item.
New Work Order: Create a new work order for items with serial numbers.
New Item Check: Add the item to a preset item check.
Submitting Results
Review all quantity updates and condition notes for accuracy.
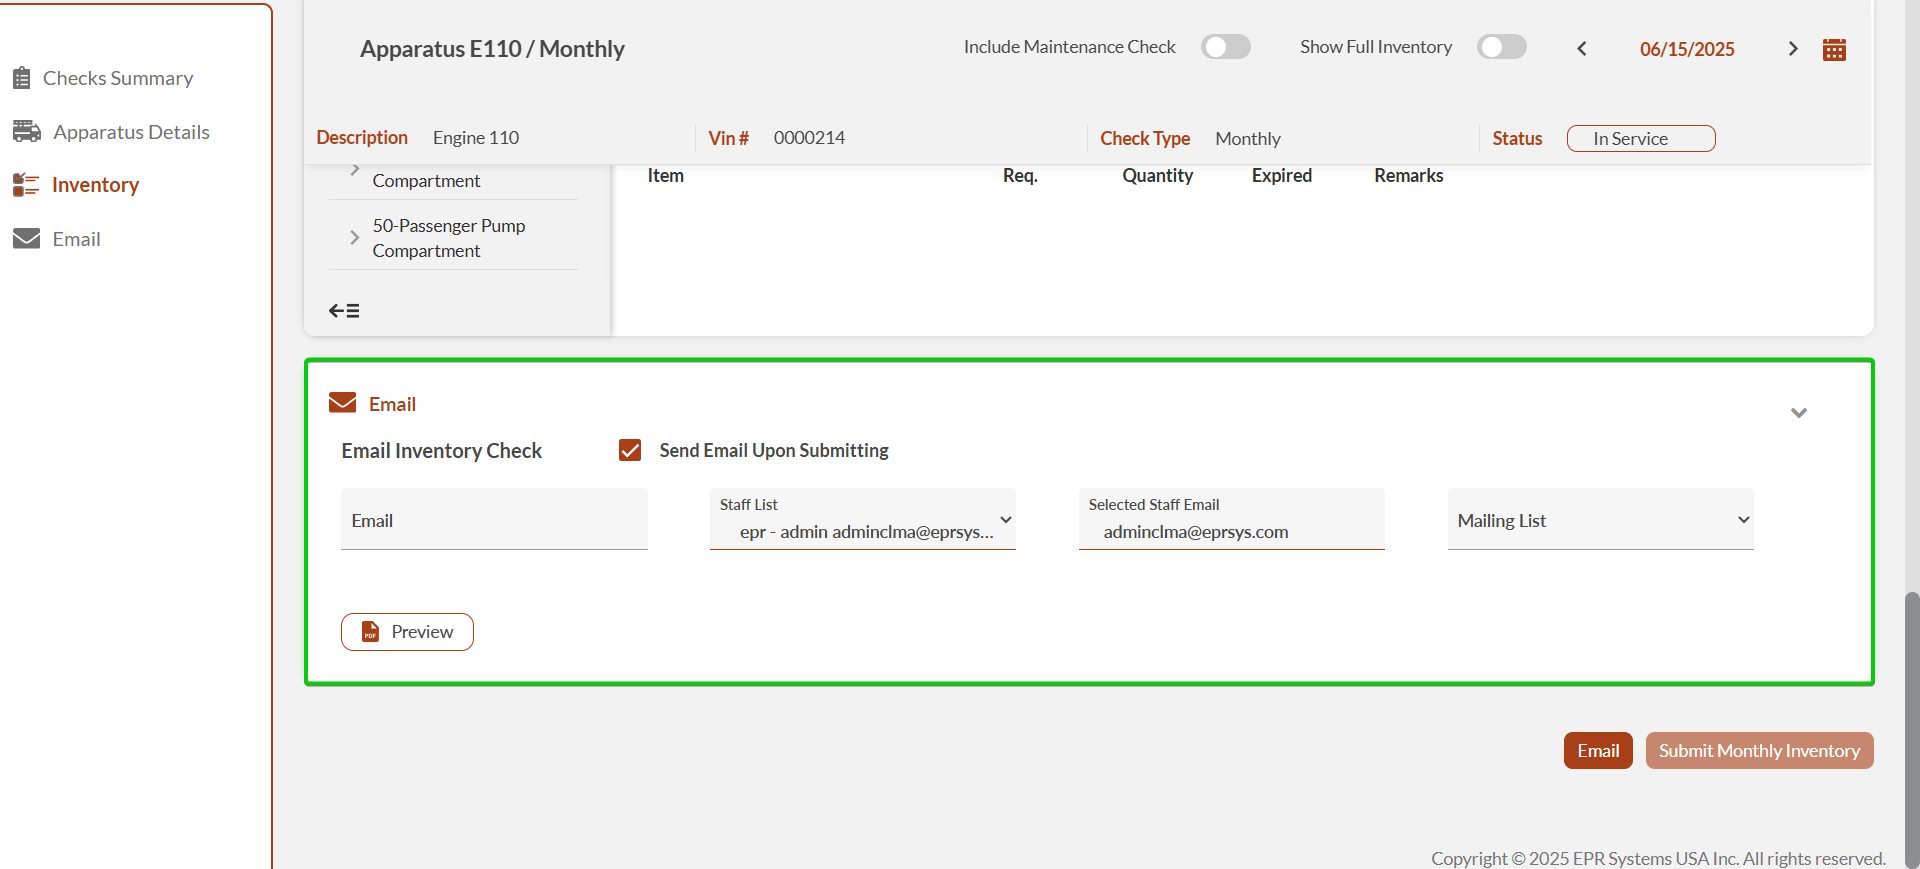
Configure email notifications by enabling Send Email Upon Submitting and adding recipients.
Preview reports before submission using the Preview option.
Submit the check using Submit [Check Type] Inventory.
Note: Select Email to send reports without submitting the check.
When done, click Submit <Check Type> Inventory.
