
Completing an Inspection (Web App)
What You'll Learn: Complete an inspection from opening the record through marking violations, documenting details, and submitting the final report with signatures and email distribution.
Overview
Document code violations, track inspection time, and finalize reports with signatures and follow-up scheduling using the FireWorks web application.
Quick Workflow
Standard inspection workflow:
Mark violations - Review categories and mark each violation OK/Not OK/n/a
Document details - Add remarks, location, and photos for Not OK violations
Record time - Enter inspection duration using your department's method
Capture signatures - Inspector and property representative
Submit - Finalize and distribute report
Optional steps: Duplicate similar violations, configure email distribution, track reinspection requirements
Before You Start (Prerequisites)
Ensure:
Inspection record created and opened.
Email addresses for report distribution.
Recording Violations
Violations are documented according to your department's inspection list configuration. Each category contains specific code requirements that you mark as compliant (OK), non-compliant (Not OK), or not applicable (n/a).
Mark Violation Status
Each violation in your selected category requires a status determination based on your inspection findings.
Important: Violations marked in red are mandatory and must be completed before submission
In the Violations section, select your first inspection category from the list.
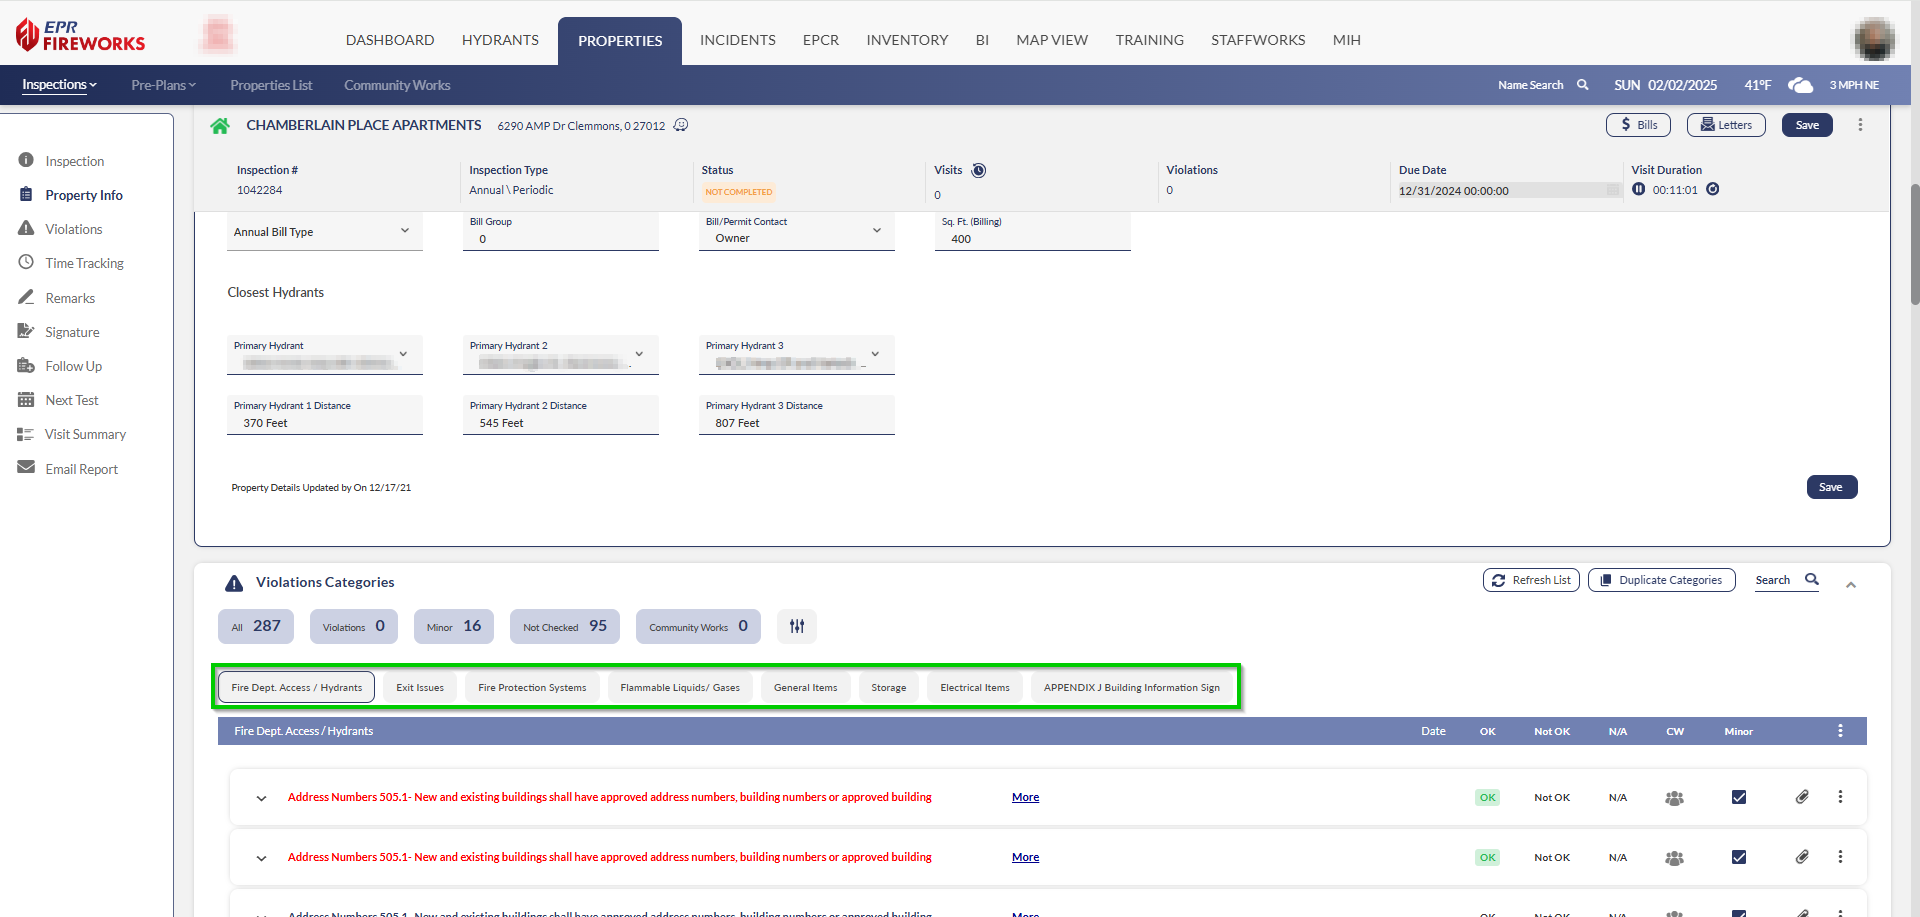
Review each violation in the category.
Mark violations OK, Not OK, or n/a based on inspection findings.

For departments with ‘Minor Violations’ enabled: Violations that are deemed by the authority having jurisdiction as minor, do not generate a reinspection.
Recording Violation Details
Violations marked Not OK require detailed documentation, including remarks, location information, and supporting photos. This information appears on the final inspection report and guides property owners in making corrections.
Complete these fields when you mark a violation Not OK.
Expand the violation.
Complete the following sections:
Remarks: Document the violation condition. These appear on the final report.
Compliance: Verify auto-populated compliance code. Add additional compliance information if needed.
Location: Enter the violation's location in the property.
Sub-Location: Add specific location details if needed for clarity.
Due Date: Verify auto-calculated violation correction deadline.
Tip: Use the dropdown next to the Remarks field to insert preset remarks templates.
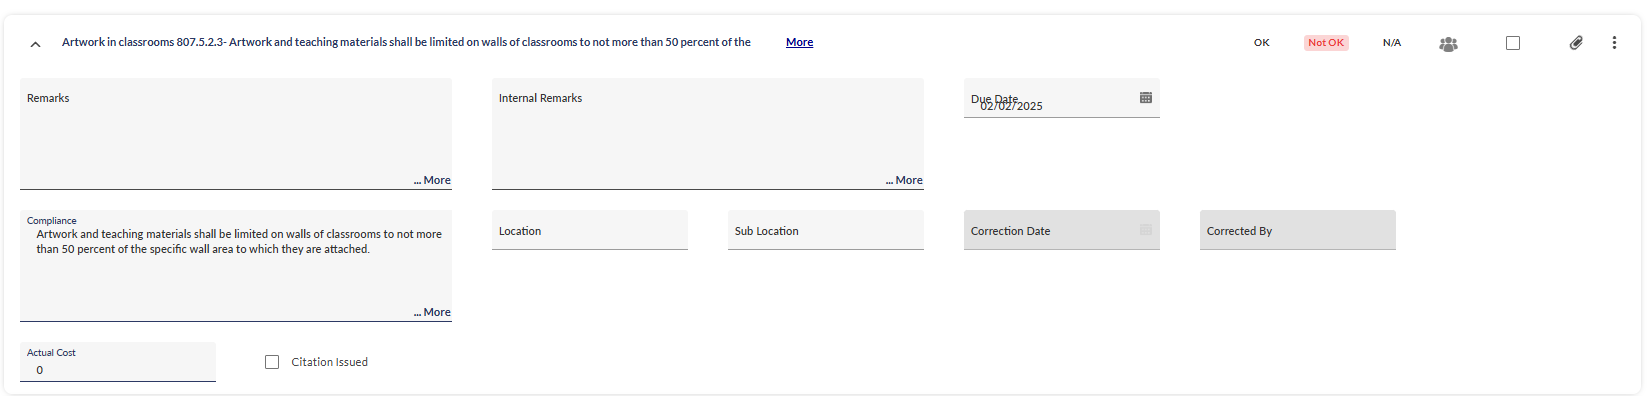
Optional Fields
Internal Remarks: Add notes for future inspections (not included in report).
For Reinspections Only
If documenting a reinspection, complete these additional fields to track violation corrections:
Correction Date: Verify the date when violation was corrected (auto-updates when status changes to OK).
Corrected By: Verify staff member who approved correction (auto-populates during status change).
Actual Cost: Enter final correction cost if applicable.
If Citation Issued
When code violations require formal citations:
Select the Citation Issued checkbox.
Complete Citation # field.
Enter Citation Remarks describing citation details.
Attachments
Photographic and document evidence support violation findings and provide property owners and the fire department with a clear visual reference.
Note: In Offline mode, camera photos must be taken separately and uploaded when you reconnect to the internet service.
Click the attachments icon.
Do any of the following:
Take photo now: Click camera icon to capture image (saves to FireWorks cloud storage - Online mode only).
Upload existing photo: Click the upload icon to select an image from your device.
Attach document: Click the document icon to upload supporting files.
Result: Violation documented with status, details, and supporting media attached to the inspection record.
Duplicating Violations
If needed, you can duplicate violations and violation categories, as follows:
Individual Violations: Click the three-dot menu to the the right of the violation name, and then select Duplicate.

Entire Category: Click Duplicate Category at the top of the Violations section.

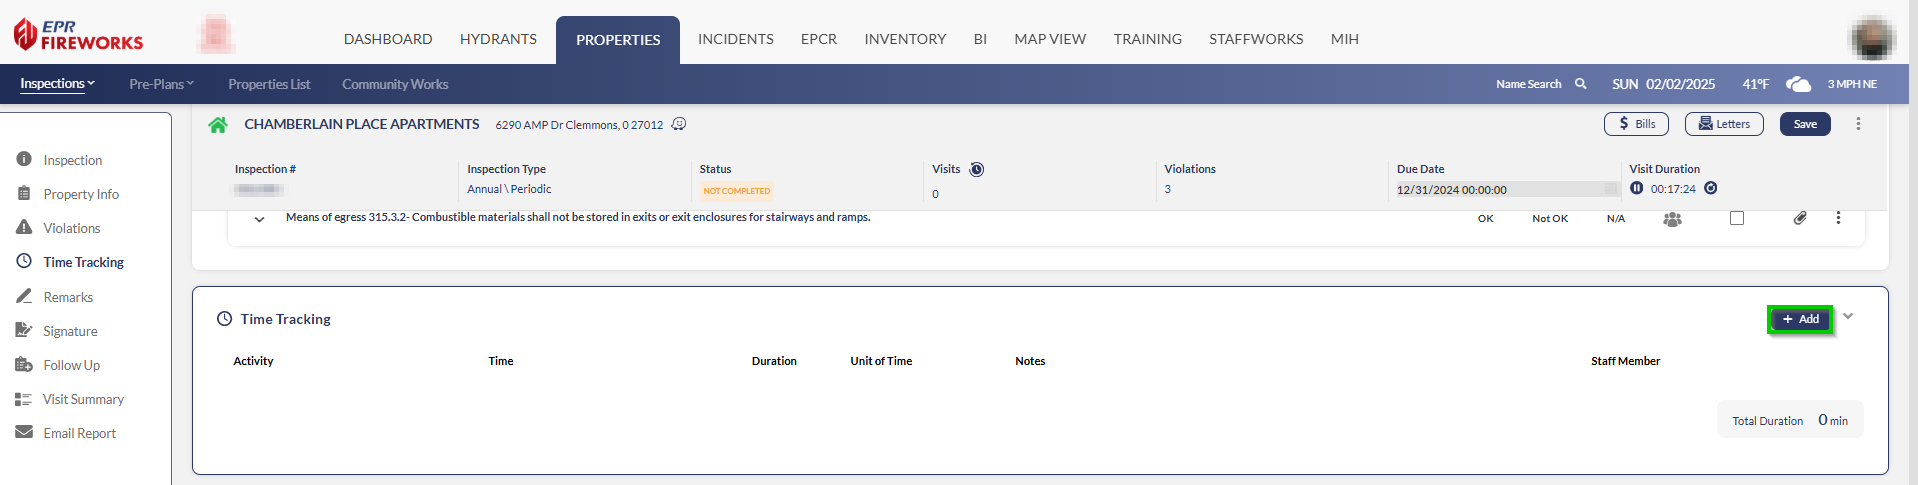
Recording Time
After documenting violations, record your time using these methods:
Time Tracking
Record detailed activity breakdown (travel, primary inspector time, assistant inspector time).
Scroll to the Time Tracking section.
Click Add.
Complete all fields:
Activity: Select your activity type.
Time Field: Enter the activity date and time.
Unit of Time: Choose hr, min, or sec.
Duration: Enter the activity length in selected time unit.
Notes: Enter activity-related comments (optional).
Staff Member: Select who performed the activity.
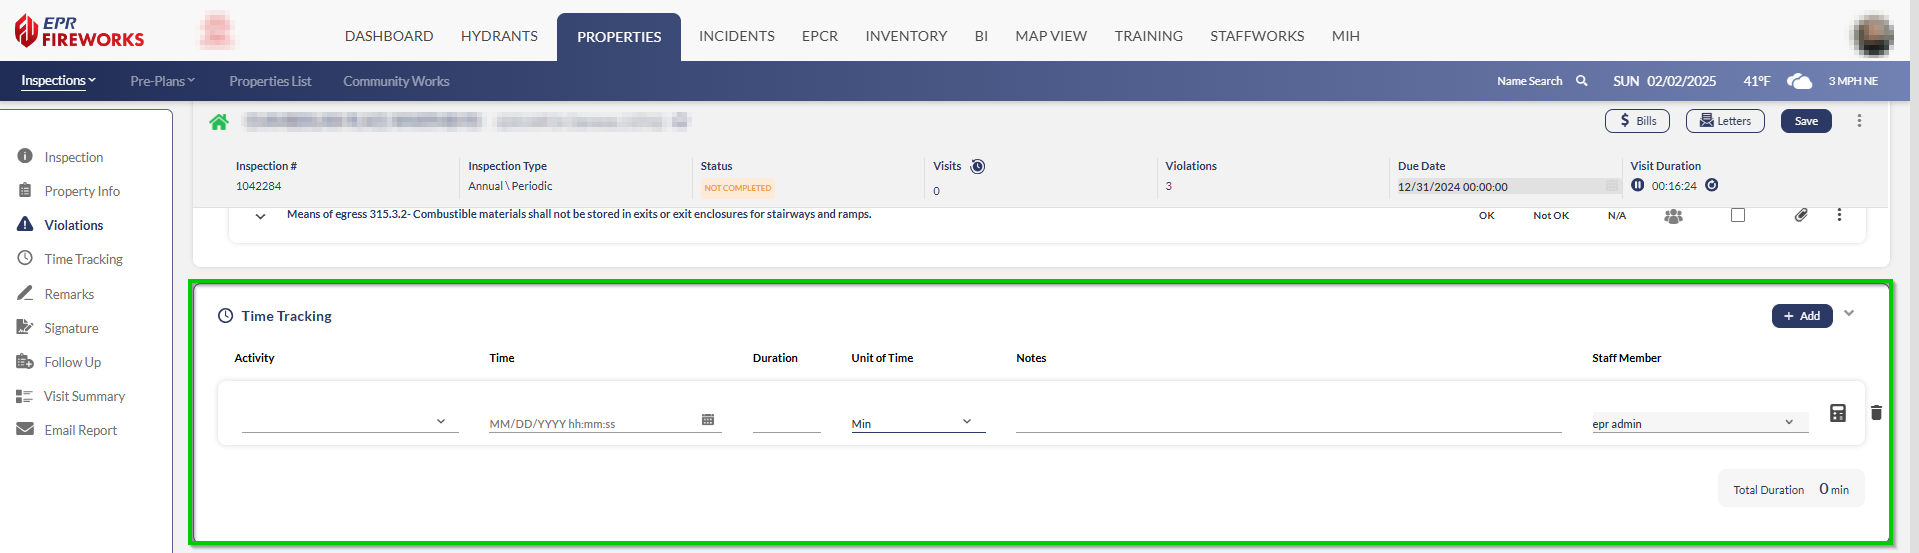
Tip: If you're tracking the current visit, click the calculator icon next to the Staff Member field for the exact duration.
Visit Summary
Record total visit duration for billing and basic time tracking.

Click the calculator icon next to the Travel Time field to auto-calculate the exact visit duration.
In the Travel Time field, manually add the travel time in minutes.
Alternative: Manually enter visit duration in minutes in Visit Duration field.
Additional Actions:
To add the visit and travel time to the bill, select Create Bill.
To preview the report in a PDF file after submitting the inspection, select Preview after Submit.
Finalizing the Inspection
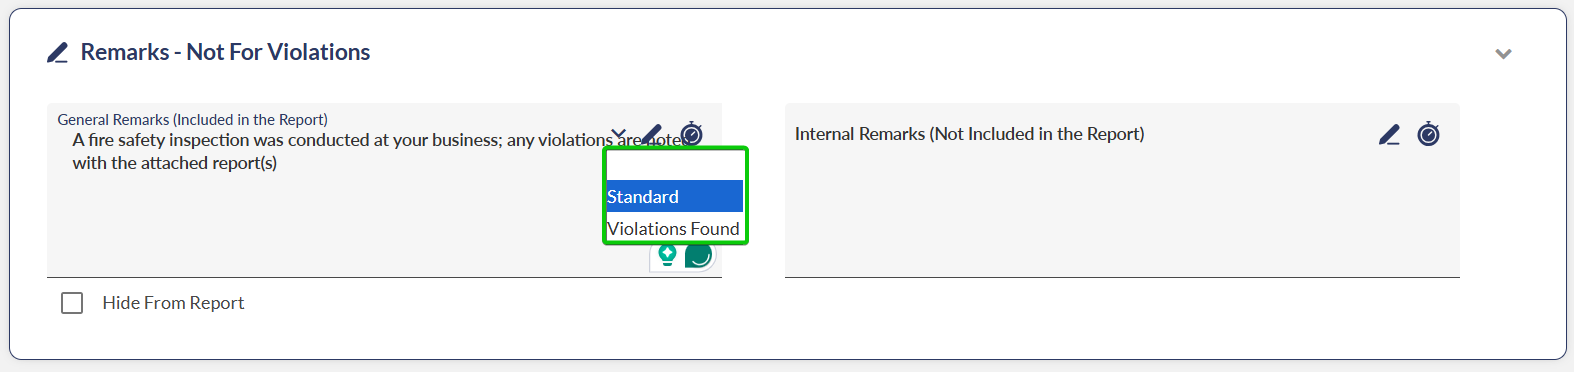
Adding Final Remarks
Final remarks provide overall inspection summary, general observations, and notes for future inspections that don't relate to specific violations.
In the Remarks field, enter comments that will appear on the final report.
In the Internal Remarks field, add notes for future inspections if needed (optional - not included in report).
Tip: Use the dropdown next to Remarks to insert preset remark templates.
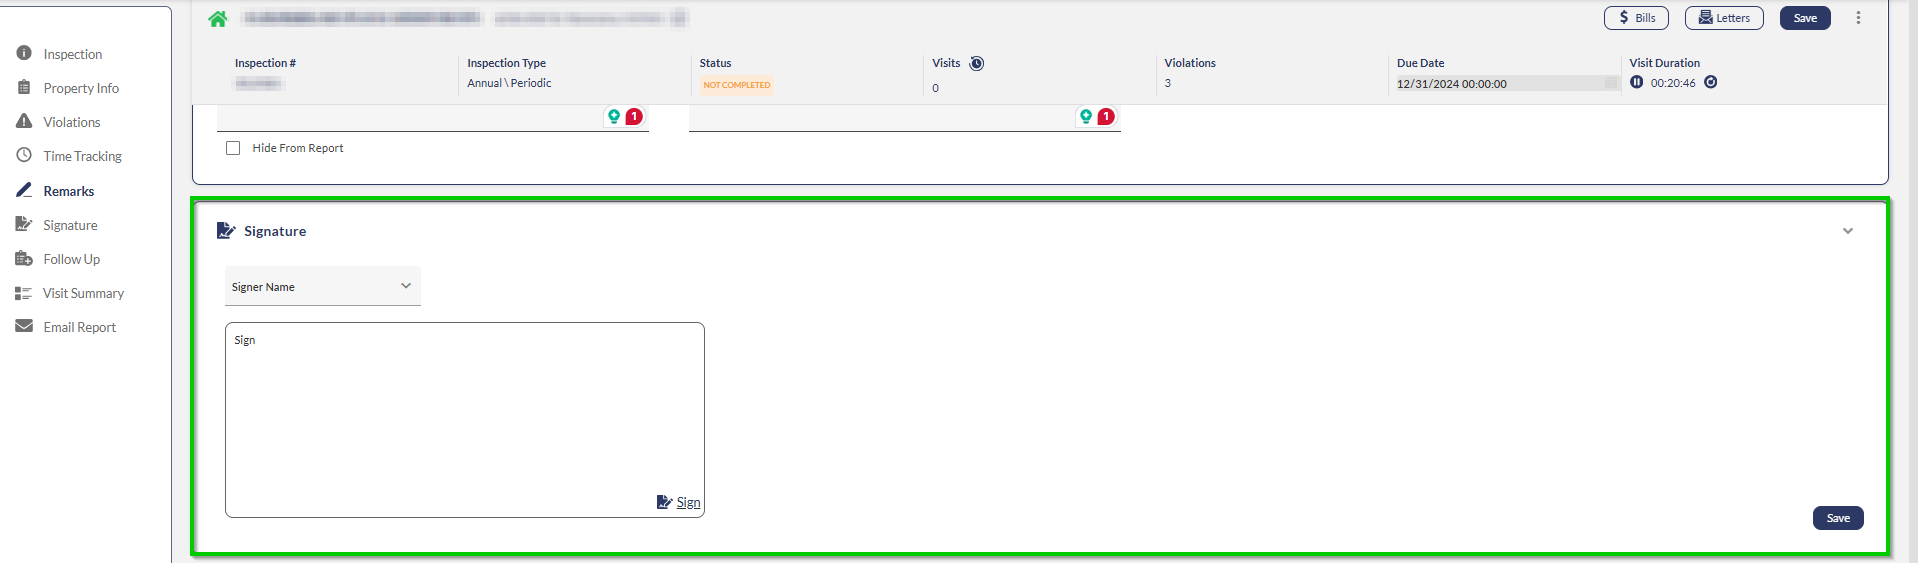
Capturing Signatures
In the Signatures section, select the signer's name from the dropdown list.
Capture the signature.
Note: If the signer’s name is not in the dropdown, manually type their name.
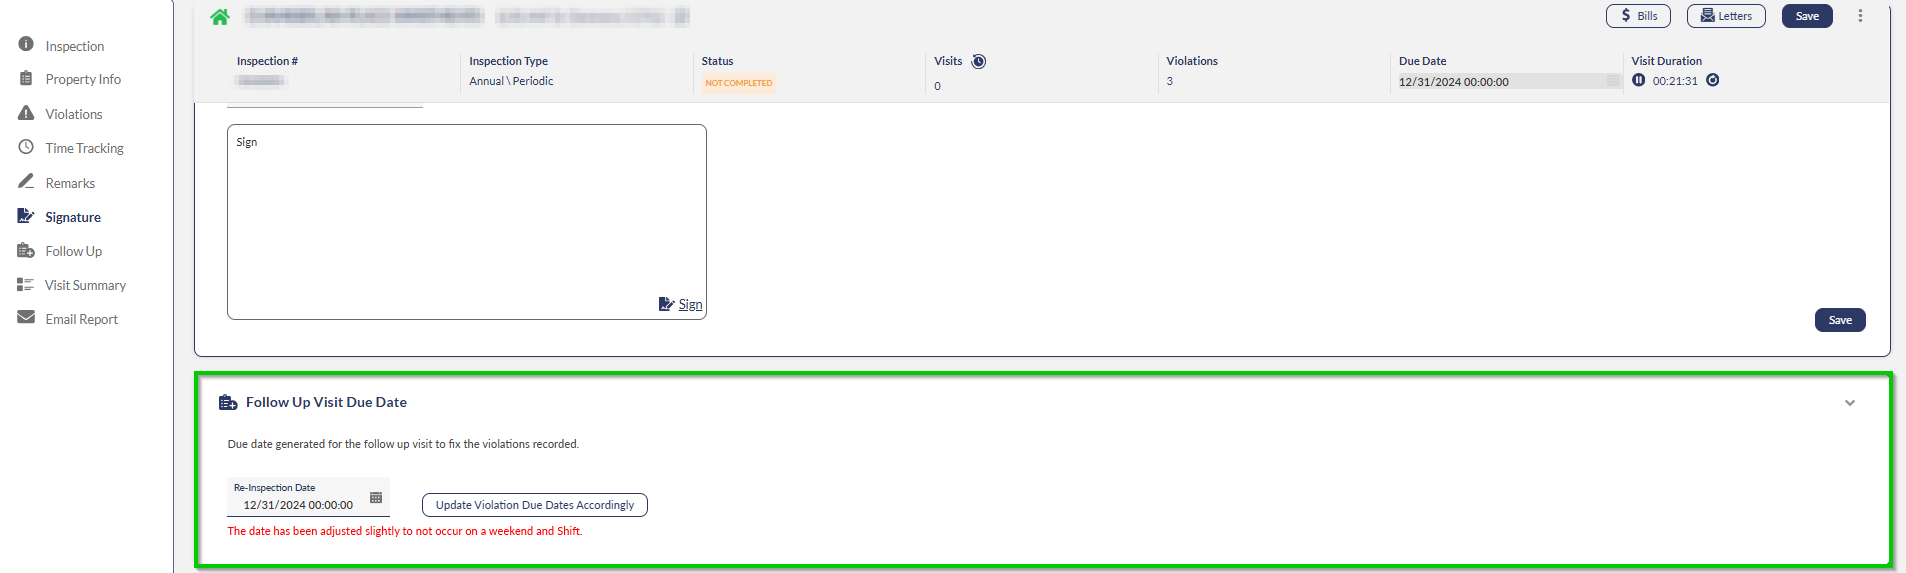
Verifying Follow-Up Schedule
Review Follow-Up Visit Due Date section.
Verify calculated next inspection date.
If violations are overdue or need fixing, click Update Violation Due Dates Accordingly.
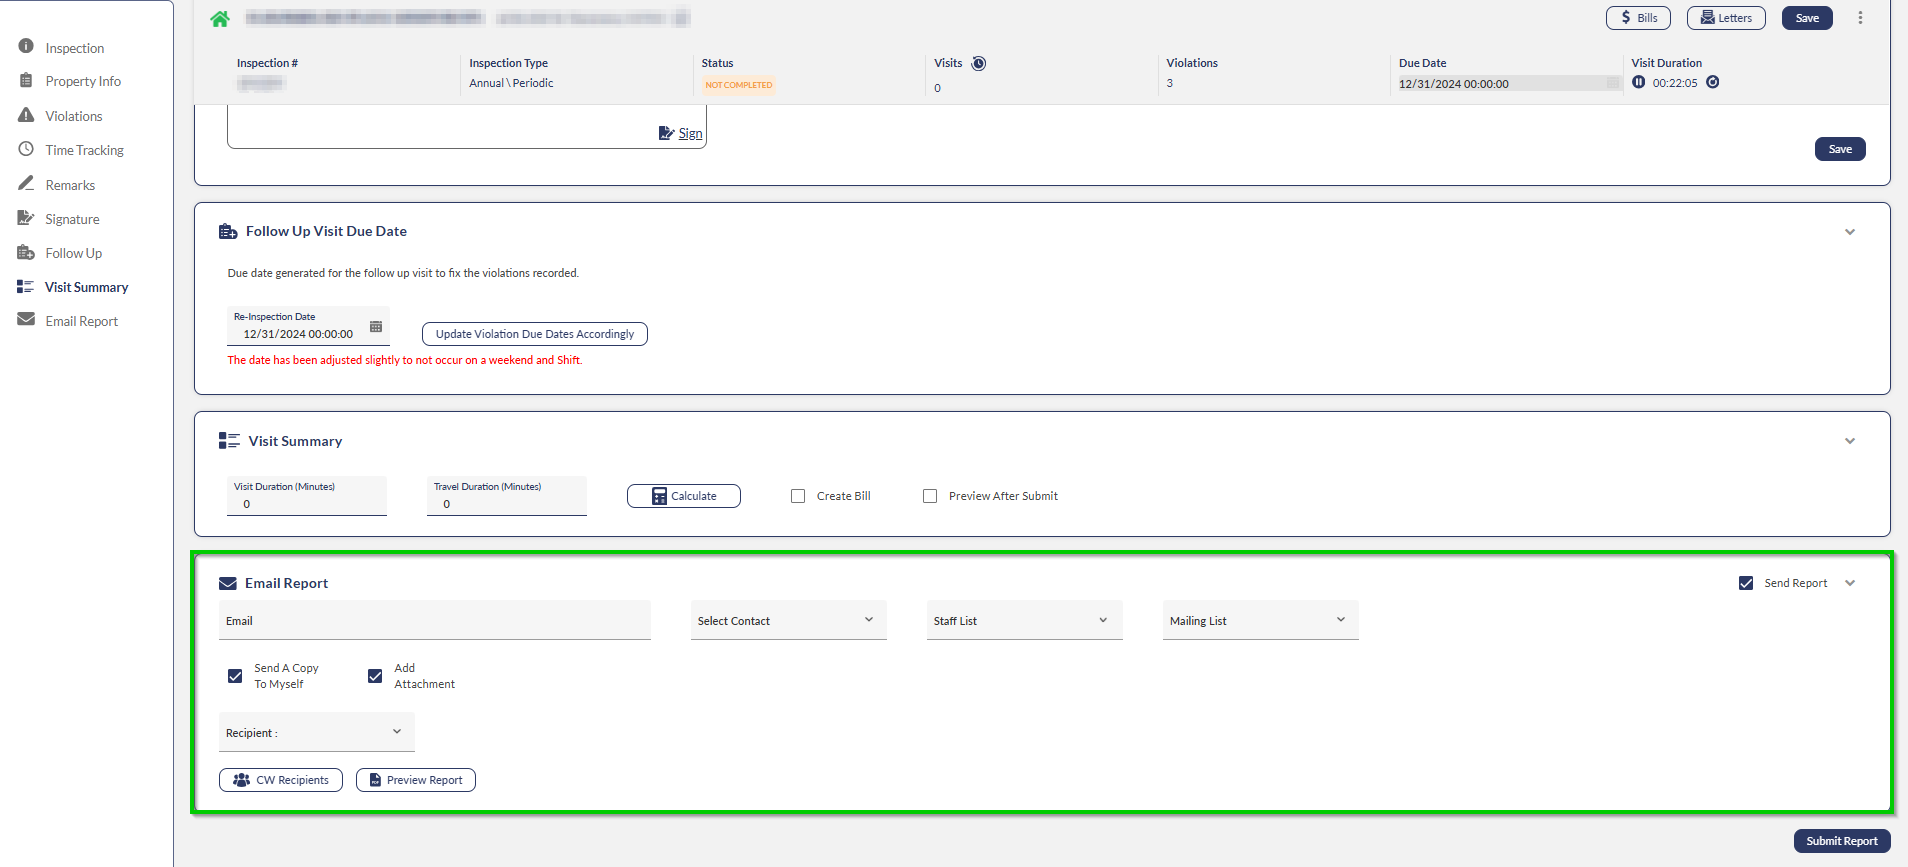
Configuring Email Distribution
Skip this section if email notification is not needed.
Select the Email Report checkbox.
Add recipient email addresses.
Select mailing lists if applicable.
Completing Custom Fields
Complete department-specific custom fields according to your agency's requirements (if applicable).
Submitting Report
Review all sections for completeness:
All mandatory violations (red) marked
Signatures captured
Follow-up date calculated
Email recipients added (if applicable)
Click Submit Report.
Result: Inspection report submitted to FireWorks database. If Preview after Submit is selected, the PDF opens automatically. Email recipients receive the report within 5 minutes. Inspection status changes to Completed and appears in the inspection history.
Offline Mode: You can complete all inspection tasks offline except adding violation photos and submitting the report. Service may interrupt during building inspections due to construction materials, geography, or cellular coverage gaps. When ready to submit, ensure cellular service is available and do not click refresh or close the page during submission.