
Capturing Manual Vitals (Deep-Dive)
What you'll learn: Document vital signs using main row rapid entry and clinical context sidebars for NEMSIS-compliant assessment trending.
Quick Navigation: Creating Entry | Blood Pressure | Heart Rate | Respiratory | Neurological | Pain | Reperfusion | Trauma | Temperature | APGAR | Stroke
Overview
EPR FireWorks vital signs documentation supports rapid field assessment through main row entry combined with comprehensive clinical context via detail sidebars.
Two-Tier Documentation System:
Main Row: Enter critical vital values for immediate trending during field operations.
Detailed Sidebars: Access comprehensive clinical context when the clinical situation requires additional documentation.
Enter primary values in main row fields, then access detail sidebars for clinical context documentation. All main row fields appear in the detailed sidebars, allowing you to complete all fields in a single workflow.
Note: Close detail sidebars to save changes (applies to all sidebar procedures throughout this guide).
Creating Vital Signs Entry
Create new vital signs entries.
Click +.

The Time sidebar opens automatically. Select Date and Time
Select YES or NO for Obtained Prior to this Units EMS Care.

Result: New vital signs row appears in the assessment timeline with specified timestamp.
Documenting Blood Pressure
Recording Primary Blood Pressure Values
Enter systolic value in the first BP field and diastolic value in the second BP field.

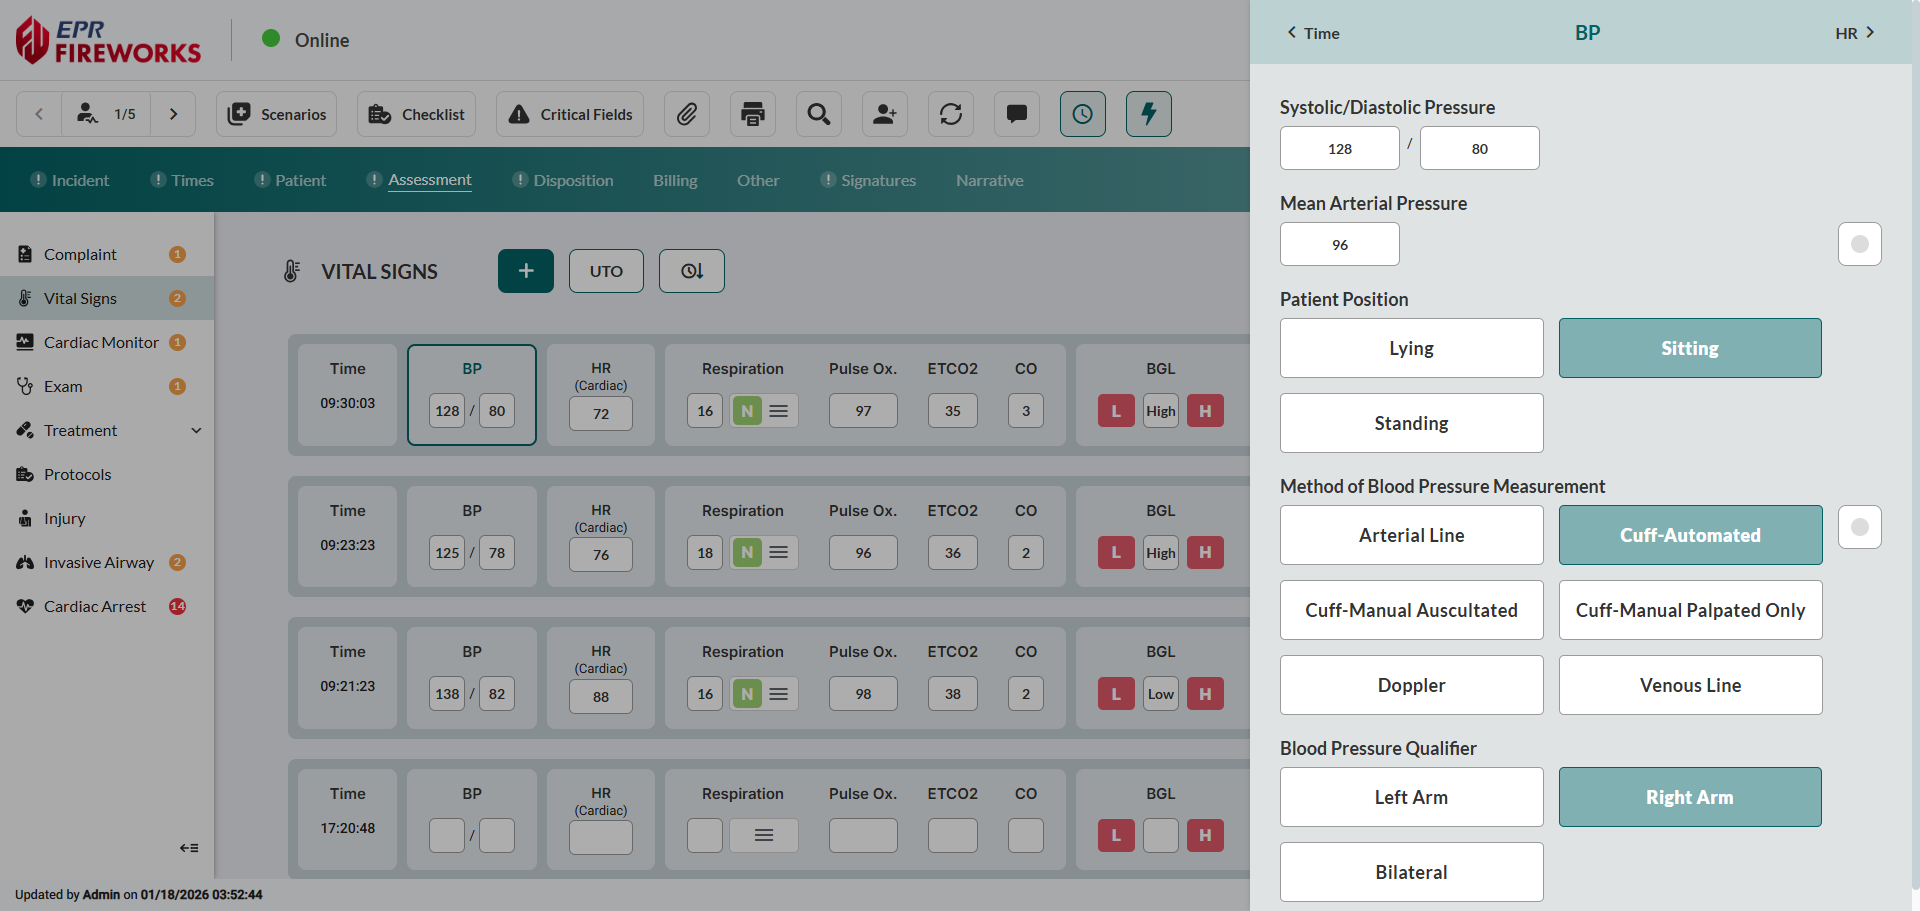
Documenting Blood Pressure Clinical Context
Document comprehensive hemodynamic assessment details.
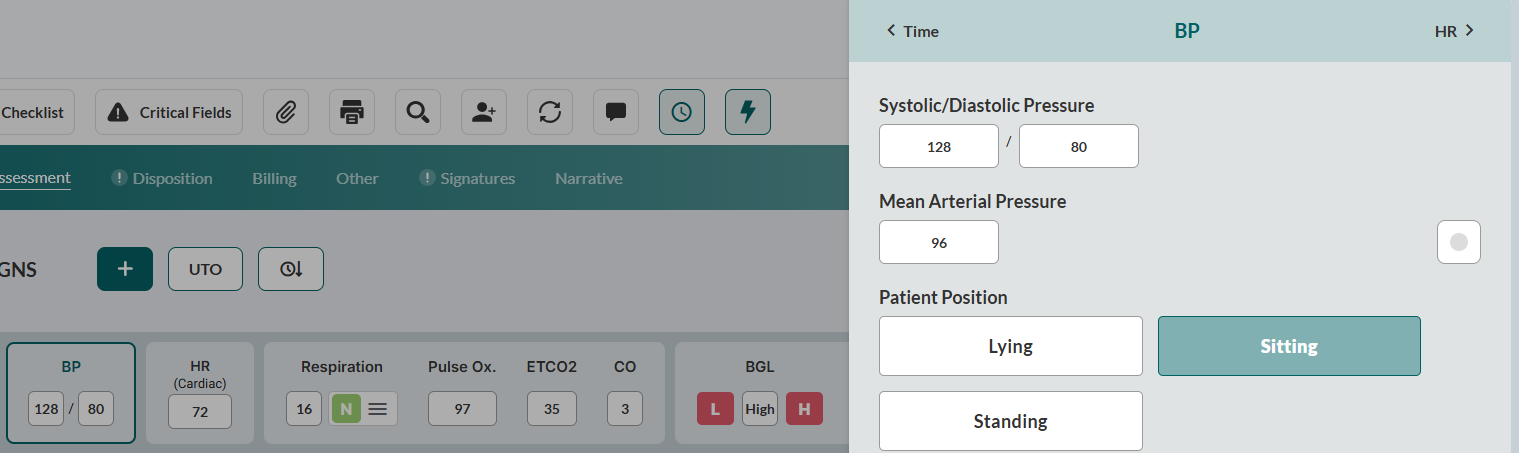
Click the BP section to open the sidebar.
Enter Mean Arterial Pressure if measured directly.
Select Patient Position (Lying, Sitting, or Standing).
Select Method of Blood Pressure Measurement (Arterial Line, Cuff-Automated, Cuff-Manual Auscultated, Cuff-Manual Palpated Only, Doppler, or Venous Line).
Select Blood Pressure Qualifier (Left Arm, Right Arm, or Bilateral).
Documenting Heart Rate
Recording Primary Heart Rate Value
Enter value in the HR (Cardiac) field.

Documenting Additional Cardiac Assessment Details
Document comprehensive cardiac evaluation including rhythm and ECG interpretation.
Click HR (Cardiac) section to open sidebar.
Select Method of Heart Rate Measurement, Pulse Rhythm, and ECG Type.
Select Cardiac Rhythm/Electrocardiography (ECG) interpretation.
Select the Method of ECG Interpretations if applicable.

Documenting Respiratory Status
Recording Primary Respiratory Values
Document respiratory rate and effort for immediate assessment.
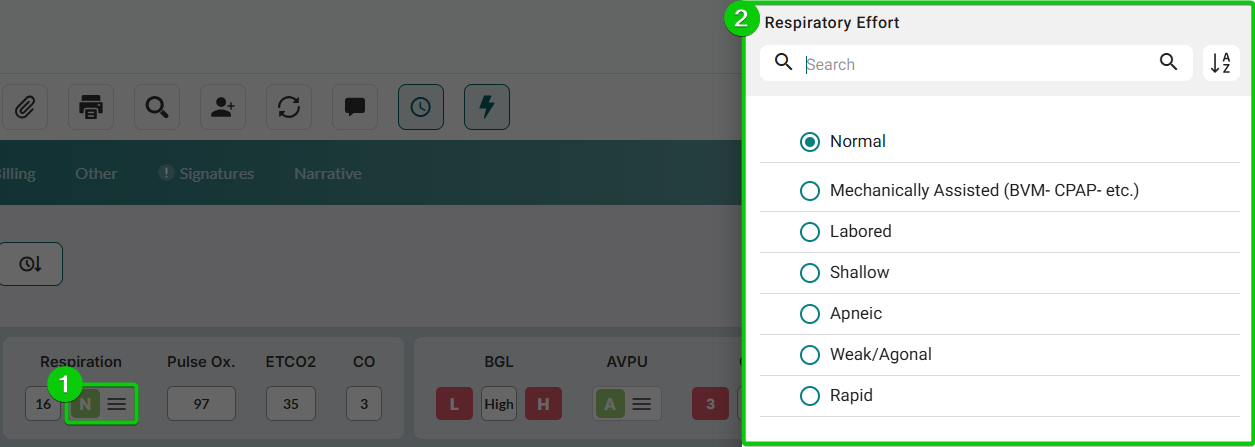
In the Respiration section, complete the Respiratory Rate, Pulse Oximetry, and ETCO2, and CO fields.

Click the three-line menu, and then select Respiratory Effort from the sidebar.
Documenting Additional Respiratory Assessment Details
Document comprehensive pulmonary evaluation, including oxygenation and ventilation. Complete the empty fields:
Click the Respiration section to open the sidebar.
Select Pulse Oximetry Qualifier.
Select ETCO2 Type (kPa, mmHg, or Percentage).
Documenting Neurological Assessment
Document neurological status and responsiveness.

Recording Neurological Assessment
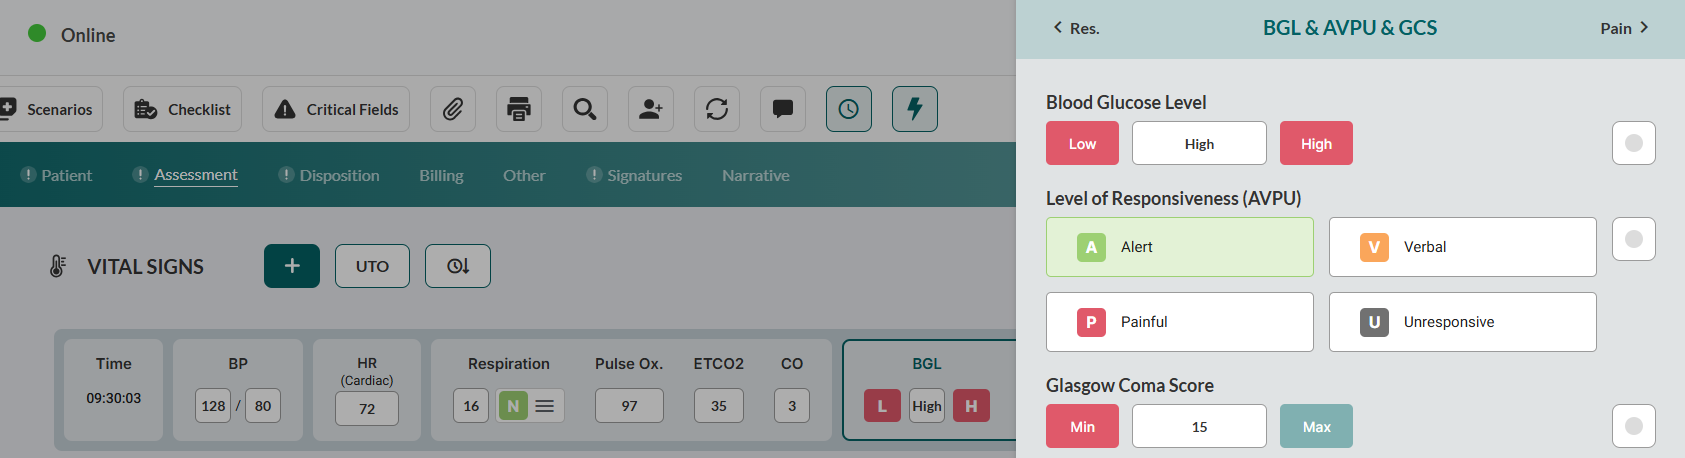
Enter Blood Glucose value in BGL field.
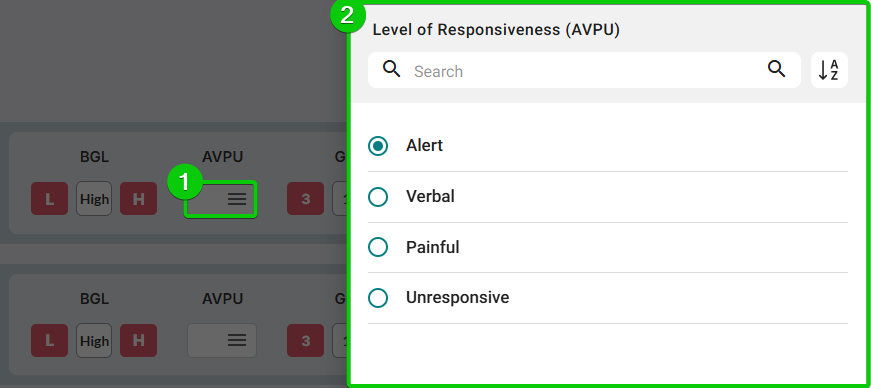
Assess level of responsiveness. Click the AVPU field, and then select the Level of Responsiveness (AVPU) from the sidebar.
Complete Glasgow Coma Scale (3-15).
Documenting Additional Neurological Assessment Details
Document comprehensive neurological evaluation with clinical context.
Click the BGL & AVPU & GCS section to open the sidebar.
Measure Glasgow Coma Score. Click the following fields, and then select values from the corresponding sidebars:
Glasgow Coma Score-Eye.
Glasgow Coma Score-Motor.
Glasgow Coma Score-Verbal.
Documenting Pain Assessment
Recording Primary Pain Score
Document pain level for pain management protocols. Enter pain score (0-10) in the Pain Scale field.

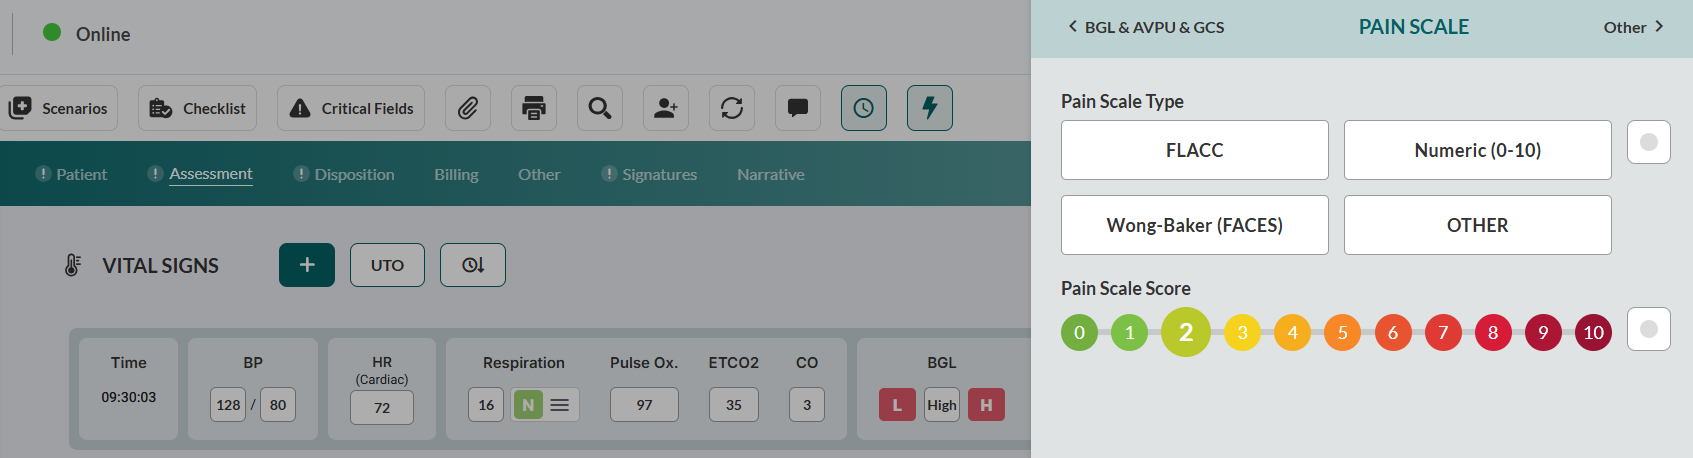
Documenting Pain Assessment Details
Conduct a comprehensive pain evaluation using standardized scale methodology.
Click Pain section to open sidebar.
Select Pain Scale Type (FLACC, Wong-Baker (FACES), Numeric (0-10), or OTHER).
Verify Pain Scale Score.
Documenting Specialized Assessments
Access the Other sidebar for specialized clinical assessments. Click the Other section to open the sidebar, then complete applicable assessments:
Reperfusion Checklist
Document cardiac assessment contraindications.
Click Reperfusion Checklist field.
Select applicable contraindications.
Revised Trauma Score
Enter Revised Trauma Score.
Click the calculator icon to calculate RTS automatically.
Result: EPR FireWorks calculates RTS based on Glasgow Coma Scale, systolic blood pressure, and respiratory rate from current vital signs entry.
Temperature
Enter Temperature.
Select Temperature Method (Oral, Rectal, Axillary, Temporal, Tympanic, etc).

APGAR Score
Calculate APGAR score for newborn patient using component-based scoring.
Click the APGAR calculator icon.
Select criteria according to your findings:
Strength and regularity of heart rate (0-2 points).
Lung maturity (0-2 points).
Muscle tone and movement (0-2 points).
Skin color/oxygenation (0-2 points).
Reflex responses to irritable stimuli (0-2 points).
Review Total Score, then click Update.
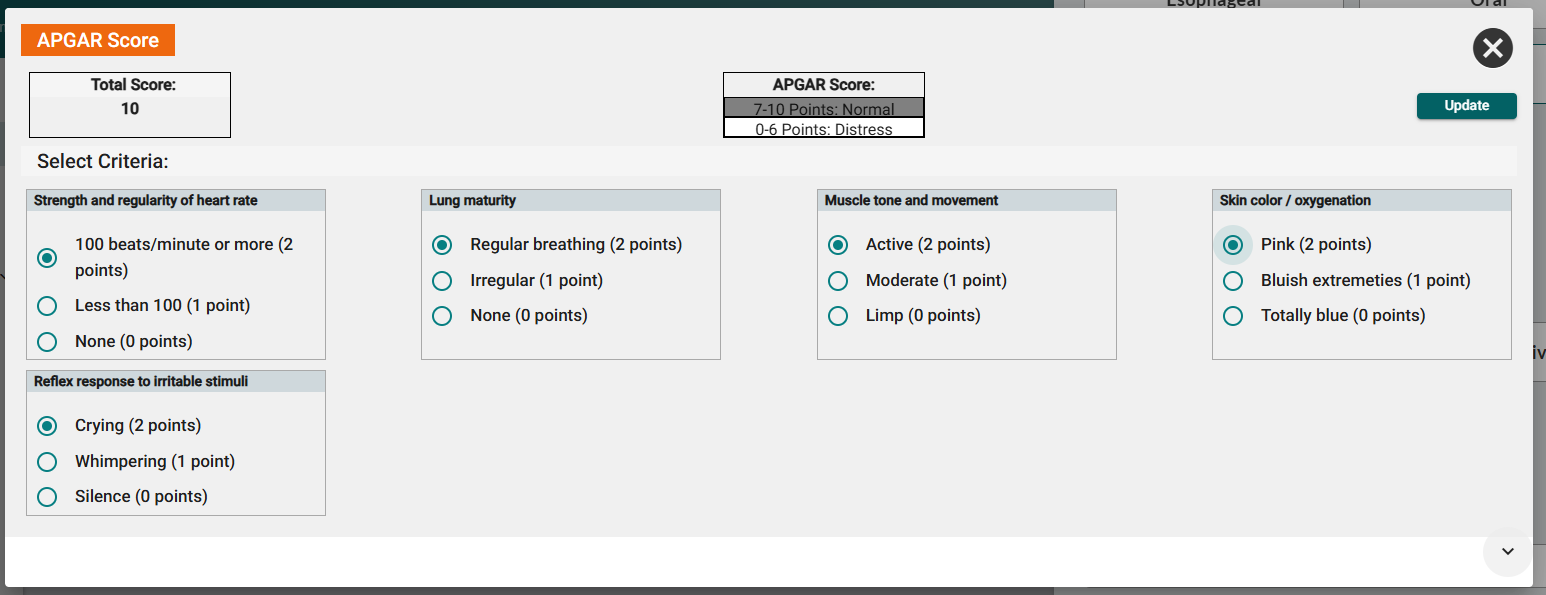
Result: APGAR score populates in the vital signs entry and appears in the patient assessment summary.
Stroke Scale
Select Stroke Scale Score (Negative/Non-Conclusive/Positive).
Select Type.
Enter Stroke Scale Score (Number).
