
Configuring Apparatus and Warehouse Details
Overview
This guide explains how to configure apparatus and warehouse inventory units directly from the FireWorks Web App. Configure unit details to establish operational parameters, maintenance schedules, and technical specifications for your department's equipment.
You can modify apparatus identification, operational status, maintenance schedules, and technical specifications. Warehouse configuration focuses on identification and check scheduling requirements.
Before You Start
Before configuring apparatus and warehouse details, ensure:
You have appropriate editing permissions for apparatus and warehouse configuration.
The apparatus or warehouse exists in your department's inventory system.
You have gathered the necessary technical specifications and operational parameters.
Accessing Apparatus and Warehouse Configuration
Navigate to Inventory & Maintenance from the main menu.
Locate the apparatus or warehouse you want to configure.
Click the three-dot menu next to the right of the unit name.
Select Apparatus Details (or Warehouse Details for warehouses).
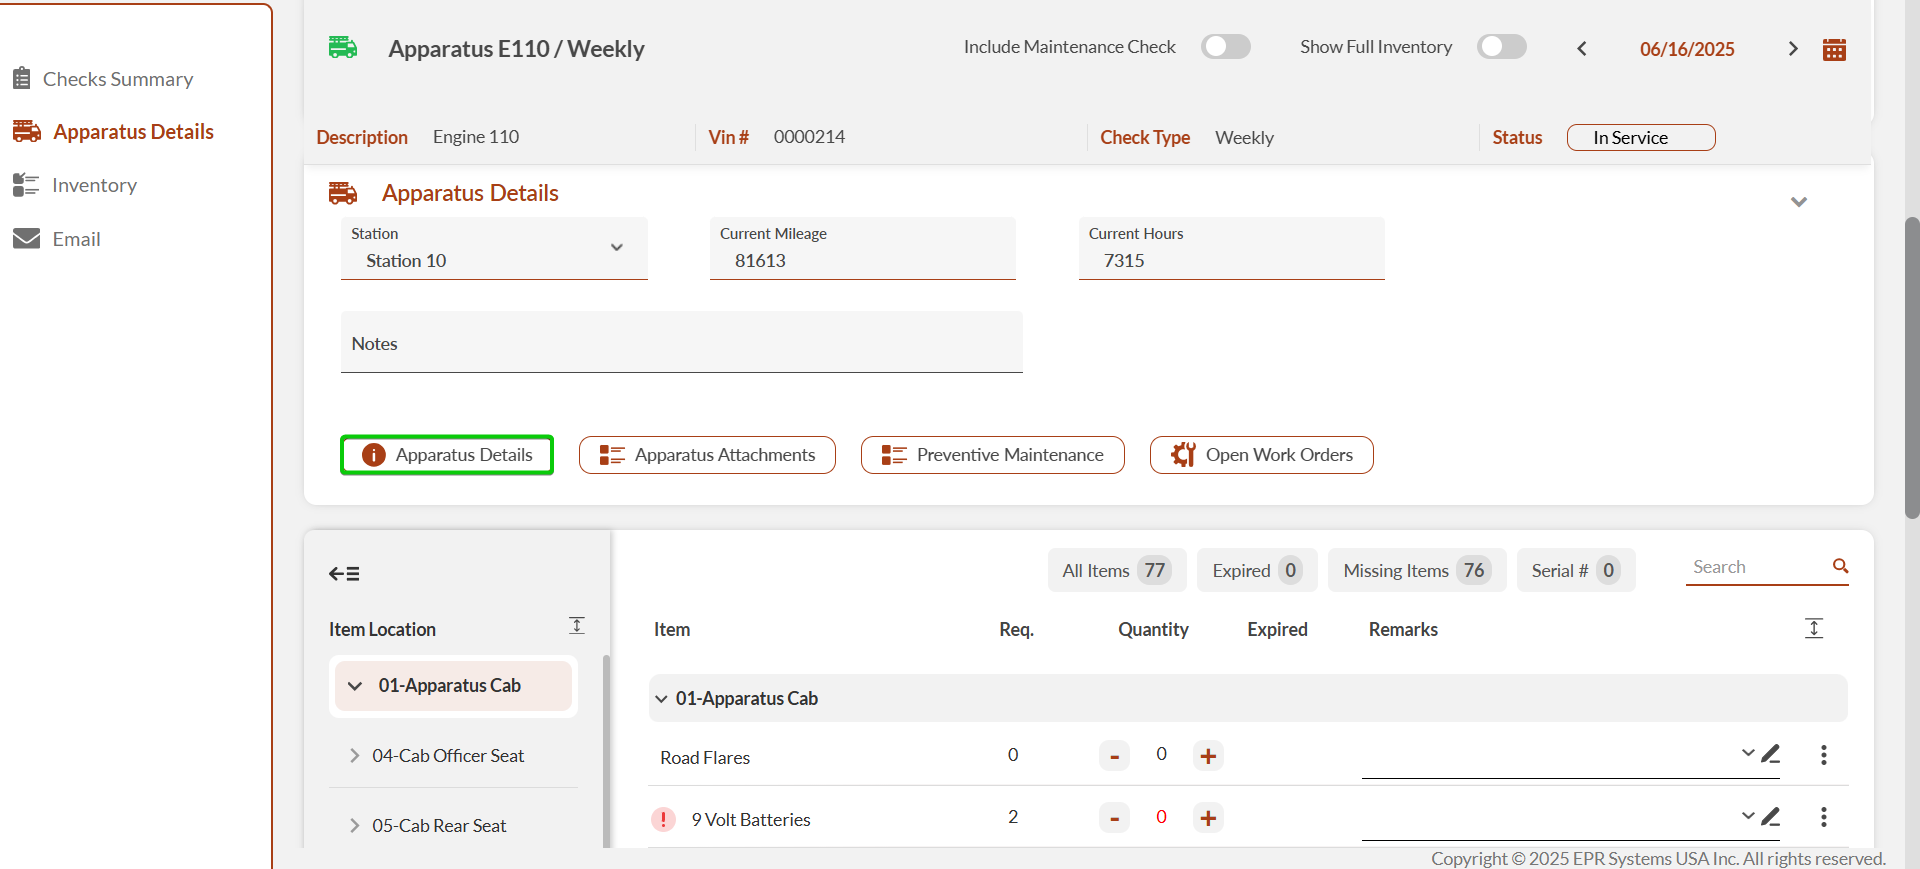
The apparatus/warehouse configuration interface opens with multiple tabs for different types of information.

Alternative access: You can also access apparatus details from individual check or work order pages under Apparatus/Warehouse Details.
Configuring General Information
Click the General tab if not already selected.
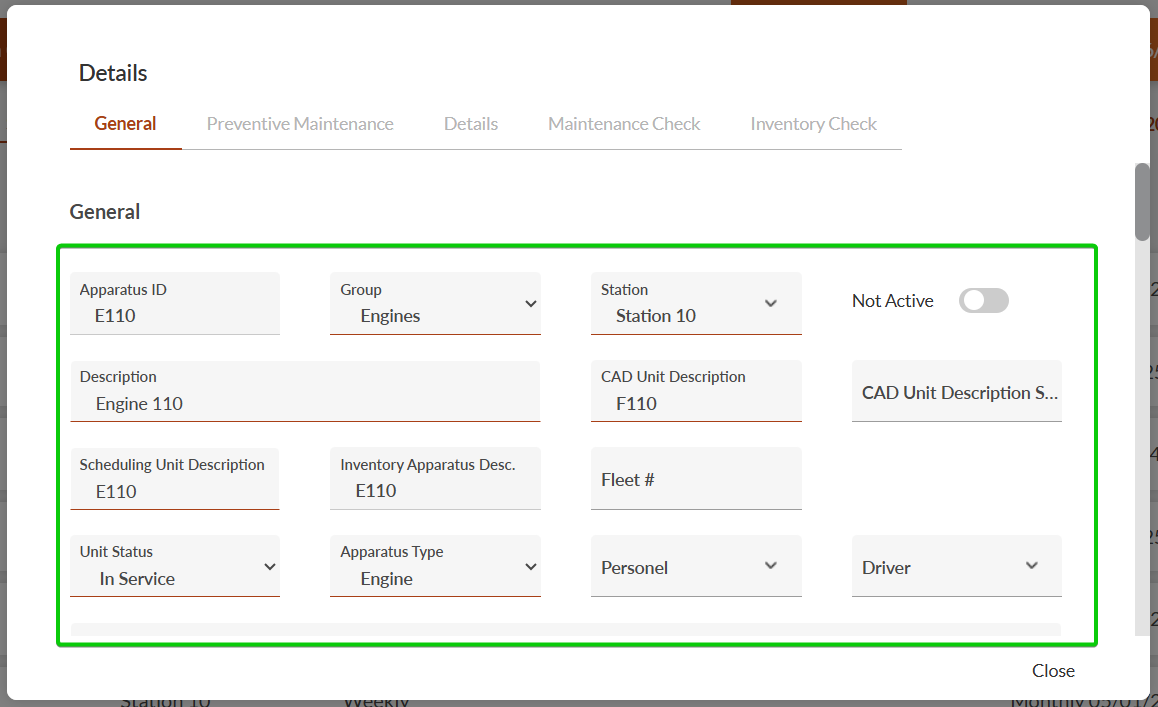
Complete the identification and operational fields as needed:
Apparatus ID/Warehouse ID: Enter your department's unit identification.
Group: Select the apparatus organizational group (apparatus only).
Station: Select the assigned station from the dropdown.
Description: Add a descriptive name for the unit.
CAD Unit Description: Enter CAD apparatus codes for dispatch systems (apparatus only).
CAD Unit Description Second: Enter secondary CAD unit description (apparatus only).
Scheduling Unit Description: Enter name or identifier for scheduling systems and duty rosters (apparatus only).
Inventory Apparatus Description: Enter name or identifier for inventory tracking (apparatus only).
Fleet #: Enter the apparatus fleet number (apparatus only).
Unit Status: Select operational status - In Service, In Reserve, or Out of Service (apparatus only).
Apparatus Type: Select the vehicle classification from the dropdown (apparatus only).
Personnel: Select designated apparatus personnel from the list (apparatus only).
Driver: Select designated apparatus driver from the list (apparatus only).
Vehicle/Warehouse Notes: Add notes concerning the vehicle or warehouse.
Configure apparatus type classifications by checking appropriate boxes (apparatus only, might need to scroll down):
EMS: Check if this apparatus provides emergency medical services.
Suppression: Check if this apparatus provides fire suppression capabilities.
Other: Check if this apparatus serves additional functions.
Set visibility and operational options:
Toggle Not Active if the unit is currently out of use.
Check Don't Show In Roster to exclude from personnel rosters (apparatus only).
Check Don't show in Incidents to exclude from incident module (apparatus only).
Setting Maintenance Schedule Information
This section applies to apparatus only.
Click the Preventive Maintenance tab.
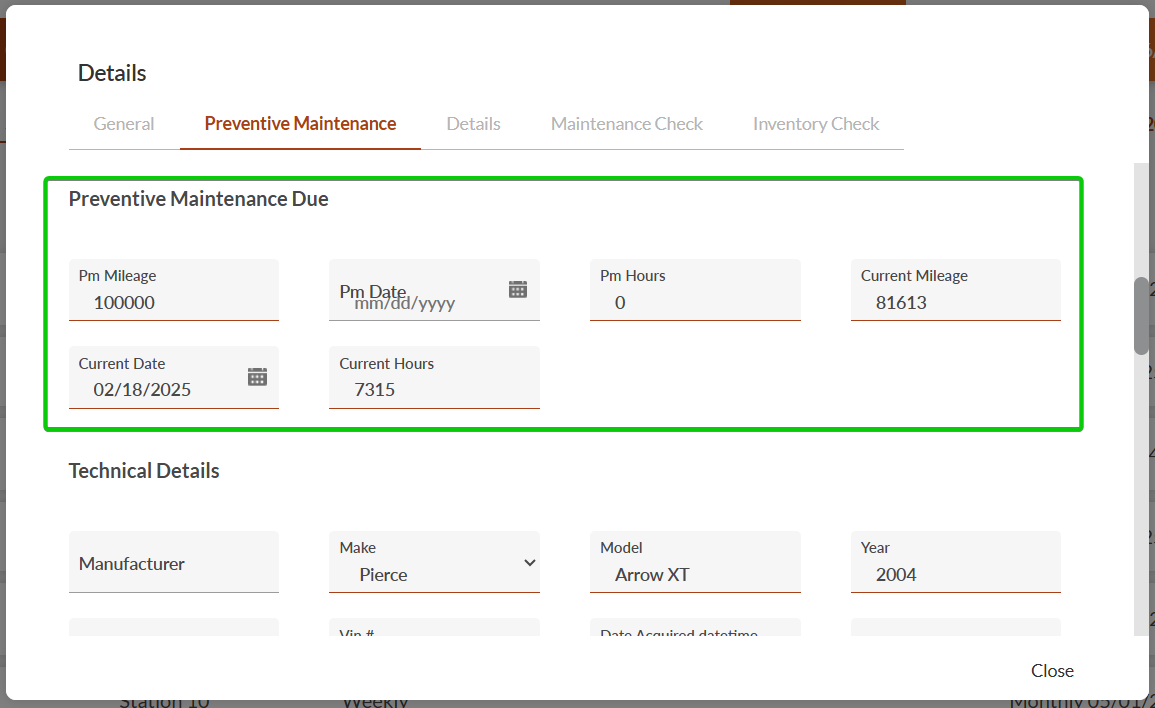
Enter current operational data:
Current Mileage: Record the current odometer reading.
Current Hours: Enter current engine operating hours.
Current Date: Update to today's date.
Define maintenance intervals:
PM Mileage: Set miles between preventive maintenance checks.
PM Hours: Set operating hours between preventive maintenance checks.
PM Date: Set the next scheduled maintenance date.
Recording Technical Specifications
This section applies to apparatus only.
Click the Details tab.

Complete vehicle identification information:
Manufacturer, Make, Model: Enter apparatus manufacturing details
Year: Enter the manufacturing year
License #: Record the apparatus registration number.
VIN #: Record the 17-character Vehicle Identification Number.
Date Acquired: Enter when the department acquired the apparatus.
Original Cost: Record the purchase price.
Enter physical specifications:
Length, Width, Height: Record apparatus dimensions.
Front Weight, Rear Weight, Total Weight: Enter weight distributions.
Wheelbase: Record distance between front and rear axles.
Document operational capabilities:
Pump Capacity: Record water pumping rate in gallons per minute (GPM).
Tank Capacity: Enter water tank volume in gallons.
Folding T. Capacity: Enter portable water tank capacity in gallons.
Engine Make and Engine Model: Record engine specifications.
Configuring Check Requirements
Click either the Maintenance or Inventory tab to configure check schedules.
Click Add to create a new check requirement.
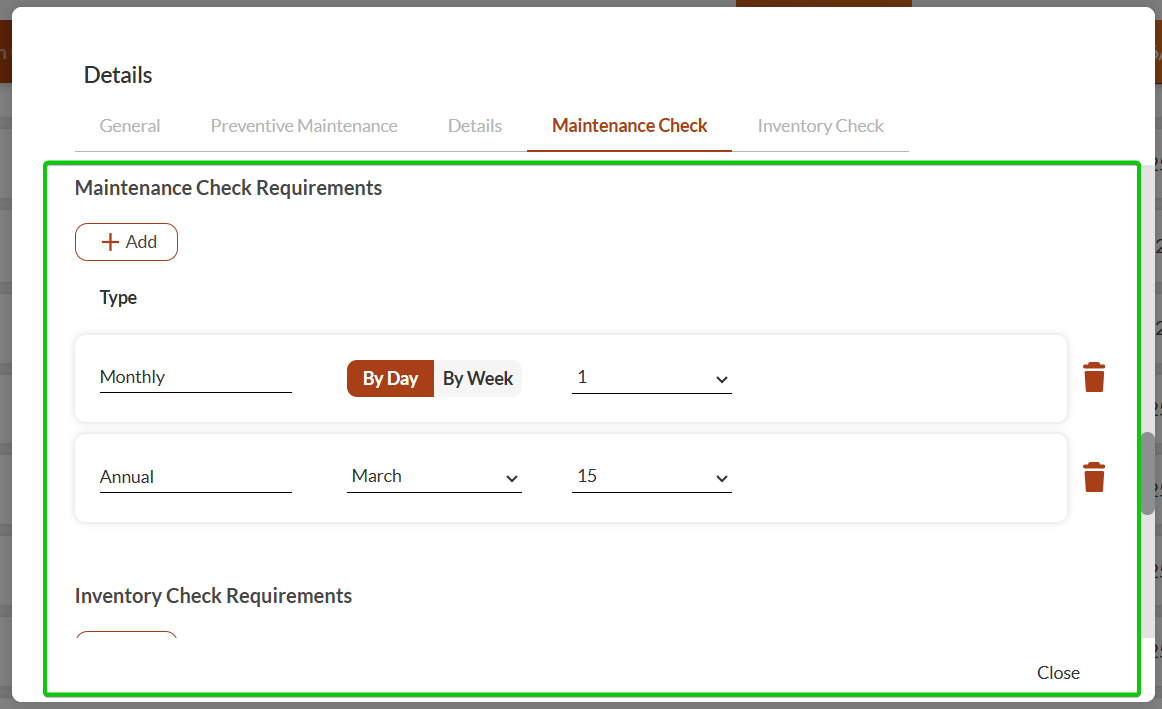
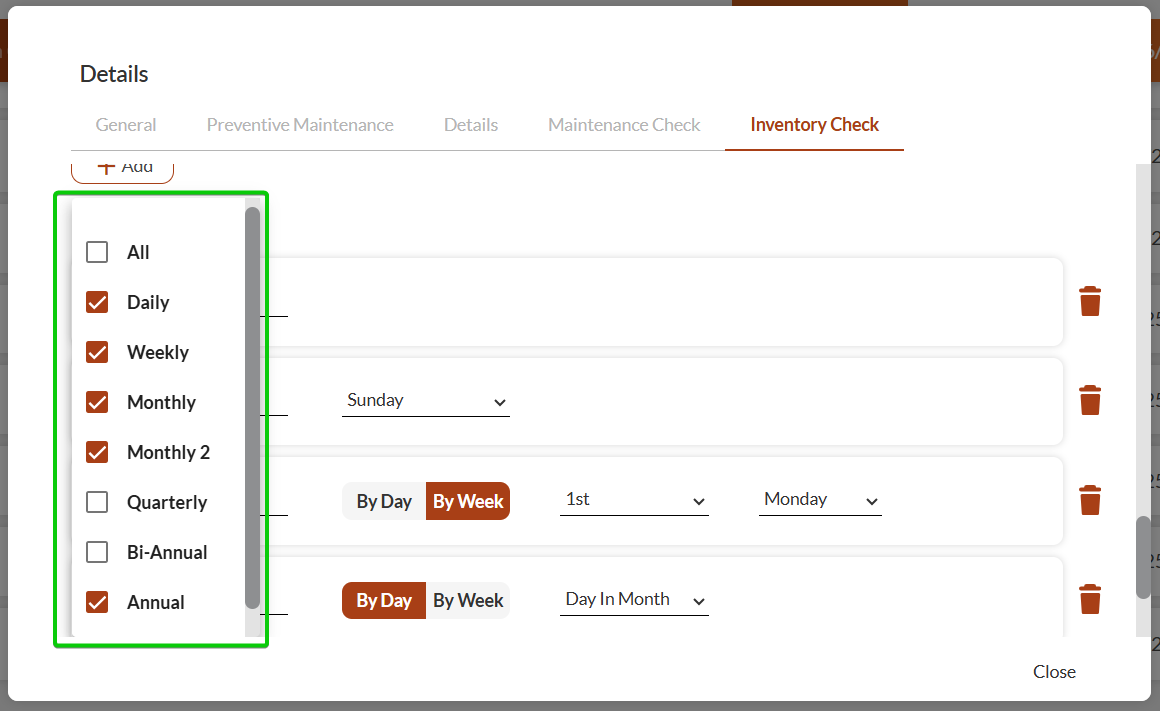
Select the check frequency from the Type dropdown:
Daily: Checks performed every day
Weekly: Checks performed on a specific day each week
Monthly: Checks performed monthly on a fixed date or specific week
Quarterly: Checks performed every three months
Bi-Annual: Checks performed twice yearly
Annual: Checks performed once yearly
Configure frequency-specific settings:
For Weekly checks: Select the designated day of the week.
For Monthly checks: Choose either a fixed date or enable the Or option to schedule for a specific week (like 3rd Tuesday).
For Annual checks: Set the designated annual date.
For Inventory checks, check Hide Required Quantity In Inventory Check if you want to hide quantities from the inventory interface.
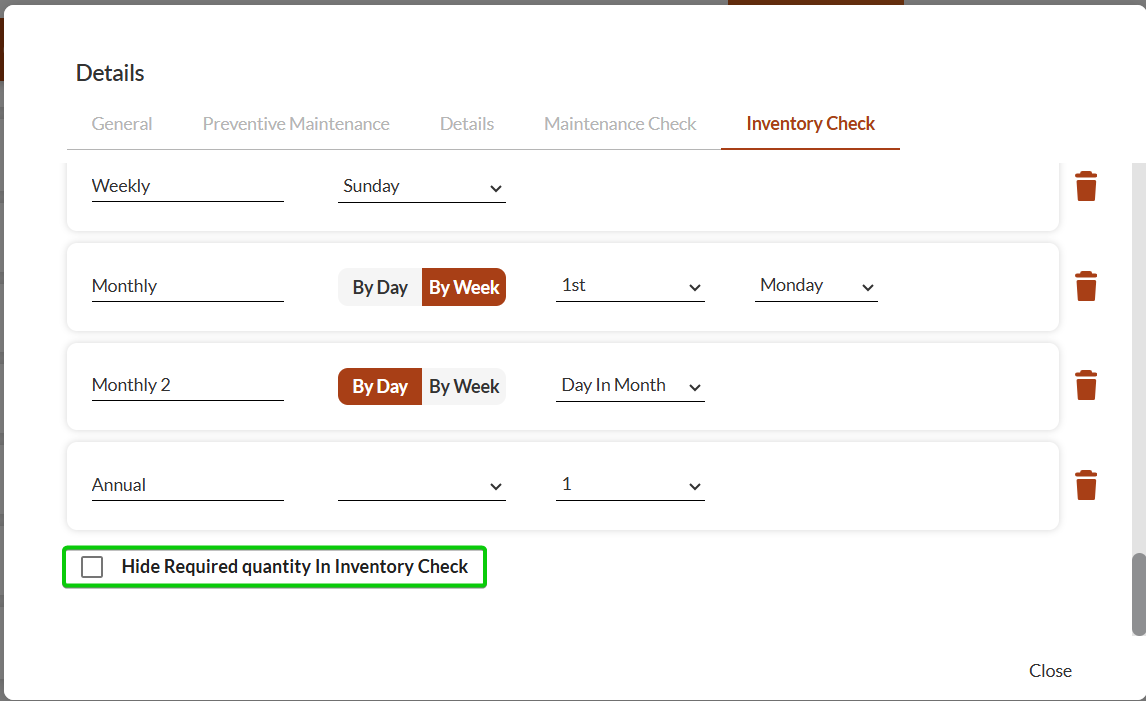
Click Close to save the check requirement.
Repeat this process to add additional check requirements as needed.