
ePCR Quick Start Guide
Overview
Complete your first ePCR using the field-proven workflow. This guide shows you the single documentation path used across all call types - from routine transports to critical emergencies.
Your Documentation Path:
Open ePCR > Rapid Field Response > Complete ePCR > Submit
Intended for: EMS personnel with ePCR module basic access permissions.
Before You Start
Ensure you have:
✅ Active crew assignment and network connection
✅ Incident number from CAD OR basic incident details
✅ Responding apparatus unit number
Step 1: Open ePCR
If your incident shows in the Patient List:
Navigate to the Patient List tab.
Click + Add ePCR next to your incident.
Confirm (Yes) → select apparatus → Add.
If you need to search:
Click + New ePCR (toolbar, upper right).
Filter by Date and Apparatus.
Click incident → Create ePCR.
Result: ePCR opens with Rapid Field Response tools accessible in the top toolbar.

Learn More: Opening an ePCR - Complete ePCR creation details
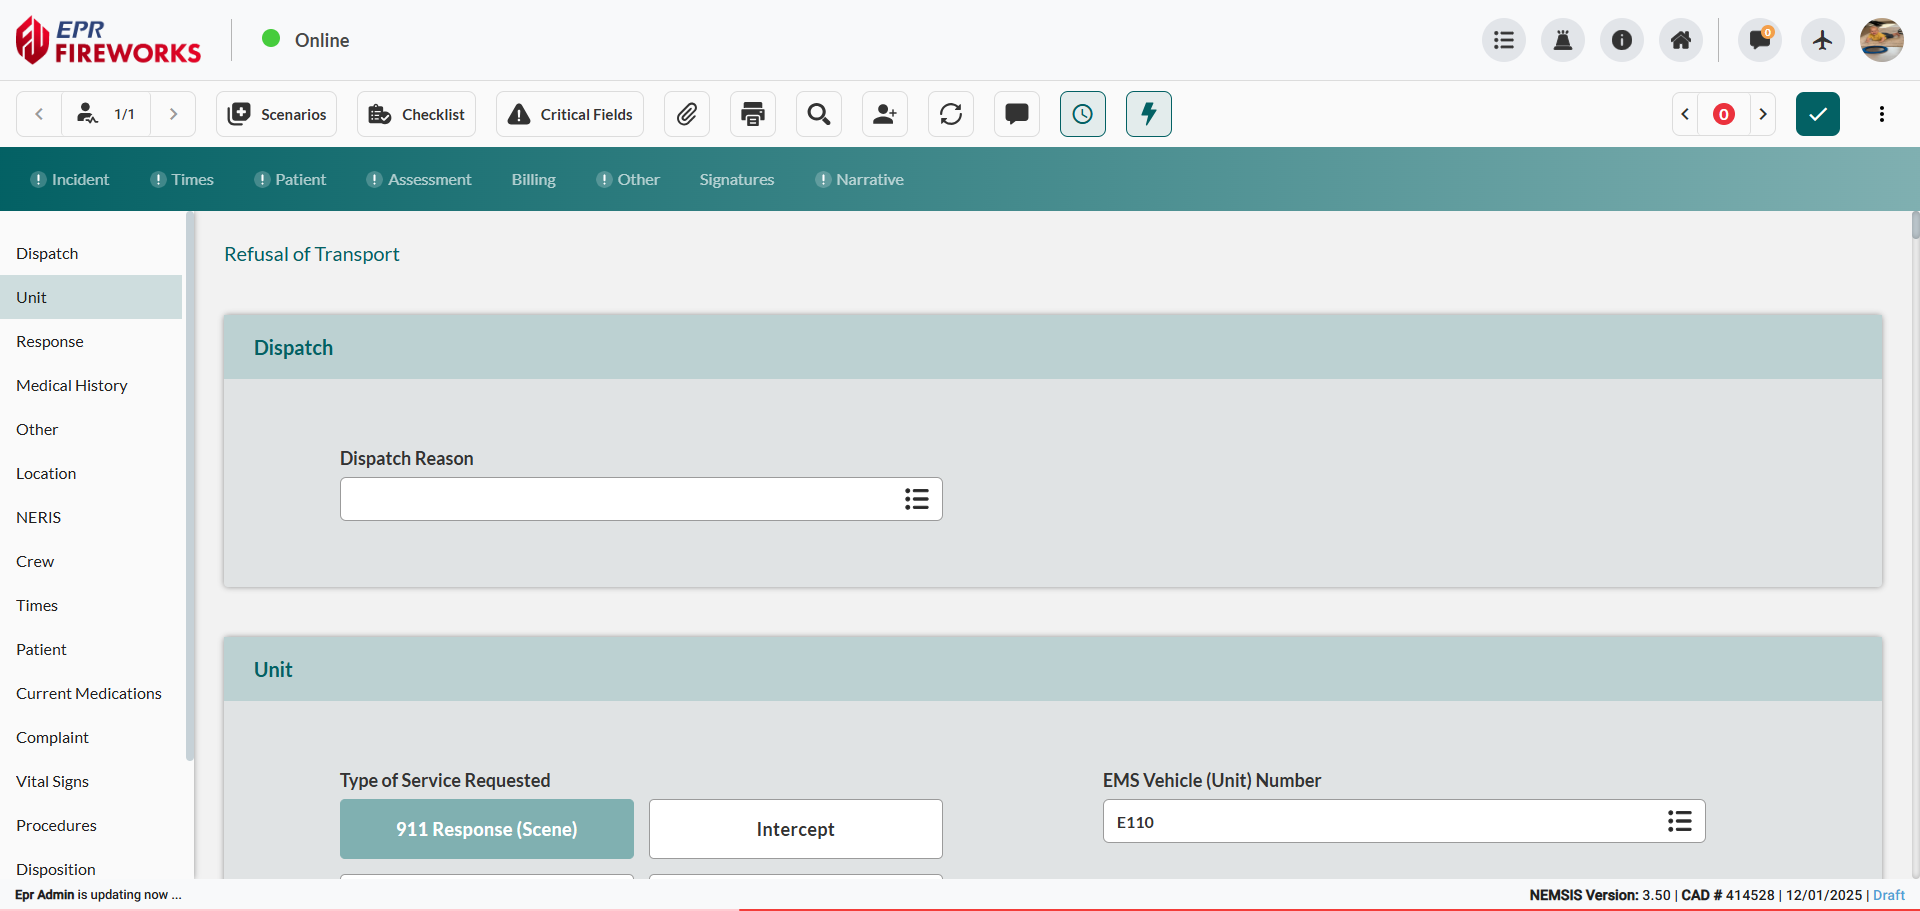
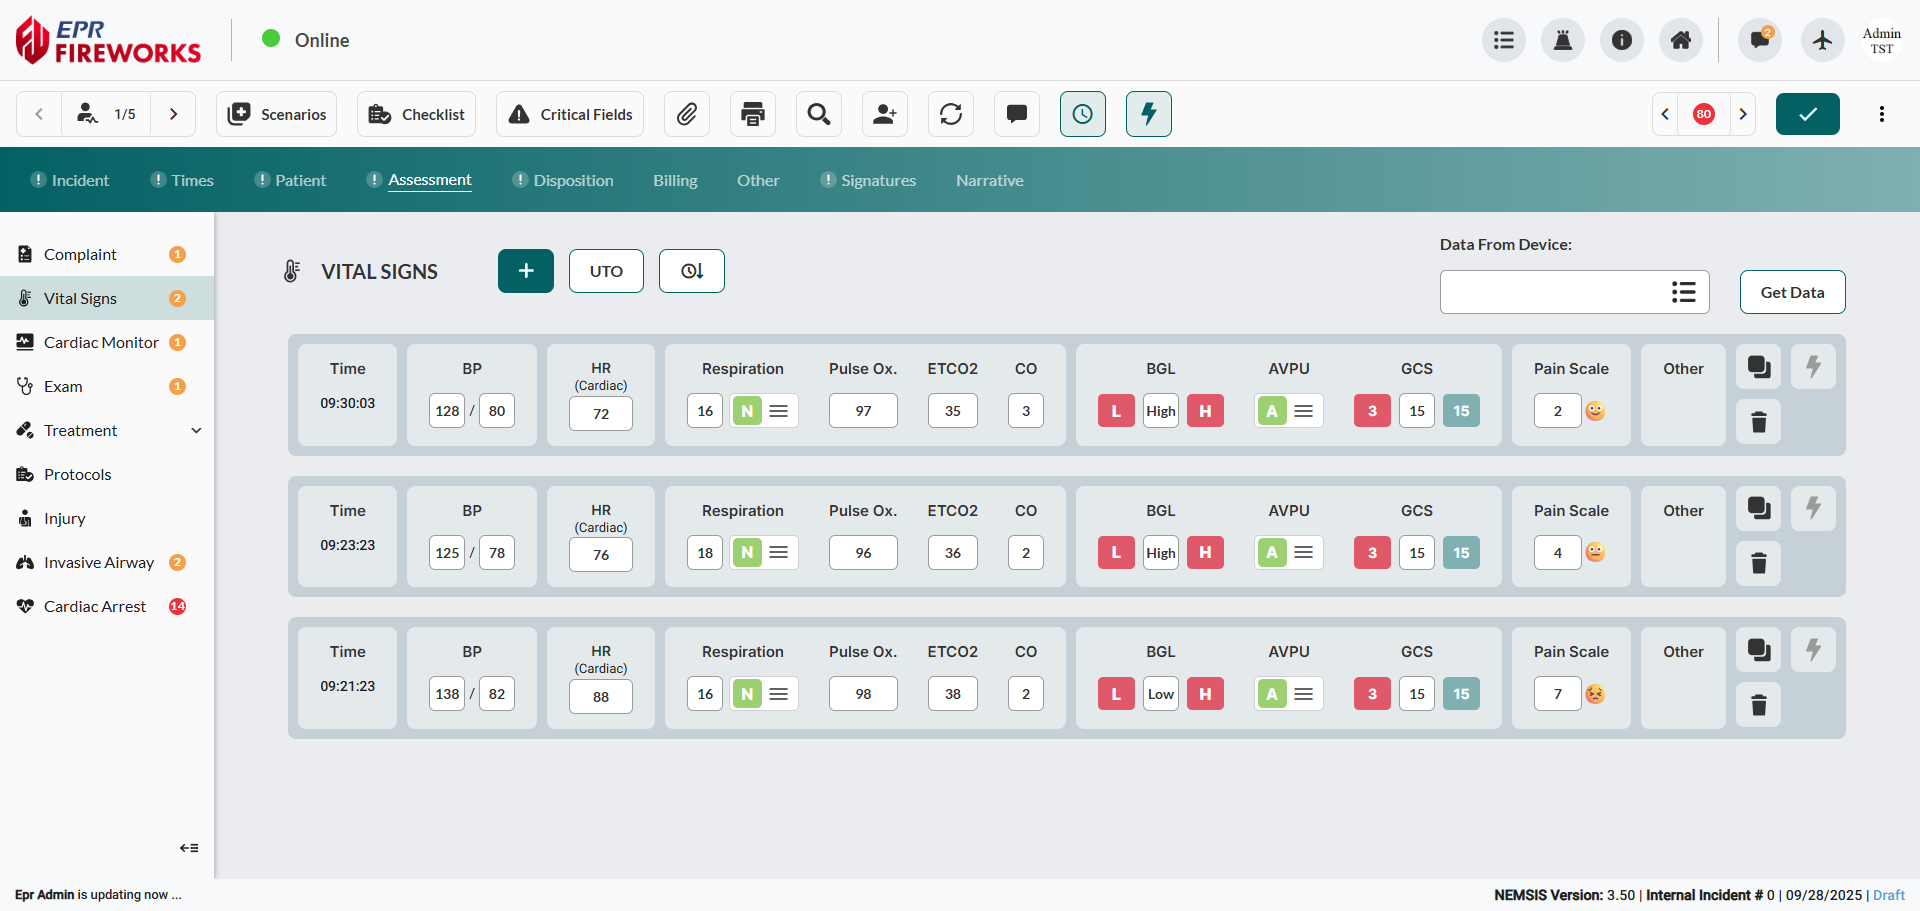
Step 2: Rapid Field Response
All of these features are created in the back office per department to streamline the documentation process.
Complete Overview: Rapid Field Response - Detailed explanation of all four toolbar features and field workflows

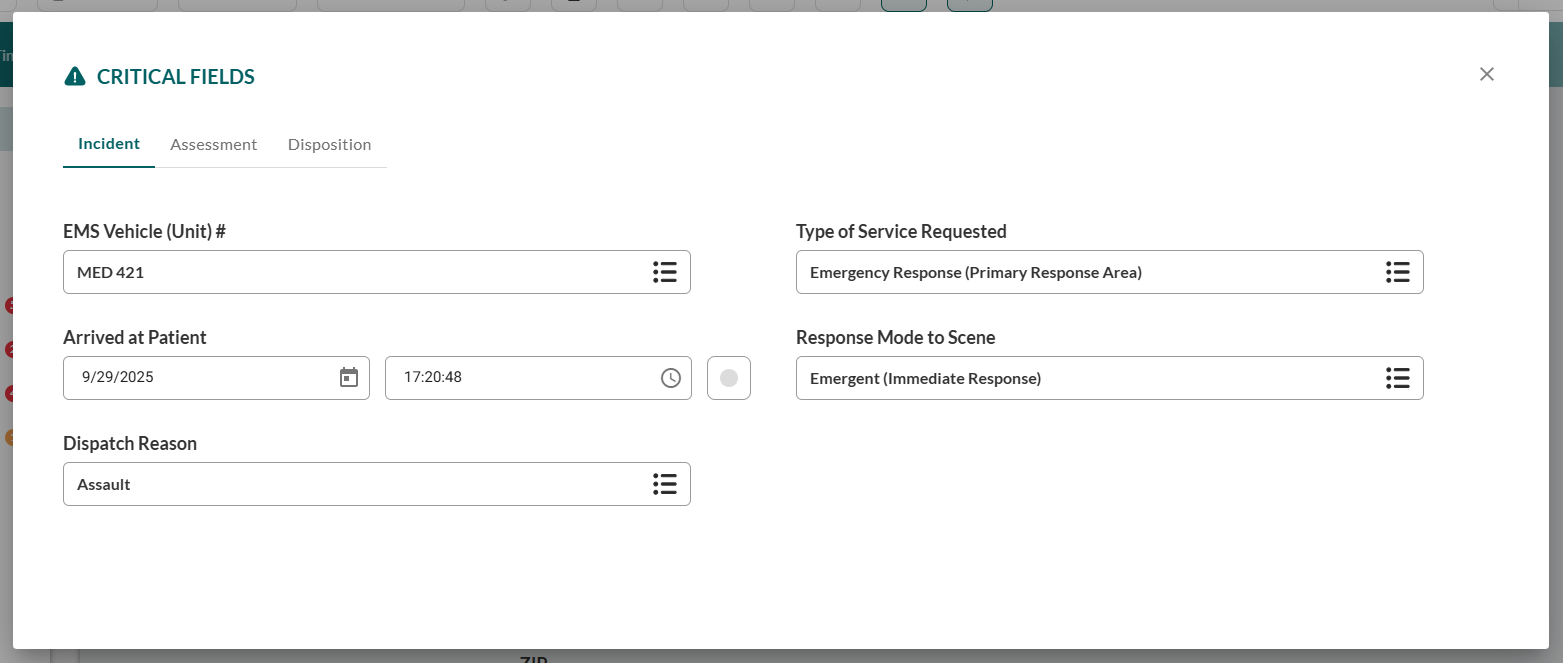
Critical Fields (Triangle Icon)
Purpose: Essential NEMSIS fields that control validation throughout the ePCR.
Complete Now:
Click triangle icon (!) in top toolbar.
Complete fields marked with red asterisks across three tabs:
Incident: Arrival time, unit identification
Assessment: Patient weight (required for drug calculations)
Disposition: Leave until ready to clear scene/transport
Result: Red asterisks clear as you complete required fields. Auto-saves continuously.
Complete Reference: Critical Fields Documentation - All NEMSIS requirements and field explanations
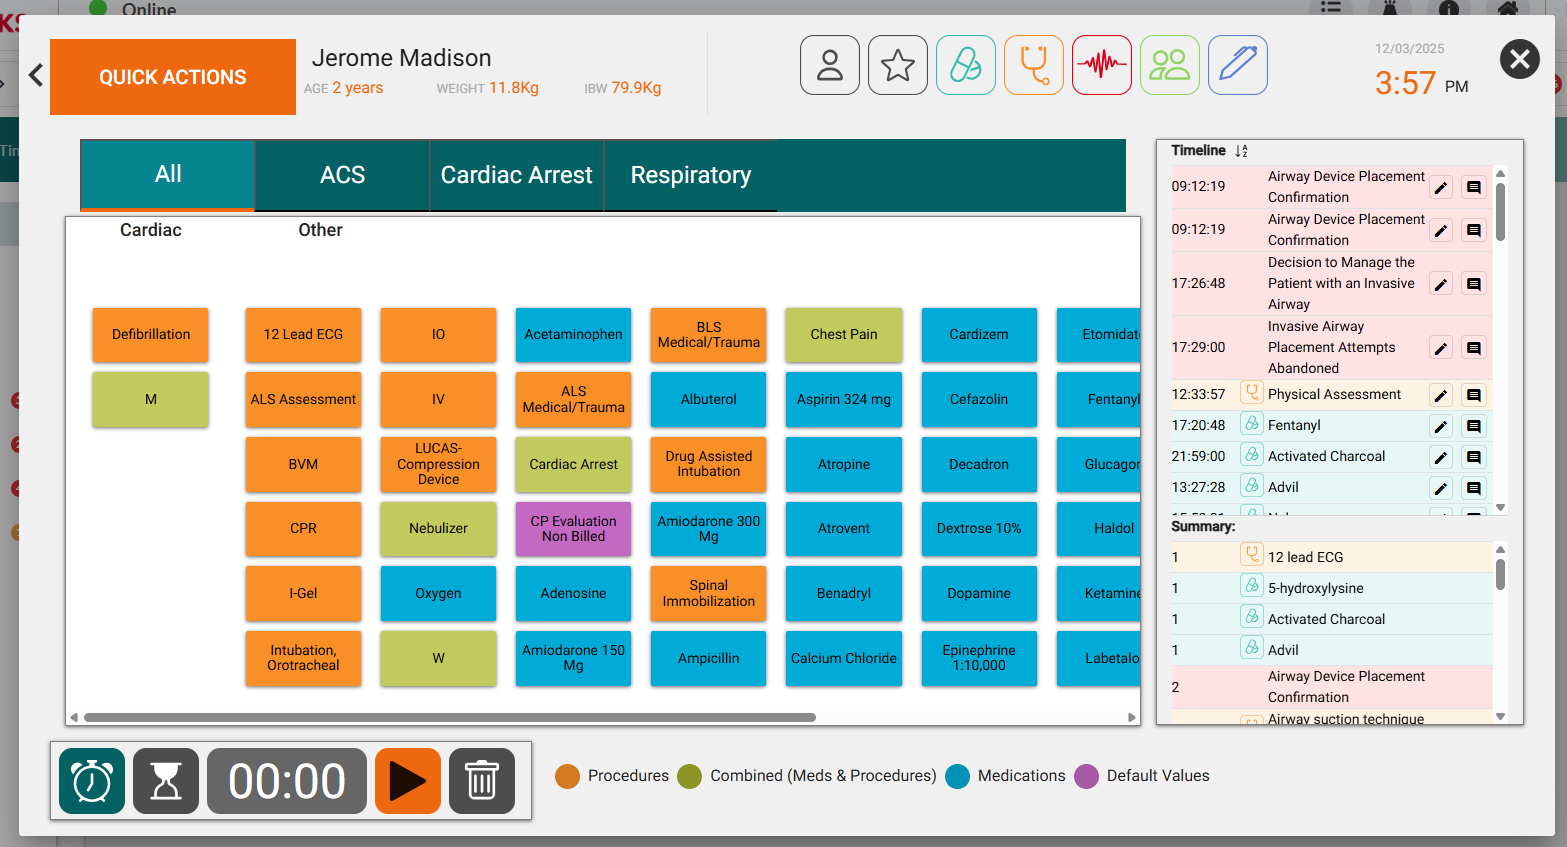
Quick Actions 
Purpose: Document Treatments (procedures and medications), vitals, and signatures.
Use During Patient Care:
Click
 in the upper toolbar.
Click treatment buttons as you provide care → automatically timestamped.
Note: Use the Category tabs at the top of the page for quick navigation betwween treatment types.
Result: Treatments appear in Timeline and sync to all crew devices within 30 seconds.
Complete Guide: Quick Actions - Quick Medications, Quick Procedures, Quick Vitals, and category organization
Scenarios
Purpose: Single-page consolidated workflows for routine incidents.
Scenarios are individual for each agency and are configured in the back-office. Consult your administrators for the available scenarios.
Use For Simple Calls:
Click Scenarios in the upper toolbar.
Select a scenario from the available options.
Complete all fields on single-page form.
Click Submit at bottom of scenario.
Result: ePCR documentation complete without navigating multiple tabs.
When to Use Scenarios: Straightforward calls where single-page format captures all necessary information. For complex calls requiring detailed assessment, use standard ePCR tabs instead.
Complete Guide: Scenarios Documentation - All scenario types, customization options, and workflow optimization
Checklists
Purpose: Structured documentation for clinical decisions and protocol verification.
Use When Applicable:
Click Checklists in the upper toolbar.
Select the appropriate checklist.
Complete the checklist according to agency protocol.
Result: Completed checklists print with ePCR and embed in billing PDFs.
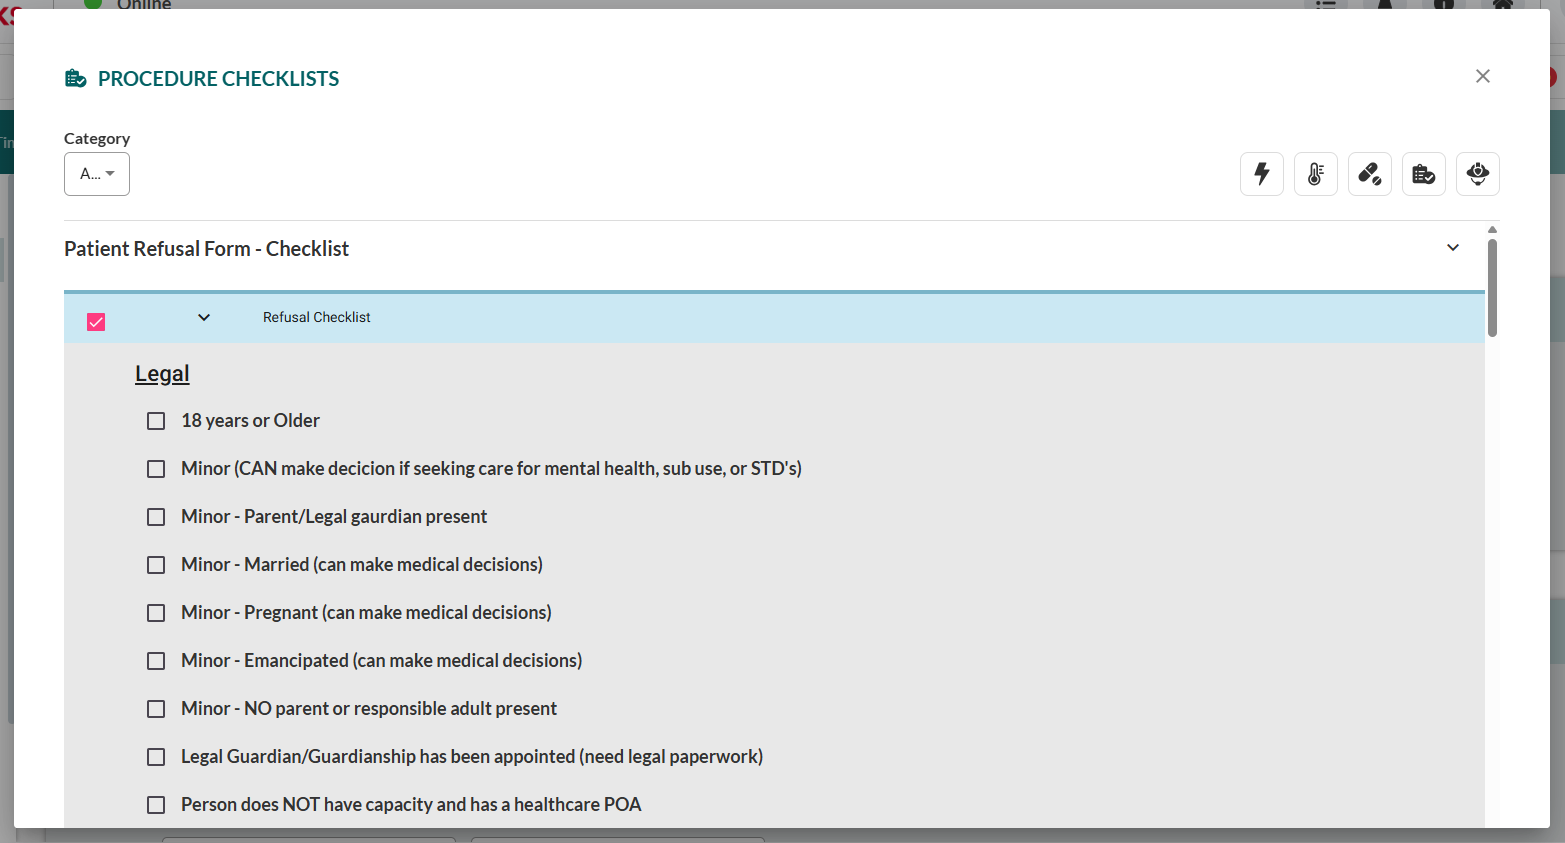
Important: Checklists are internal EPR FireWorks tools, not NEMSIS data elements.
Complete Reference: Checklists Documentation - All available checklists, usage guidance, and quality assurance integration
Step 3: Complete Full ePCR Documentation
After using Rapid Field Response tools, complete the ePCR sections according to agency and state requirements:
Incident - Location, crew assignments, response type, scene information, disposition (unless done separately)
Times - CAD timestamps and response delays
Patient - Demographics, address, contact information
Assessment - Chief complaint, vital signs, physical exam, treatments
Billing - Procedures, supplies, mileage, and insurance information
Other - Quality assurance, outcomes, and additional documentation
Signatures - Patient consent, refusal, or release signatures
Narrative - Patient care narrative and incident summary
Complete Guide: Documenting Patient Care (ePCR) - Detailed documentation for all ePCR tabs
Step 4: Generate Narrative
Navigate to the Narrative tab.
Type the narrative manually, or click Generate/Generate with AI to auto-compile from your ePCR fields.
Review and edit as needed.
Why Generate: Creates comprehensive narrative from documented data while ensuring completeness and consistency.
Alternative: Click Generate with AI for enhanced narrative with configurable style and focus areas.

Complete Guide: Narrative Documentation - Manual narrative writing, auto-generation, and AI enhancement features
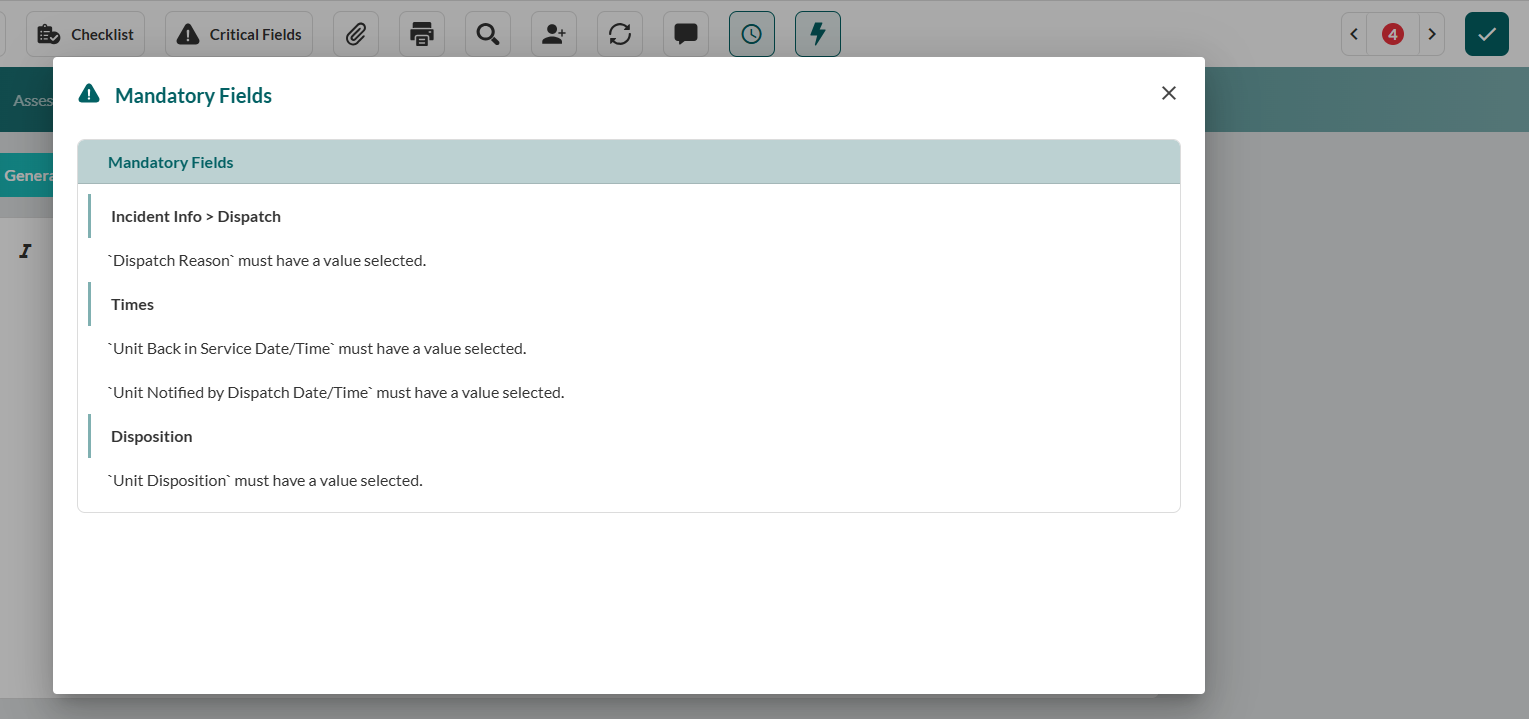
Step 5: Validate and Submit
Click Completed icon (checkmark, top right toolbar).
If validation errors appear → navigate to indicated tabs and correct.
When validation passes → click Submit.
Result: ePCR locked and submitted for review and state reporting.
Next Steps
Congratulations! You've completed ePCR using the field-proven workflow.
Build Your Skills
Master Rapid Field Response:
Critical Fields - All NEMSIS requirements explained
Quick Actions - Quick Medications, Procedures, Vitals
Checklists - Checklists guidance
Scenarios - All scenario types and customization
Deepen Clinical Documentation:
Assessmen - Comprehensive field descriptions and exam findings
Vital Signs - Serial vital signs and cardiac monitor integration
Treatments - Medications, procedures, and protocols
Narrative - Creating comprehensive patient care narratives
Essential References
Full ePCR Documentation - Complete system guide covering all tabs and features
Rapid Field Response Overview - Detailed explanation of all four toolbar features
Times - Chronological event management and timestamp corrections
Key Concepts
Rapid Field Response Tools Are Your Entry Point:
Always start with these four toolbar features regardless of call complexity or when you're documenting. They capture time-critical data and establish your ePCR foundation.
One Workflow, Multiple Applications:
The same core workflow applies to all call types. Variations simply emphasize different Rapid Field Response tools based on clinical scenario.
Document When It Makes Sense:
Real-time during critical calls. During transport for routine calls. At the station for completed incidents. The workflow adapts to your operational reality.
NEMSIS Compliance:
Red asterisks in Critical Fields indicate mandatory data for state reporting. Complete these fields to ensure validation passes.